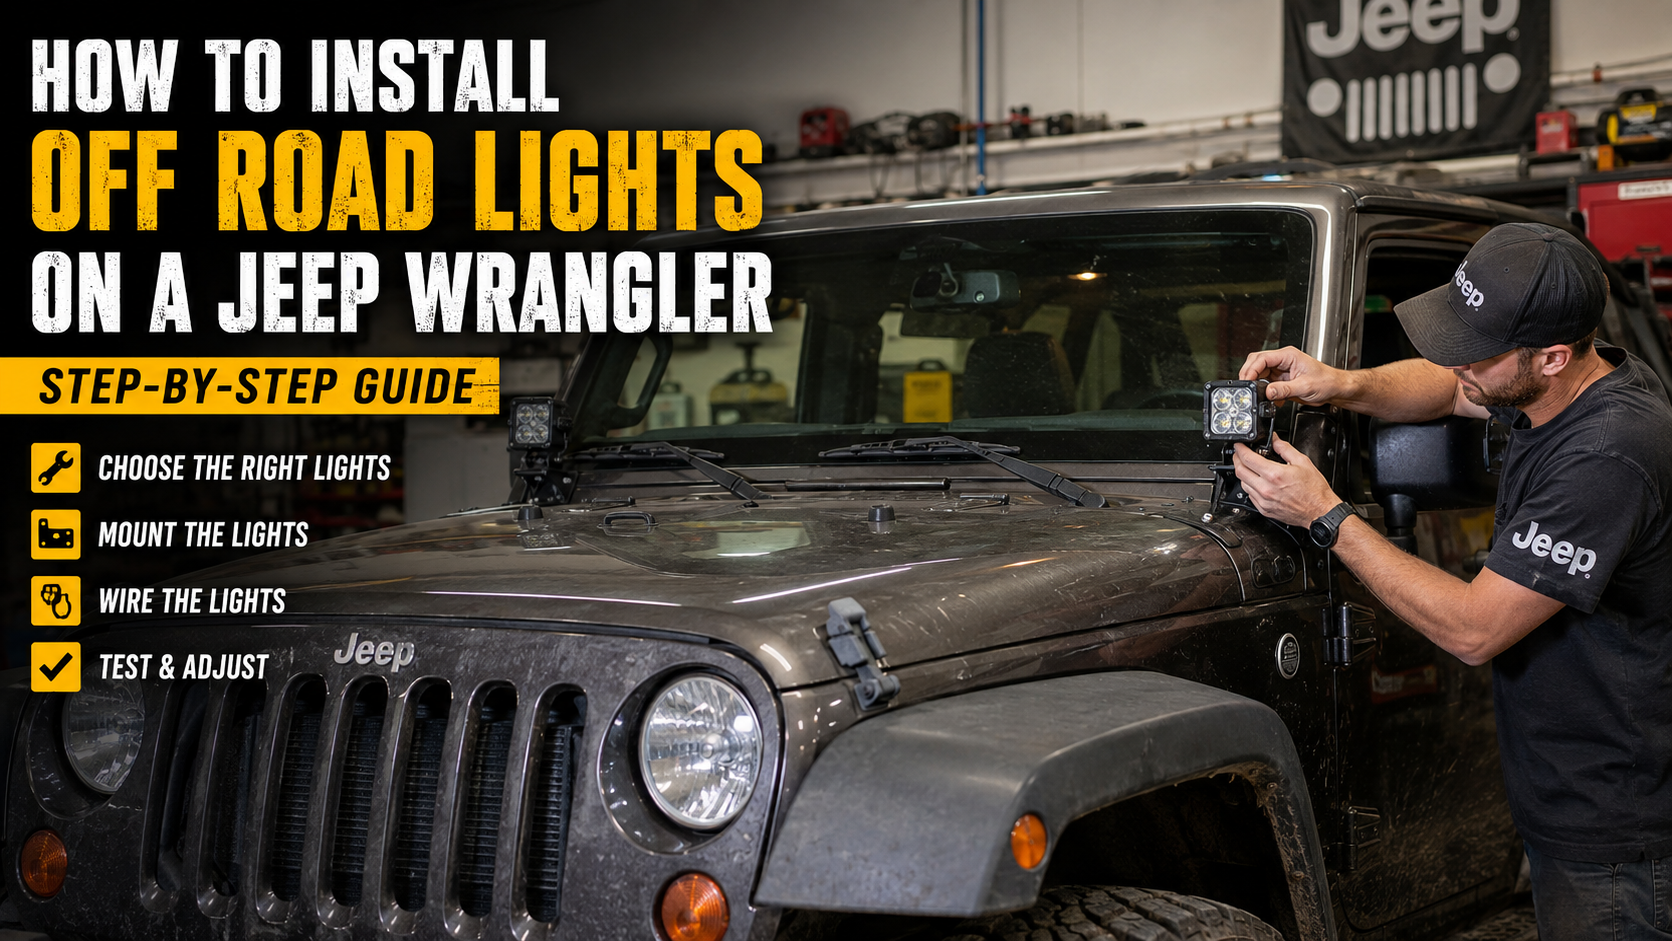
Adding off-road lights to a Jeep Wrangler can make nighttime trail driving much safer and easier. A good set of LED pods, ditch lights, bumper lights, or a light bar can help you see obstacles, trail edges, wildlife, and turns that your factory headlights may not illuminate well.
The installation itself is not especially difficult if you plan the wiring before you start. The most important parts are mounting the lights securely, protecting the wiring, using the correct fuse and relay setup, and keeping electrical cables away from heat and moving components.
This guide explains how to install off-road lights on a Jeep Wrangler step by step. It also covers wiring, factory AUX switches, fuse sizing, wire routing, troubleshooting, and common differences between Wrangler generations.
What Type of Off-Road Lights Should You Install on a Jeep Wrangler?
Before installing anything, decide what kind of lighting will actually solve your visibility problem.

LED Pod Lights
LED pods are small and easy to mount. They work well on:
- Front bumpers
- A-pillars
- Hood brackets
- Grille areas
They are a good choice if you want extra light without installing a large light bar.
Ditch Lights
Ditch lights normally sit near the lower A-pillars or hood hinges.
Instead of pointing directly forward, they are usually angled slightly outward. This helps illuminate trail edges, turns, ditches, and obstacles beside the Jeep.
They are especially useful for slow nighttime trail driving.
LED Light Bars
A light bar provides a wide area of illumination.
Common mounting positions include:
- Front bumper
- Grille
- Windshield
- Roof area
A bumper-mounted bar is usually easier to wire and creates less glare than a high-mounted windshield bar.
Bumper-Mounted Driving Lights
Bumper lights are one of the easiest options for beginners.
The wiring run is short, mounting points are often easy to access, and the lights stay below the driver’s line of sight.
Spot vs Flood vs Combo Beam: Which Is Best?

Beam pattern matters just as much as brightness.
Spot beam: Sends light farther down the trail. It is useful when you need long-distance visibility.
Flood beam: Spreads light over a wider area. It works well on slow trails, around campsites, and for side visibility.
Combo beam: Combines spot and flood lighting. This is often a practical all-around choice for a Jeep Wrangler.
For A-pillar ditch lights, a flood or wide beam usually makes more sense. For bumper or long-distance trail lighting, spot or combo beams may be more useful.
What You Need Before Installing Off-Road Lights
Having everything ready before you remove a single bolt makes the job much easier.
Tools You May Need
- Socket and ratchet set
- Screwdrivers
- Pliers
- Wire stripper
- Wire crimper
- Multimeter or test light
- Wrenches
- Electrical tape
- Heat-shrink tubing
- Zip ties
- Trim removal tool
- Drill, only if your mounting system requires it
Parts You May Need
- LED off-road lights
- Wrangler-specific mounting brackets
- Wiring harness
- Relay
- Inline fuse
- Dashboard switch
- Electrical connectors
- Ground wire
- Wire loom
- Heat-shrink connectors
Many complete off-road lighting kits already include a relay, fuse, switch, and harness.
Choose the Best Location for Your Jeep Off-Road Lights
Where you place the lights affects both visibility and installation difficulty.
Front Bumper
This is often the easiest place for beginners.
Advantages include:
- Short wiring route
- Easy access
- Less windshield glare
- Good forward illumination
A-Pillar or Hood Hinges
A-pillar lights are popular because they can illuminate the sides of the trail.
Wrangler-specific brackets often use existing hood-hinge bolts, which can eliminate the need to drill new holes.
Windshield
A windshield light bar can illuminate a large area, but installation may take more work.
You must carefully route wiring down the A-pillar or through another protected path.
High-mounted lights can also reflect off the hood if they are aimed incorrectly.
Grille
Smaller LED pods or light bars can sometimes be mounted near or behind the grille.
Before choosing this location, make sure the lights do not block important airflow.
Can You Install Off-Road Lights Without Drilling Your Jeep?
In many cases, yes.
Wrangler-specific light brackets are available for factory mounting points such as:
- Hood hinges
- A-pillars
- Bumper bolts
- Windshield mounting areas
- Existing accessory mounting locations
A no-drill setup is normally the better choice when possible because it reduces the risk of rust, leaks, and permanent body modifications.
If your kit requires drilling, check behind the mounting surface before making any holes. Make sure you will not hit wiring, trim, airbags, or another hidden component.
Choose the Right Wiring Method
There are three common ways to control Jeep off-road lights.
Pre-Wired Relay Harness
This is one of the easiest methods for an aftermarket installation.
A typical harness includes:
- Relay
- Fuse
- Battery connections
- Light connectors
- Dashboard switch
The switch controls the relay, while the relay handles the higher electrical load going to the lights.
Factory AUX Switches
Some newer Wrangler models may be equipped with factory auxiliary switches.
If your Jeep has them, you may be able to connect the lights to the correct factory accessory circuit instead of installing another switch inside the cabin.
Always check the owner’s information for your specific model year before connecting accessories.
Aftermarket Switch Panel
An aftermarket accessory control system can be useful if you plan to install several electrical accessories, such as:
- Front lights
- Ditch lights
- Rear lights
- Air compressor
- Winch accessories
- Camping equipment
A switch panel can keep the installation cleaner than adding several individual switches.
Calculate the Electrical Load Before Wiring
Do not choose a fuse or wire size by guessing.
You first need an idea of how much current the lights will draw.
A simple estimate is:
Watts ÷ Voltage = Amps
For example, if a pair of lights uses 120 watts total on a roughly 12-volt system:
120 ÷ 12 = 10 amps
That gives you an approximate current draw.
Actual vehicle voltage can vary while the engine is running, so use the manufacturer’s electrical specifications when selecting wiring and protection.
What Wire Gauge Should You Use?
Wire size depends on:
- Current draw
- Wire length
- Number of lights
- System voltage
- Installation environment
Higher current and longer wiring runs usually require thicker wire.
If you are using a complete lighting harness from a reputable manufacturer, use the supplied wiring as instructed.
What Size Fuse Do You Need?
The fuse protects the wiring.
It should be large enough to handle normal operating current but small enough to protect the circuit if something goes wrong.
Never solve a repeated blown-fuse problem by installing a much larger fuse.
If the fuse keeps blowing, find the electrical problem first.
How To Install Off Road Lights On A Jeep Wrangler
Now you can begin the actual installation.

Step 1: Park the Jeep and Disconnect the Battery
Park your Wrangler on a flat surface.
Turn the ignition off and remove the key.
Disconnect the negative battery terminal before working on the electrical system.
This reduces the chance of an accidental short circuit while connecting wires.
Step 2: Install the Mounting Brackets
Position the mounting brackets where you want the lights.
If the brackets use existing factory bolts:
- Remove the required bolt.
- Position the bracket.
- Reinstall the bolt.
- Leave it slightly loose until everything is aligned.
If you are mounting lights at the hood hinges, avoid removing more hardware than necessary at the same time. This helps reduce the chance of moving the hood out of alignment.
Step 3: Mount the Off-Road Lights
Attach the lights to the brackets.
Do not fully tighten the adjustment bolts yet.
You still need to aim the lights after the electrical installation is complete.
Check that:
- The hood opens normally.
- The windshield is not blocked.
- The lights do not contact body panels.
- Wiring connectors have enough clearance.
- The mounting hardware is secure.
Step 4: Plan the Wiring Route
Before connecting anything, decide where every wire will go.
Keep wires away from:
- Exhaust components
- Engine heat
- Cooling fans
- Belts
- Pulleys
- Sharp metal edges
- Steering components
- Suspension parts
Follow existing factory wire routes when practical.
Use wire loom and zip ties to protect and secure the harness.
Do not leave wires hanging loosely inside the engine bay.
Step 5: Connect the Lights to the Harness
Most LED lighting harnesses use plug-style connectors.
Connect each light to the harness and make sure the plugs are fully seated.
If the connectors have locking tabs, confirm that they click into position.
For exposed connections, use appropriate weather-resistant connectors.
Step 6: Install the Relay and Fuse
A common aftermarket circuit follows this basic path:
Battery positive → Fuse → Relay → Off-road lights
The dashboard switch controls the relay.
The relay allows a small switch circuit to control the larger electrical load used by the lights.
Mount the relay somewhere protected from:
- Direct water spray
- Excessive engine heat
- Moving components
The main fuse should normally be installed close to the power source so the wiring is protected if a short develops farther down the circuit.
Step 7: Connect the Positive Power Wire
Connect the fused positive wire from the harness to the appropriate positive power source.
With a standard aftermarket harness, this is often the battery positive terminal.
Make sure the connection is:
- Clean
- Tight
- Properly insulated
- Protected from accidental contact
Do not leave exposed copper near the battery.
Step 8: Connect the Ground Wire
A poor ground is one of the most common reasons aftermarket lights fail or flicker.
Connect the ground wire to:
- Battery negative, or
- A suitable factory chassis ground
If using a chassis ground, the connection should contact clean metal.
Paint, rust, dirt, and corrosion can create resistance and cause electrical problems.
Step 9: Run the Switch Wire Through the Firewall
If you are installing a separate dashboard switch, you need to route the control wire into the cabin.
Look for an existing factory firewall grommet that can safely accept an additional wire.
Avoid drilling through the firewall unless necessary.
When routing the wire:
- Identify a safe entry point.
- Check both sides before pushing anything through.
- Pass the switch wire carefully through the grommet.
- Protect the wire from sharp edges.
- Seal the opening if needed.
- Secure the wire under the dashboard.
Never route wiring where it can interfere with the steering column, pedals, airbags, or other safety equipment.
Step 10: Install the Dashboard Switch
Choose a position that you can reach easily without taking your eyes off the trail for too long.
Depending on the switch design, you may mount it in:
- An unused factory switch position
- A dashboard switch panel
- A lower dash trim panel
- An aftermarket accessory panel
Connect the switch according to the wiring harness instructions.
Secure the wire behind the dashboard so it cannot fall near the pedals.
How To Wire Off-Road Lights to Jeep Factory AUX Switches
If your Wrangler has factory auxiliary switches, installation may be simpler because some of the switching and circuit protection is already integrated into the vehicle.
The exact wire locations and circuit capacities can differ by model year and configuration, so check the Jeep owner’s information before making connections.
Find the Correct AUX Wire
Locate the factory auxiliary leads provided for accessories.
Do not connect the light simply because a wire is easy to reach.
Identify the correct circuit first.
Check the Current Capacity
Determine how many amps your lights draw and make sure the selected auxiliary circuit can safely handle the load.
If the lights exceed the capacity of the available circuit, use the AUX output only as a control trigger for a separate relay rather than powering the lights directly.
Connect the Light
A simple setup may look like:
Factory AUX output → Light positive
Light negative → Ground
However, the exact connection depends on the electrical requirements of the lights and the specific Jeep.
Best Ways to Route Off-Road Light Wiring
Clean wire routing makes the installation safer and easier to maintain.
Through the Firewall
Best for lights using a separate dashboard switch.
Use an existing grommet whenever practical.
Along the A-Pillar
This route is commonly used for windshield or A-pillar lights.
Keep the wire secure and protected from weather and door movement.
Under the Cowl
Some installations allow wiring to be hidden around or beneath the cowl area.
This can create a cleaner appearance.
From a Windshield Light Bar
Windshield-mounted bars require extra care.
The wire should not:
- Flap in the wind
- Get crushed by a door
- Interfere with removable roof panels
- Rub directly against sharp body edges
Use proper clips, loom, or protective routing methods instead of relying only on electrical tape.
Waterproof and Protect the Connections
Off-road lighting is exposed to rain, mud, dust, vibration, and sometimes water crossings.
Protect exterior electrical connections using suitable products such as:
- Heat-shrink connectors
- Weather-resistant plugs
- Wire loom
- Protective boots
- Proper electrical sealing methods
Route connectors where they are not constantly exposed to direct water spray.
A clean electrical connection today can become unreliable later if moisture and corrosion are allowed to enter.
Reconnect the Battery and Test the Lights
Once everything is connected and secured, reconnect the negative battery terminal.
Turn the lights on.
Check that:
- Both lights illuminate.
- The switch works correctly.
- No fuse blows.
- Wiring does not become unusually hot.
- No wire touches a moving component.
- The lights remain stable while the engine is running.
If something looks wrong, turn the lights off and inspect the circuit before continuing.
How To Aim Jeep Wrangler Off-Road Lights
Do not simply point every light as high as possible.
The goal is usable illumination, not maximum glare.
Park the Jeep on level ground and adjust each light.
For bumper lights, aim them primarily forward.
For ditch lights, angle them slightly outward so they illuminate the sides of the trail.
For a light bar, make sure the beam is not creating excessive reflection from the hood.
Once you are happy with the position, tighten the adjustment bolts securely.
Jeep Wrangler YJ, TJ, JK, and JL Installation Differences
The basic electrical principles are similar across Wrangler generations, but installation details can change.
Jeep Wrangler YJ
Older YJ models usually rely on aftermarket wiring, relays, switches, and mounting brackets.
Carefully inspect older wiring before adding additional electrical accessories.
Jeep Wrangler TJ
TJ installations are also commonly based on independent relay harnesses and aftermarket switches.
Firewall routing and dashboard switch location deserve extra attention during installation.
Jeep Wrangler JK
The JK has many aftermarket lighting options, including:
- A-pillar lights
- Windshield bars
- Bumper lights
- Switch pods
- Accessory control systems
Pre-wired harnesses are a popular option because they simplify installation.
Jeep Wrangler JL and JLU
JL and JLU models may offer factory auxiliary switch options depending on configuration.
When available, these circuits can make accessory wiring cleaner.
Always verify the correct circuit and electrical capacity for your specific model year.
Common Jeep Off-Road Light Problems
Even a simple installation can develop problems. Most can be traced to a few common causes.
Off-Road Lights Won’t Turn On
Check:
- Battery connection
- Fuse
- Ground
- Relay
- Switch
- Harness plugs
- Light connectors
Use a multimeter or test light to find where power stops.
Lights Flicker While Driving
Flickering often points to a weak electrical connection.
Inspect:
- Ground connections
- Battery terminals
- Harness connectors
- Crimp connections
- Damaged wires
A loose ground can cause intermittent problems when the Jeep vibrates on rough trails.
Only One Light Works
Swap the light connectors if the harness allows it.
This can help determine whether the problem is:
- The light
- The connector
- The wiring branch
- The ground
The Fuse Keeps Blowing
A fuse that repeatedly blows may indicate:
- A short circuit
- Damaged insulation
- Excessive electrical load
- Incorrect wiring
- Wrong circuit design
Do not keep replacing the fuse with a larger one.
Find the cause first.
The Lights Drain the Battery
Check whether the lights receive constant power and whether they can remain on after the Jeep is turned off.
You may want a switched-power control strategy if accidentally leaving the lights on is a concern.
The Light Bar Whistles at Highway Speed
Windshield-mounted light bars can sometimes create wind noise.
Check:
- Mounting angle
- Loose brackets
- Gaps around mounting hardware
- Exposed fins or edges
Some light-bar designs are naturally quieter than others.
If highway noise matters to you, bumper-mounted lights may be a better option.
The Lights Shake on Rough Trails
Check the bracket hardware.
Use the correct washers and locking hardware supplied with the kit.
The mount should be secure, but do not overtighten fasteners to the point that you damage the bracket or mounting surface.
Safety Tips for Installing Jeep Off-Road Lights
A few simple precautions can prevent most installation problems.
- Disconnect the battery before electrical work.
- Use properly sized wiring.
- Install suitable fuse protection.
- Use a relay when the circuit requires one.
- Keep wires away from heat.
- Protect wiring from sharp edges.
- Waterproof exterior connections.
- Do not overload factory accessory circuits.
- Keep dashboard wiring away from airbags and pedals.
- Follow the instructions supplied with your lights.
- Check mounting hardware after your first few trail trips.
If you are not comfortable working with automotive electrical systems, having the final wiring checked by a qualified technician is a sensible choice.
Can You Use Off-Road Lights on Public Roads?
Do not assume that every off-road light is legal to use on public roads.
Lighting rules can vary between:
- U.S. states
- Canadian provinces
- UK jurisdictions and vehicle requirements
- Australian states and territories
Rules may cover:
- Light color
- Mounting height
- Beam pattern
- Number of auxiliary lights
- Light covers
- When auxiliary lights may be used
- Whether the lights must switch off with high beams
Check the rules that apply where you drive.
Even when the lights themselves are legal to install, using them around other road users may be restricted.
How Long Does It Take to Install Off-Road Lights?
Installation time depends heavily on the mounting and wiring method.
A simple pair of bumper-mounted LED pods using a complete harness is usually easier than installing a windshield light bar with wiring routed through the cabin.
A factory AUX switch setup may also reduce the amount of interior wiring required.
The job becomes more involved when you need to:
- Drill mounting holes
- Remove interior trim
- Install a new switch panel
- Route several harnesses
- Wire multiple lighting zones
Plan for careful installation rather than trying to finish as quickly as possible.
Frequently Asked Questions
Can I install off-road lights on a Jeep Wrangler myself?
Yes. Many Jeep owners can install basic LED lights with common hand tools and a pre-wired harness. The most important part is following safe electrical practices and the instructions supplied with the light kit.
Do LED off-road lights need a relay?
Many aftermarket high-current lighting circuits use a relay. A relay allows a low-current switch circuit to control the higher current required by the lights.
Some factory auxiliary circuits or specialized control systems may handle switching differently.
Do off-road lights need a fuse?
Yes, accessory lighting circuits should be properly protected. The correct fuse depends on the electrical load, wiring, and manufacturer’s specifications.
Can I wire off-road lights directly to the battery?
The main power source may come from the battery, but the circuit should still include proper fuse protection and an appropriate switching method. Connecting lights directly to an unfused battery wire is not a safe installation.
Where should I mount off-road lights on a Jeep Wrangler?
Popular locations include the bumper, A-pillars, hood hinges, grille, and windshield. The best position depends on whether you need forward distance, side visibility, or broad trail illumination.
Are ditch lights better than a light bar?
They solve different problems. Ditch lights are excellent for side visibility and tight trails. A light bar provides broader forward illumination. Many off-road Jeeps use both.
Can I install Jeep off-road lights without drilling?
Often, yes. Wrangler-specific brackets can use existing bumper, hood-hinge, A-pillar, or windshield mounting points.
Where should I ground off-road lights?
Use the battery negative terminal or a suitable factory chassis ground. A chassis ground should make firm contact with clean metal.
What gauge wire should I use for Jeep off-road lights?
Wire gauge depends on the total current draw and wire length. Follow the lighting manufacturer’s recommendations or use the correctly sized wiring supplied with a complete harness.
How many amps do LED off-road lights draw?
It depends on the wattage of the lights. You can estimate current using watts divided by system voltage, but use actual manufacturer specifications when designing the circuit.
Do Jeep factory AUX switches need a relay?
It depends on the Wrangler model, the specific auxiliary circuit, and the current draw of the lights. Some factory accessory circuits are designed to handle certain loads directly. Higher-current accessories may require a separate relay.
Can two off-road lights use one switch?
Yes, two lights can commonly be controlled by one switch when the wiring, relay, fuse, and circuit are properly sized for their combined electrical load.
Where do I run light bar wires on a Jeep Wrangler?
Common routes include the A-pillar, cowl area, existing firewall grommets, and protected factory wiring paths. The safest route depends on where the light is mounted.
Why won’t my Jeep off-road lights turn on?
Start by checking the fuse, ground, battery connection, relay, switch, and harness connectors. Poor grounds and loose connections are especially common causes.
Why does my Jeep light bar whistle?
Air moving across a windshield-mounted light bar or its cooling fins can create a whistle. Mounting angle, bracket position, and the design of the light bar can all affect wind noise.
Final Thoughts
Learning how to install off road lights on a Jeep Wrangler is mostly about planning the job before making connections.
Choose a light that matches the kind of driving you do. Use solid mounting brackets. Plan a protected wiring route. Size the electrical circuit correctly. Add proper fuse protection, and use either a relay, factory AUX circuit, or suitable accessory control system.
Once everything is installed, test the wiring carefully and spend time aiming the lights instead of simply pointing them straight ahead.
A clean installation should look almost factory-made: secure brackets, hidden wiring, protected connections, and switches that are easy to reach. More importantly, it should give you useful trail visibility without creating new electrical or safety problems.