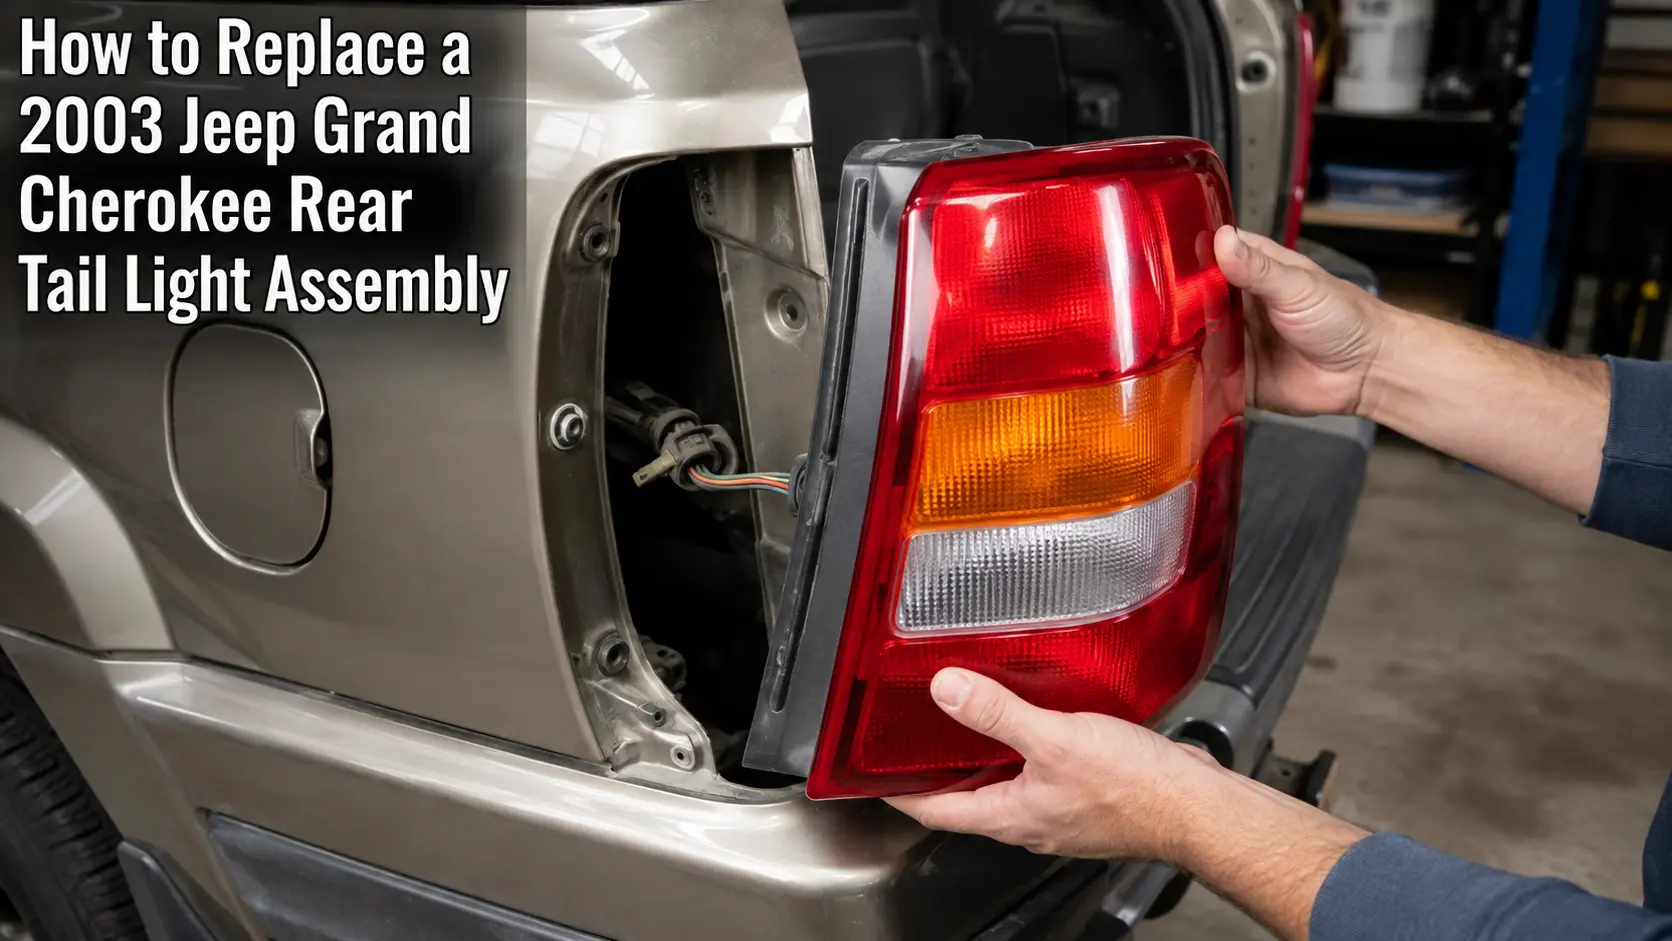
Replacing the rear tail light assembly on a 2003 Jeep Grand Cherokee is a manageable DIY repair. You do not need to remove interior trim or take apart the rear of the vehicle.
Open the liftgate, remove the two Phillips-head screws holding the tail light, carefully pull the assembly forward, disconnect the electrical connector, and install the replacement light in reverse order.
Before ordering a new assembly, however, make sure the housing is actually the problem. A failed bulb, damaged bulb socket, corroded circuit board, or poor electrical connection can cause similar symptoms.
This guide walks you through the complete removal, replacement, fitment check, and troubleshooting process.
Quick Answer: How Do You Replace the Rear Tail Light Assembly?
To replace a 2003 Jeep Grand Cherokee rear tail light assembly:
- Park the Jeep and switch off the ignition and exterior lights.
- Open the rear liftgate.
- Find the two Phillips-head screws beside the tail light.
- Remove both screws.
- Carefully pull the tail light assembly forward from the body.
- Disconnect the electrical connector from the back.
- Transfer any required bulbs, sockets, or other reusable parts to the new assembly.
- Connect the wiring to the replacement tail light.
- Align the housing and press it into position.
- Reinstall the two screws.
- Test the tail light, brake light, turn signal, and other rear-light functions.
For most owners, the main tool required is a Phillips-head screwdriver.
Do You Need a New Tail Light Assembly, Bulb, Socket, or Circuit Board?
A rear light that does not work does not automatically mean the complete tail light assembly needs replacing.
It is worth spending a few minutes checking the problem before buying parts.
When to Replace the Complete Tail Light Assembly
Replacing the entire tail light housing usually makes sense when you find physical damage such as:
- A cracked or broken lens
- A damaged housing
- Broken mounting points
- Water getting inside the lamp
- Severe internal corrosion
- Collision damage
- A housing that no longer fits securely against the body
A cracked housing can allow moisture to enter. That moisture can eventually damage bulbs, sockets, terminals, or other electrical components.
If the housing is physically damaged, simply fitting another bulb will not solve the underlying problem.
When You May Only Need a Tail Light Bulb
If the housing and lens look good but one lighting function has stopped working, inspect the bulb first.
A failed bulb is much cheaper and easier to replace than the complete assembly.
Remove the tail light and check the appropriate bulb. Look for a broken filament, darkened glass, damaged contacts, or other obvious signs of failure.
If a new bulb fixes the problem and the socket is clean and secure, there is little reason to replace the complete housing.
Signs of a Bad Tail Light Bulb Socket

The socket connects the bulb to the vehicle’s electrical system. A damaged socket can cause a good bulb to stop working.
Look for:
- Green or white corrosion
- Burn marks
- Melted plastic
- Loose bulb fit
- Bent or damaged contacts
- A light that works only when the socket is moved
- Repeated bulb failures
If the socket is damaged, replace or repair it rather than immediately replacing unrelated parts.
Signs of a Tail Light Circuit Board Problem
A circuit-board or connector-plate problem can also create confusing rear-light symptoms.
Suspect an electrical component behind the lamp if:
- A known-good bulb still does not work
- The problem returns after replacing the bulb
- Several functions in one assembly behave strangely
- You find corrosion or moisture inside the assembly
- Electrical contacts are burnt or damaged
Inspect the lamp carefully before deciding whether you need a circuit-board-related part, socket, or complete assembly.
Tools and Parts Needed for a 2003 Jeep Grand Cherokee Tail Light Replacement
This repair does not require a large tool collection.
Tools You Need
Have these items ready:
- Phillips-head screwdriver
- Clean work gloves
- Flashlight, if needed
- Small container for the screws
- Clean cloth
A small container is useful because the mounting screws are easy to misplace while the tail light is removed.
Choose the Correct Left or Right Tail Light
Before buying a replacement, confirm which side of the Jeep you are repairing.
The safest terms for an international audience are:
- LH or left-hand tail light: left side of the vehicle when sitting inside and facing forward
- RH or right-hand tail light: right side of the vehicle when sitting inside and facing forward
Do not rely only on the words “driver side” and “passenger side.”
In the United States and Canada, the driver normally sits on the left. In the UK and Australia, the driver normally sits on the right. A product listing that uses only driver/passenger terminology can therefore cause confusion.
Use the LH/RH designation, product photo, part number, and vehicle fitment information before ordering.
OEM vs Aftermarket Tail Light Assembly

You may find both OEM-style and aftermarket replacement assemblies.
Whichever option you choose, focus on fit and compatibility rather than appearance alone.
Check:
- Vehicle year
- Jeep Grand Cherokee model
- Left or right side
- Connector design
- Mounting points
- Lens configuration
- Whether bulbs are included
- Whether sockets or electrical parts are included
A replacement that looks almost identical in a photo may still have different connectors or internal components.
Verify 2003 Jeep Grand Cherokee WJ Fitment
The 2003 Grand Cherokee belongs to the WJ generation. You will often see replacement parts advertised using terms such as “Jeep WJ tail light” or with a range of WJ model years.
Do not assume that every tail light advertised for a broad 1999–2004 range is identical for every market and configuration.
Verify that the seller or manufacturer specifically lists your 2003 Jeep Grand Cherokee, the correct LH or RH position, and the correct lamp configuration before buying.
If possible, compare the replacement part with the original assembly before removing packaging or starting installation.
Check What Comes With the New Assembly
Some replacement tail lights are sold as a housing only. Others may include bulbs, sockets, wiring components, or additional hardware.
Read the product description carefully.
If the replacement does not include the required bulbs or sockets, you may need to transfer usable components from the old assembly.
How to Remove and Replace a 2003 Jeep Grand Cherokee Rear Tail Light Assembly
Once you have the correct replacement part, the physical removal is straightforward.
Work slowly, especially when pulling the old lamp away from the body. Plastic mounting areas can become more brittle as a vehicle ages.
Step 1: Park the Jeep and Turn Off the Lights
Park on a flat, stable surface.
Place the transmission in Park, apply the parking brake, turn off the ignition, and switch off all exterior lights.
For a basic housing replacement, you normally work with the lighting system switched off. If you are also repairing damaged wiring or electrical connections, disconnecting the negative battery terminal before electrical repair is a sensible additional precaution.
Step 2: Open the Rear Liftgate
Open the rear liftgate fully.
This exposes the inner edge of the rear tail light assembly and gives you access to its mounting screws.
You should not need to remove the rear bumper or major interior panels for this job.
Step 3: Locate the Tail Light Mounting Screws
Look along the inner edge of the tail light beside the liftgate opening.
You should see two Phillips-head mounting screws securing the assembly.
Before removing them, take a moment to look at how the housing sits against the body. This will help when aligning the replacement.
Step 4: Remove the Two Phillips-Head Screws
Use a Phillips-head screwdriver to loosen and remove both mounting screws.
Apply steady pressure so the screwdriver stays fully seated in the screw head.
Place the screws somewhere safe. You may need to reuse them with the replacement assembly.
If a screw is badly rusted or damaged, do not force it until the head strips. Use the appropriate method to free it before continuing.
Step 5: Remove the Tail Light Housing
With both screws removed, support the lamp with one hand and carefully pull the assembly forward and away from the body.
Do not aggressively twist, pry, or yank the housing.
If it feels stuck, check that both mounting screws are completely removed. Then work the assembly out gradually while keeping it as straight as possible.
The wiring will still be connected at the back, so do not pull the lamp farther than the harness allows.
Step 6: Disconnect the Tail Light Electrical Connector
Once the assembly is far enough out to reach behind it, locate the electrical connector.
Release the connector carefully and unplug the lamp from the vehicle wiring.
Pull on the connector body rather than pulling hard on the wires.
Now the complete tail light assembly can be moved away from the Jeep.
This is a good time to inspect the connector for moisture, corrosion, bent terminals, or heat damage.
Step 7: Transfer the Bulbs, Sockets, or Required Parts
Compare the new assembly with the old one before installing it.
If your replacement housing does not include bulbs or sockets, transfer the required parts.
Bulb holders on this lamp can be released by turning them to the unlocked position and pulling them from the housing.
Work with one component at a time so you do not mix up their positions.
Inspect each bulb and socket as you go. Reusing a visibly burnt socket or damaged bulb in a new housing can leave you with the same problem after installation.
Also check the seals around reusable components. A poor seal can allow moisture back into the replacement housing.
Step 8: Connect and Install the New Tail Light Assembly
Connect the vehicle wiring harness to the replacement tail light.
Make sure the connector is fully seated.
Before pushing the assembly into place, check that no wires are trapped between the lamp and the body.
Align the housing with its mounting points and gently press it into its normal position.
It should sit evenly against the vehicle without needing excessive force.
If the assembly will not sit correctly, stop and check the alignment. Do not use the screws to pull a badly aligned housing into position.
Step 9: Reinstall the Mounting Screws
Install the two Phillips-head screws you removed earlier.
Tighten them until the assembly is secure.
Do not overtighten the screws. Excess force can damage plastic mounting areas or the replacement housing.
Check that the lamp sits evenly against the surrounding bodywork and does not move when gently touched.
Step 10: Test Every Rear Light Function
Do not close the job until you test the lamp.
Turn on the vehicle’s lights and check every function served by the assembly.
Depending on your vehicle and market configuration, this may include:
- Tail or running light
- Brake light
- Turn signal
- Hazard light
- Reverse light
Testing more than one function matters because a tail light assembly can contain multiple bulbs and electrical circuits.
A new housing does not guarantee that every old bulb or socket is working correctly.
What If the New Tail Light Assembly Still Does Not Work?
If the replacement housing is installed correctly but the light still does not work, avoid immediately buying another assembly.
Work through the electrical system logically.
Tail Light Not Working After Replacement
Start with the simple checks:
- Is the electrical connector fully seated?
- Is the correct bulb installed?
- Is the bulb locked into its socket?
- Is the socket installed correctly in the housing?
- Are any contacts bent or corroded?
- Was a wire pinched during installation?
Remove and reconnect the plug if necessary.
A connector that appears attached may not be fully locked.
Brake Light Works but the Tail Light Does Not
If the brake light works but the running or tail light does not, the complete wiring supply to the assembly is not necessarily dead.
Check the bulb and socket associated with the failed function first.
Also inspect the contacts for corrosion or heat damage.
Depending on the bulb design, separate internal circuits can serve different lighting functions, so one function working does not prove that every part of the bulb or socket is good.
Tail Light Works but the Brake Light Does Not
If the regular tail light works but the brake light does not, inspect the appropriate bulb circuit and socket.
If the problem affects brake lights on more than one side, the fault may be elsewhere in the brake-light circuit rather than inside one tail light assembly.
At that point, checking the relevant fuse, wiring, brake-light switch circuit, and related electrical components may be necessary.
Turn Signal Does Not Work After Replacement
If the turn signal stopped working after the repair, first confirm that the correct bulb and socket are installed and properly seated.
Then check:
- Bulb condition
- Socket contacts
- Electrical connector
- Wiring
- Related fuse or turn-signal circuit if the problem affects more than one lamp
Do not assume the new housing caused the fault without checking the transferred components.
Inspect the Bulb Sockets for Corrosion or Heat Damage
Older sockets can develop poor electrical contact even when they look acceptable from the outside.
Remove the socket and inspect the electrical contact surfaces.
Look for:
- Green corrosion
- White deposits
- Blackened terminals
- Melted areas
- Loose contact points
- Moisture
A damaged socket should be replaced rather than forced back into service.
Check the Tail Light Circuit Board or Connector Plate
If bulbs and sockets appear good but the lamp still behaves intermittently, inspect the circuit-board or connector-plate area where applicable.
Corrosion or heat damage can interrupt the electrical connection.
Moisture inside the housing is an especially important clue. If water has been entering the old lamp, do not focus only on the failed electrical component. Correct the sealing or housing problem as well.
Otherwise, the replacement electrical part may eventually suffer the same damage.
Inspect the Wiring Connector
Look closely at the main wiring connector you disconnected during removal.
Check for:
- Loose terminals
- Bent pins
- Corrosion
- Damaged insulation
- Broken wires
- Signs of overheating
If moving the connector causes the light to flicker, there may be a poor connection that needs proper electrical repair.
Check the Fuse if Several Lights Are Not Working
A single dead bulb is less likely to point directly to a main fuse problem.
However, if several related lights fail at the same time, check the appropriate fuse and circuit information for your exact Jeep.
Use the fuse-box labeling, owner’s information, or the correct wiring documentation for your vehicle rather than guessing at a fuse number.
If a replacement fuse blows again, do not continue installing larger fuses. A repeatedly blown fuse indicates an electrical fault that should be diagnosed.
Common Mistakes to Avoid
The job is simple, but a few mistakes can turn a quick repair into another problem.
Buying the Wrong Side
Check LH and RH carefully before ordering.
For international vehicles, relying only on “driver side” or “passenger side” can be confusing because driving position differs between markets.
Replacing the Whole Housing for a Failed Bulb
A dead light does not always mean the lens or housing is bad.
Check the bulb, socket, connector, and electrical components before buying a complete assembly.
Pulling the Housing Too Hard
Once the screws are removed, work the housing forward carefully.
Pulling aggressively can damage the wiring, connector, or plastic mounting areas.
Reusing a Corroded Socket
Installing a clean new housing while transferring a badly corroded socket may leave the electrical problem unchanged.
Inspect transferred parts before reusing them.
Pinching the Wiring Behind the Lamp
Make sure the harness sits naturally behind the housing before you press the assembly into position.
A trapped wire can be damaged by the housing.
Overtightening the Screws
The mounting screws only need to hold the lamp securely.
Overtightening them can damage plastic parts, especially on an older vehicle or aftermarket housing.
Skipping the Final Test
Do not test only the light that originally failed.
Check the brake light, running light, turn signal, hazard light, and other functions in that assembly before considering the repair complete.
How Long Does a 2003 Jeep Grand Cherokee Tail Light Replacement Take?
This is generally a short, beginner-friendly repair because access to the rear lamp is simple and only basic hand tools are required.
Your actual time will depend on the condition of the vehicle.
The job can take longer if:
- Mounting screws are rusted or damaged
- The housing is stuck
- Electrical connectors are corroded
- Bulbs or sockets also need replacement
- You need to diagnose an electrical fault
- An aftermarket assembly needs extra fitment checking
Do not rush the removal just to save a few minutes. Older plastic parts and wiring are easier to damage when forced.
Can You Replace the Rear Tail Light Assembly Yourself?
For many owners, yes.
If the problem is a cracked housing or straightforward assembly replacement, this is one of the more approachable DIY jobs on a 2003 Jeep Grand Cherokee.
You mainly need to be comfortable using a screwdriver, disconnecting an automotive electrical connector, transferring bulbs if required, and checking the lights afterward.
Professional diagnosis becomes more useful when the problem involves:
- Repeatedly blown fuses
- Burnt wiring
- Severe connector damage
- Multiple lights failing
- An intermittent electrical problem
- A new bulb and assembly that still do not work
- Electrical repairs you are not comfortable performing
Replacing parts without diagnosing an electrical fault can become more expensive than having the circuit tested properly.
Frequently Asked Questions
What tools do I need to replace a 2003 Jeep Grand Cherokee tail light assembly?
The main tool is a Phillips-head screwdriver. Gloves, a flashlight, a clean cloth, and a small container for the mounting screws can also make the job easier.
How do I remove the rear tail light on a 2003 Jeep Grand Cherokee?
Open the rear liftgate, remove the two Phillips-head screws beside the lamp, carefully pull the tail light forward, and disconnect the electrical connector from the back.
Once disconnected, the complete assembly can be removed from the vehicle.
Do I need to disconnect the battery before replacing the tail light?
For a straightforward housing replacement with the ignition and exterior lights switched off, the normal removal procedure does not require extensive electrical disassembly.
If you plan to repair exposed or damaged wiring, disconnecting the negative battery terminal before electrical work is a sensible safety step.
Can I replace only the bulb instead of the whole tail light assembly?
Yes, if the housing is undamaged and the problem is only a failed bulb.
A complete assembly is more appropriate when the lens, housing, mounting points, or internal electrical components are damaged.
How do I know if my Jeep tail light socket is bad?
Common signs include corrosion, burnt contacts, melted plastic, a loose bulb, intermittent operation, or a good bulb that still does not work.
Inspect the socket closely after removing the assembly.
How do I know if the tail light circuit board is bad?
A circuit-board-related problem may cause intermittent lights, repeated failures even with good bulbs, or visible corrosion and heat damage.
Confirm the bulb, socket, connector, and power supply before replacing electrical parts unnecessarily.
Why is my tail light still not working after installing a new assembly?
The fault may be in a bulb, socket, connector, wiring, fuse, or another part of the electrical circuit.
First make sure the rear connector is fully attached and all transferred components are installed correctly.
Are the left and right tail light assemblies interchangeable?
No. The housings are shaped for their specific side of the vehicle.
Order the correct LH or RH assembly.
For USA, Canada, UK, and Australia, using left-hand and right-hand terminology is safer than relying only on driver-side and passenger-side descriptions.
Will a 1999–2004 Jeep Grand Cherokee tail light fit a 2003 model?
Many parts are marketed across multiple WJ model years, but you should not assume every lamp configuration is interchangeable.
Before buying, confirm that the exact replacement is listed for a 2003 Jeep Grand Cherokee, the correct left or right position, and your market or vehicle configuration.
Can I replace a cracked tail light lens without replacing the housing?
It depends on the replacement parts available for your specific assembly. Many owners replace the complete housing when the lens is cracked because a poor lens seal can allow moisture inside.
Whatever repair you choose, the finished lamp should be secure and properly sealed.
Final Check Before Driving
Once the replacement is complete, take one final walk around the rear of the Jeep.
Make sure the housing sits securely against the body, both mounting screws are installed, the connector is locked, and no wiring is trapped behind the lamp.
Then test every rear-light function.
If everything works normally, the repair is complete. If one function still fails, return to the bulb, socket, connector, and circuit checks rather than assuming the new tail light housing is defective.
Taking a few extra minutes to diagnose the original problem and verify the final installation can save you from removing the assembly a second time.