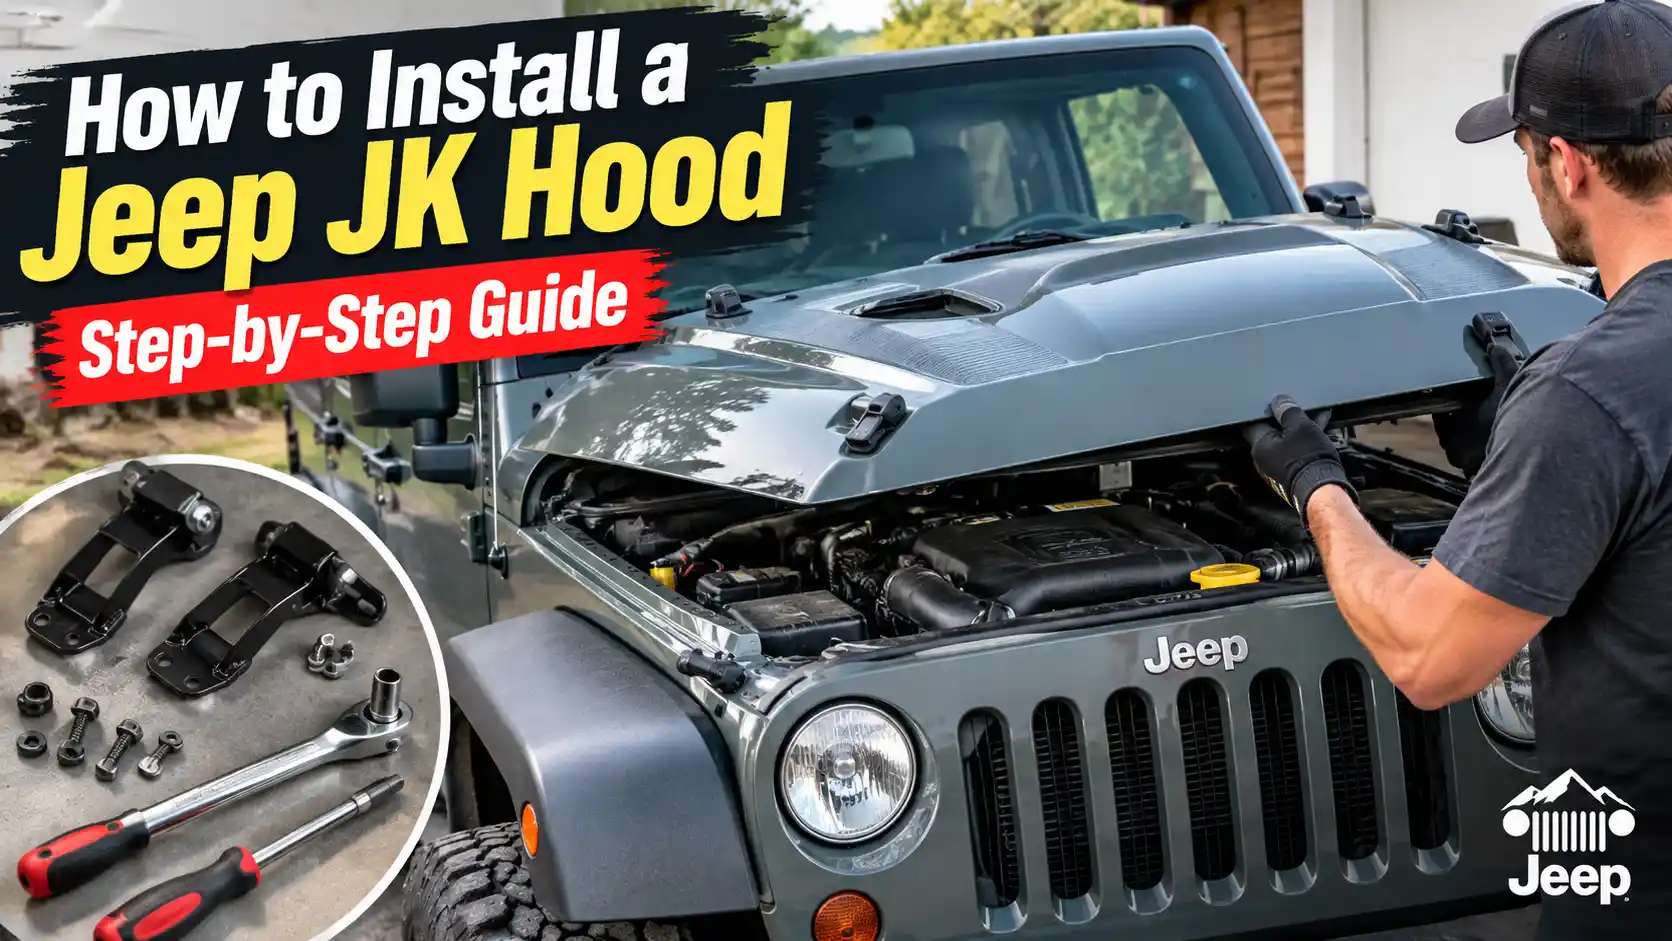
A Jeep Jk Hood Install Guide walks you through replacing the factory cover with an aftermarket or second-hand unit while keeping all gaps, latches, and locks functioning properly. The entire swap typically takes one to two hours with basic hand tools. Per manufacturer service data, hinge bolts on a JK require roughly 18 to 22 foot-pounds of torque, and you want every side gap to land between a quarter and three-eighths of an inch for clean factory-level alignment.
If you’re also running a taller suspension, you may need adjustable hinges to prevent wind flap at speed. Check this Jeep lift discussion if your ride height changes your clearances significantly.
Below is a complete visual-first process covering tool selection, safe removal, careful test-fitting, and the exact alignment tweaks that turn a crooked install into a straight one. You can treat this as a standalone walkthrough or pair it with deeper reads like our 2026 hood upgrade guide when you’re still deciding which material and design actually fits your driving style.
Why This Install Is More Visual Than Mechanical
Many people treat a hood swap as a simple bolt-on job. They loosen the hinges, drop the old cover, bolt on the new one, and call it done. That approach almost always produces uneven gaps, bindy latches, and frustrated evenings spent tightening bolts that were never meant to fix misalignment.
Hood fitment on a JK is not primarily about torque values. It is about spatial relationships. You are dealing with two stamped metal panels sitting on flexible rubber grommets, attached to a frame that may have taken a minor ding years ago, and expected to close against a striker plate positioned by millimeters.
A gap that looks one millimeter too wide on the driver side usually means the whole panel is rotated slightly, not that one hole is out of place.
Reading those relationships requires watching where lines meet. You need to see the gap between the hood edge and the fender. You need to check the line from the front grille out toward the mirror caps.
You need to observe whether the latch pulls evenly from both sides. Text can describe all three of those things, but it cannot show you how a quarter-inch rotation changes the rear gap versus the front gap. That is why this guide leans heavily on visual cues.
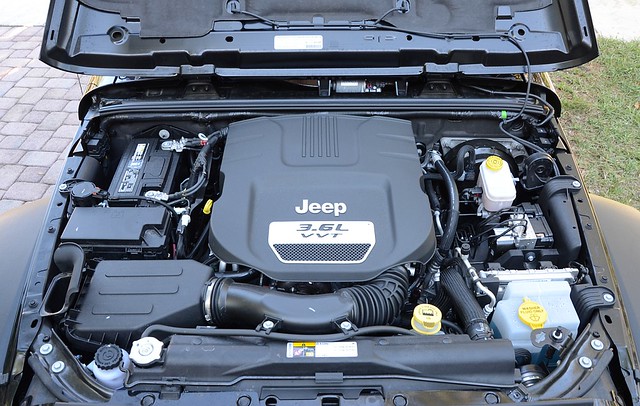
Image source: Bing (Web (fair-use with source credit))
When a new hood sits on the frame, do not reach for the ratchet immediately. Instead, step back and trace the body lines. Look at the gap between the hood and the left fender.
Look at the same gap on the right. Look down the length of the hood from a low angle near the windshield. If one side opens wider than the other toward the rear, the panel is skewed, not centered.
You will also need to judge clearance visually. The hood must open without hitting the windshield, the wiper arms, or any upper deflector you may have added. On lifted JKs, this becomes even more critical because the changed hinge arc can push the leading edge of the hood into glass or trim.
Watching that movement while someone slowly lifts the hood tells you far more than measuring a single static gap ever will.
Finally, the latch behavior reveals hidden alignment errors. If the hood closes with a solid click on one side and a weak thud on the other, the striker is likely offset. If the key turns stiffly after a seemingly perfect visual fit, the lock cylinder housing is misaligned relative to the striker tunnel.
Every one of those issues shows up visually or tactilely long before it shows up in a torque spec.
That is why we begin every real install discussion with observation first, adjustment second, and final tightening last. Skipping that order is the fastest path to a crooked hood and a stripped bolt.
Essential Tools and Parts Checklist
A hood swap does not require a full mechanic’s garage, but it does demand a focused set of tools. Going in under-prepared turns a straightforward job into a search-for-the-right-socket exercise mid-install. Here is what you actually need, organized by stage rather than by generic categories.
Core Hand Tools
- 8-millimeter socket or Allen key, depending on your hinge hardware
- 10-millimeter socket for most hinge mounting nuts and bracket bolts
- 13-millimeter socket for larger bracket hardware on certain aftermarket kits
- Ratchet with a short and a medium extension
- Torque wrench capable of reading 5 to 30 foot-pounds accurately
- Screwdriver set covering flathead and Phillips sizes
- Trim removal tools for cowl panels and any clips along the base of the windshield
Fastener and Hardware Considerations
- New hinge bolts if the originals are stretched, corroded, or cross-threaded
- Grade-8 hardware whenever you upgrade to heavy-duty adjustable hinges
- Thread locker rated for moderate heat, applied only to bolts that specify it
- Replacement push-type retainers if your cowl trim uses them
Alignment Aids
- Zip ties in a few lengths for temporary gap spacing
- Washers or small spacers cut from soft plastic
- Marker or scribe for dotting bolt positions on the hood flange
- Masking tape for marking striker centerlines before you move anything
Safety and Comfort Items
- Nitrile gloves to protect hands from sharp sheet metal edges
- Safety glasses when working underneath an unsupported hood
- A second person, ideally, though solo installs are possible with careful support
- A sturdy hood prop or an adjustable gas strut kit rated for Jeep applications
Optional Upgrade Parts
Depending on your goals, you may also want:
- Adjustable hinge sets that allow vertical and lateral adjustment without bending brackets
- Aftermarket striker plates with wider adjustment ranges
- Hood pin kits for off-road security
- Lock cylinders or upgraded key mechanisms if the factory ones are worn
- Gas struts to replace the stock foldable prop rod
Once you gather these items, verify everything matches your specific JK year and hood type before starting. Mopar documentation and aftermarket vendor spec sheets both emphasize that hinge bolt lengths, striker thread pitches, and lock cylinder diameters can vary slightly between model years and replacement vendors. Confirming parts upfront prevents mid-install trips to the parts store.
If you are considering other body or interior upgrades alongside this swap, it might help to review options like fixed side steps for your JK for general fitment philosophy, or look into lighting upgrades such as a heavy-duty light bar setup to ensure your electrical routing stays organized during the door-and-hood work window.
How to Remove the Stock Hood Safely
Removing the factory hood cleanly sets the foundation for everything that follows. Rush this step, and you risk dropped panels, damaged wiring, and stripped threads that make reinstallation a headache. Handle it slowly, and the rest of the job flows naturally.
Stage One: Secure the Work Area
Begin by parking the Jeep on level ground and engaging the parking brake. Open the hood fully and engage the factory prop. If your prop feels weak or the latch releases unexpectedly while you are under it, support the hood with a separate jack stand wrapped in cloth or use a helper to hold it steady.
Never rely solely on the factory latch mechanism to carry the hood’s weight during hardware removal.
Stage Two: Protect Paint and Body Panels
Lay a thick blanket or dedicated hood cover over the fenders and cowl area. Sheet metal scratches during this process usually come from dropped sockets, sliding ratchets, or accidental contact with sharp edges. A simple protective layer prevents costly touch-ups later.
Stage Three: Disconnect Electrical and Latch Cables
On JK models equipped with a keyed lock or auxiliary wiring, locate the connector beneath the hood near the passenger-side hinge area. Press the release tab and pull straight out. Do not yank the wires.
If you are transferring the lock cylinder to a new hood, unclip the cable housing from its retaining brackets before loosening any hardware. Label each cable with masking tape so reconnection goes smoothly.
Stage Four: Support the Hood Before Removing Hardware
Before touching the hinge bolts, slide a wooden board or padded support under the leading edge of the hood. This step is non-negotiable. Once those bolts leave the threads, the hood has only gravity holding it in place.
A two-person team can manage without support, but a solo installer absolutely needs it.
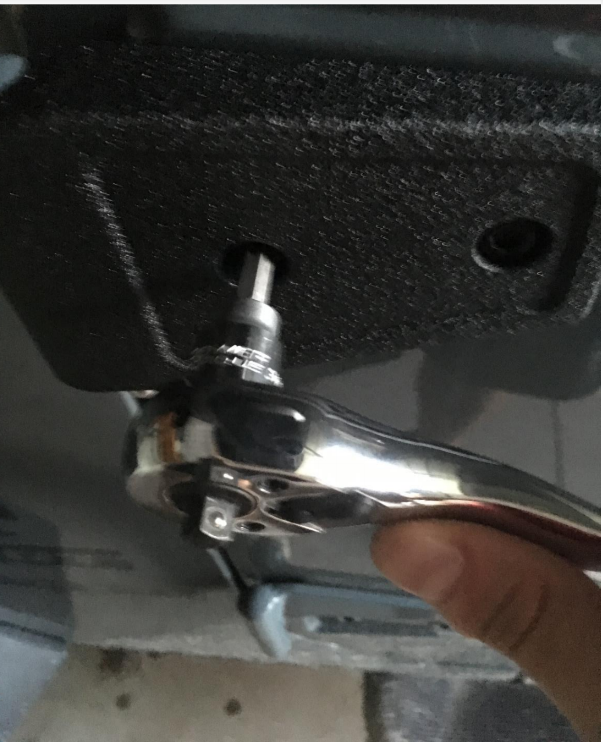
Image source: Bing (Web (fair-use with source credit))
Stage Five: Loosen Hinge Bolts in the Correct Sequence
Start by breaking each hinge bolt loose a half-turn rather than removing it completely. Working in an alternating pattern prevents stress concentration on one side of the flange. Once all bolts are loose, finish removal in pairs.
Keep close track of each bolt, its washer, and its location. Note whether a bolt came from the driver-side hinge, the passenger-side hinge, or the hood itself, because aftermarket replacements sometimes mix metric and standard threads across brands.
Stage Six: Label and Photograph Everything
Take a quick photo of the hinge assembly, the striker position, and the lock cylinder routing before you separate anything. These reference images become invaluable when you return to reinstall or diagnose a misaligned latch later. Write down bolt lengths if they differ visibly.
Even small variations matter when you are threading into tight aluminum tabs.
Stage Seven: Lower and Set Aside the Old Hood
With all hardware disconnected and the support in place, lower the hood slowly onto a padded surface. Avoid dragging it across concrete or gravel. Once resting, double-check that no cables remain attached and that no small clips are hiding inside the cowl well.
Transfer any reusable components, such as the striker plate and lock housing, to your new hood according to the instructions below.
Following these stages carefully keeps the process clean and predictable. When the old cover is safely removed and your workspace is organized, you are ready to move into test-fitting the replacement panel without rushing the next steps.
Test-Fitting and Initial Positioning
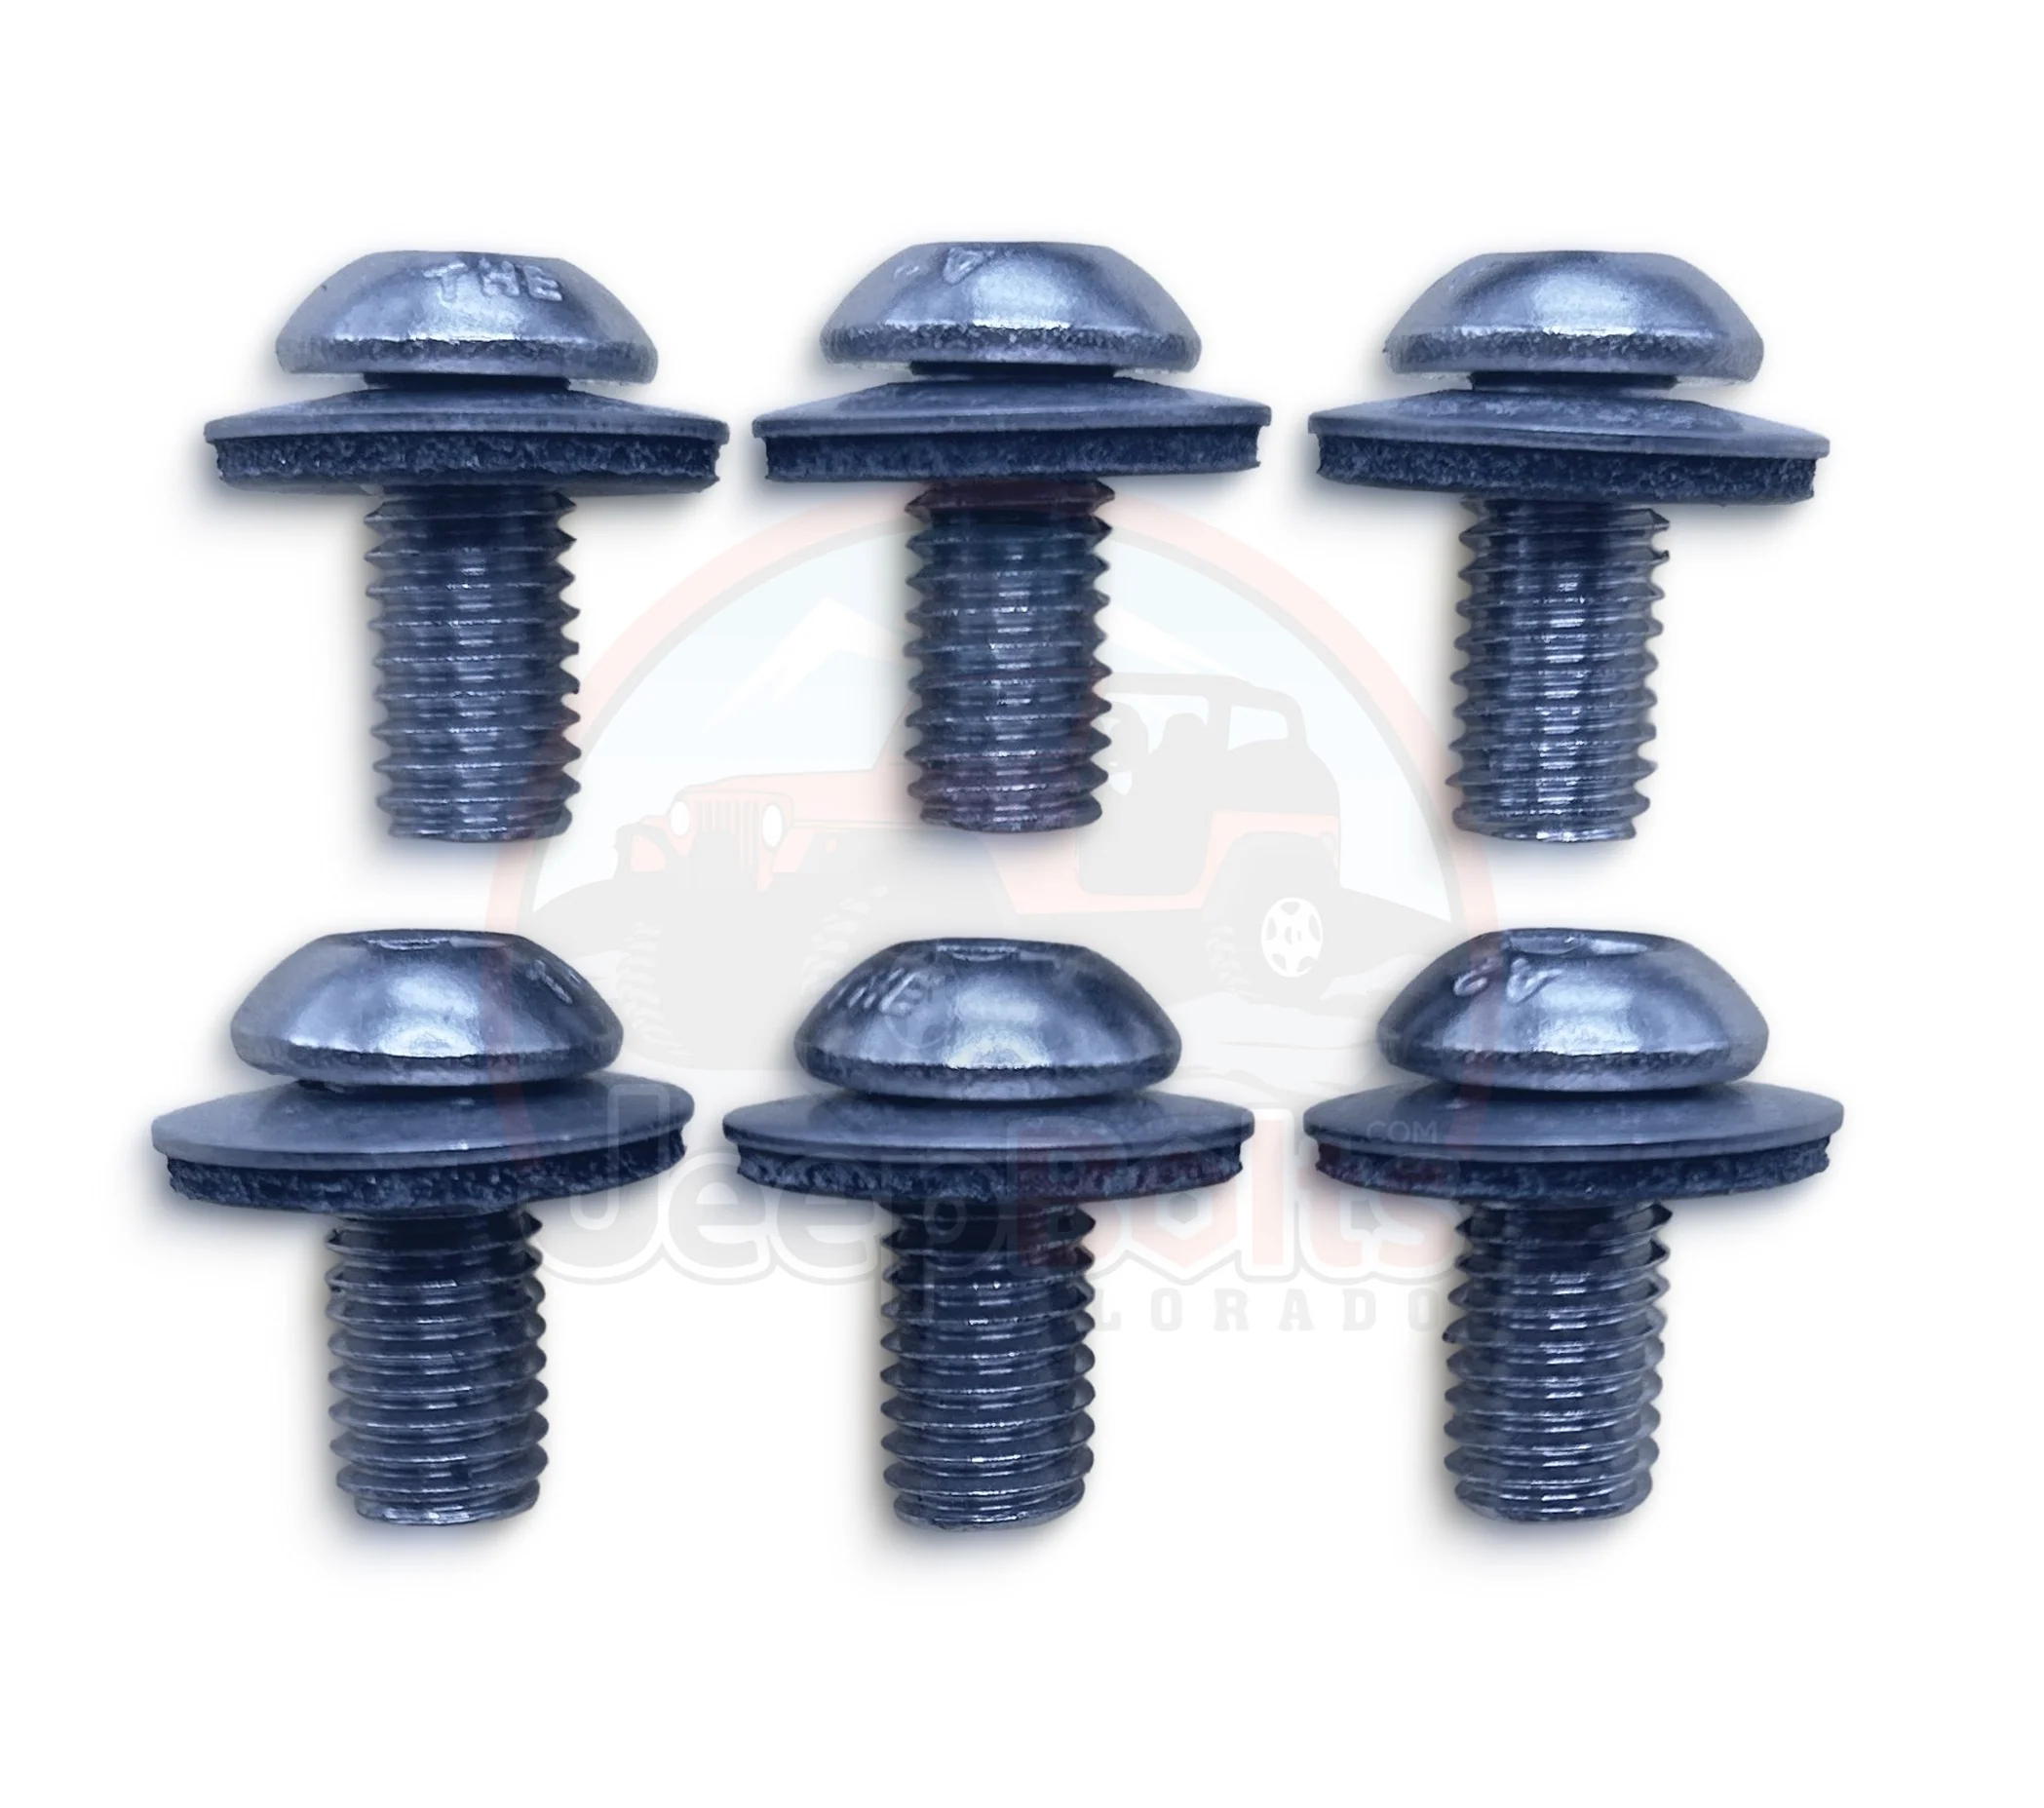
Image source: Bing (Web (fair-use with source credit))
Test-fitting separates a successful installation from a frustrating one. This is the stage where you learn how the new hood sits before you commit to final torque values. Skipping it almost guarantees gap problems later.
Step One: Place the Hood Without Fully Engaging Hardware
Lift the new hood into position and align the hinge holes roughly with the frame mounts. Insert the bolts by hand, just enough to hold the panel in place. Do not tighten anything yet.
At this point, the hood should rest securely but remain freely adjustable in all directions. If it falls off during this stage, your hinge holes are misaligned and you need to adjust bracket positioning before proceeding.
Step Two: Check for Obvious Rubbing Points
Slowly open and close the hood through its full range of motion. Watch closely for any contact between the leading edge and the windshield frame, wiper arms, or deflector. Listen for scraping sounds that indicate paint-to-paint contact.
Even minor rubbing at full open can translate into major clearance issues once the vehicle is moving on rough terrain.
Step Three: Verify Basic Latch Engagement
Close the hood gently and observe how the latch catches. Does it pull evenly from both sides? Does the primary latch engage without excessive force?
If the hood slams shut on one corner while leaving a wide gap on the other, the striker is likely far from its correct position. Record this behavior before making adjustments.
Step Four: Assess Overall Panel Placement
Step back and view the hood from multiple angles. Check the gap between the hood and each fender. Compare front-to-rear measurements on both sides.
Look at the line continuity from the grille outward. Take note of which areas need correction and which already look acceptable. This assessment guides your adjustment priorities.
Step Five: Make Preliminary Adjustments
Based on your observations, make small positional changes. If a gap is too wide at the front but tight at the rear, shift the entire panel slightly forward. If one side runs wider than the other along its full length, adjust that hinge vertically or horizontally.
Make changes incrementally, closing and reopening the hood after each adjustment to assess progress.
Step Six: Confirm Key Lock Operation
If your hood includes a lock cylinder, insert the key and cycle the lock through open and closed positions. The locking pin should engage smoothly without binding. If operation feels stiff, the lock housing may need repositioning relative to the striker.
Minor adjustments to the housing placement often resolve this issue.
Step Seven: Document Your Findings
Before moving to final torquing, take photos of your current setup. Document bolt positions, gap measurements, and any adjustment notes. These records prove useful if you need to revert changes or troubleshoot issues after the install is complete.
Proper test-fitting transforms guesswork into informed decisions. Once satisfied with the preliminary positioning, you are ready to move into the more precise work of gap alignment and final hardware installation.
Visual Gap Alignment: Reading the Lines
Gap alignment is where most JK hood installations either succeed or stumble. The difference between a professional-looking result and a DIY-looking one often comes down to how carefully you read and adjust those visible seams. This section breaks down exactly what to look for and how to correct common issues.
Understanding Gap Expectations
Factory Jeep JK specifications target consistent gaps across all body panel interfaces. For the hood-to-fender relationship, aim for approximately one-quarter to three-eighths of an inch uniformly along the entire length. The front gap between hood and grille should fall within a similar range.
These targets provide visual harmony while allowing for normal manufacturing tolerances.
The Three Primary Gap Zones
Focus your alignment efforts on three critical zones:
- Fender-to-Hood Gaps, These run along both sides of the hood from front to back
- Grille-to-Hood Gap, This horizontal seam at the front of the vehicle
- Windshield-to-Hood Gap, This rear vertical seam where the hood meets the cowl
Each zone requires different adjustment approaches, as explained below.
Adjusting Fender-to-Hood Gaps
Uneven side gaps usually indicate panel rotation rather than absolute position error. If the driver-side gap measures one-quarter inch at the front but three-eighths at the rear while the passenger side shows the opposite pattern, your hood is rotated slightly clockwise or counterclockwise.
To correct rotation:
- Loosen hinge bolts just enough to allow panel movement
- Gently pivot the hood around its centerline
- Close and check gaps repeatedly until symmetry improves
- Retighten bolts gradually while maintaining position
Consistent width gaps across both sides suggest the entire panel sits too far left or right. In this case:
- Shift the whole hood laterally while bolts remain loose
- Use zip ties or washers as temporary spacers to maintain consistent gaps
- Check alignment from multiple viewing angles
- Secure bolts gradually, rechecking gaps after each tightening cycle
Image source: Bing (Web (fair-use with source credit))
Fine-Tuning the Grille Gap
The front gap demands attention to both width and consistency. An uneven grille-to-hood gap often results from asymmetric fender gaps rather than a grille problem itself. Address side gaps first, then revisit the front seam.
For minor grille gap adjustments:
- Loosen grille mounting bolts slightly
- Reposition the grille to complement the hood position
- Ensure equal spacing across the entire width
- Tighten gradually while maintaining alignment
Some aftermarket grilles offer additional adjustability through slotted mounting points. Consult your specific product documentation for adjustment procedures.
Managing the Windshield Gap
The rear gap between hood and cowl area serves both aesthetic and functional purposes. Excessive gaps here can allow water intrusion and debris accumulation. Minimal gaps risk contact with the windshield or deflector during suspension travel.
Target approximately one-quarter inch clearance along the entire rear edge. To achieve this:
- Adjust overall hood height via hinge positioning
- Ensure the hood sits parallel to the windshield plane
- Check clearance at multiple points along the rear edge
- Verify no contact occurs at full hood open position
Using Visual Reference Points
Develop a systematic approach to gap evaluation:
- Always view gaps from directly in front, behind, and to each side
- Look down the length of panels from a low angle near ground level
- Check gaps with the hood closed at normal latched pressure
- Compare opposite sides directly, not separately
- Use consistent lighting to avoid shadow misinterpretation
Common Visual Mistakes to Avoid
Several pitfalls commonly undermine gap alignment efforts:
- Overtightening bolts prematurely, This locks in poor alignment with no correction path
- Ignoring the whole-panel view, Focusing on one gap area while neglecting others creates new problems
- Adjusting based on a single viewpoint, What looks correct from the front may appear wrong from the side
- Forcing misaligned components, Never bolt hardware into misaligned holes; adjust positioning instead
- Neglecting dynamic checks, Gaps that look good statically may change when driving over bumps
Final Verification Process
After achieving satisfactory gap appearance:
- Close and latch the hood firmly
- Recheck all gap measurements
- Open and close multiple times to confirm consistency
- Verify lock and latch function throughout the range
- Drive the vehicle briefly, then recheck gaps for any settling
Proper visual gap alignment transforms a functional installation into a professional result. Taking time during this phase saves significant rework later and ensures your Jeep maintains the sharp, factory-quality appearance you want.
Adjusting the Hood Latch Striker
The striker is the small metal hook mounted to the frame that the hood latch grabs onto when you close the door. Getting it positioned correctly matters more than most people realize. A poorly placed striker causes weak latching, key cylinder damage, and that annoying bounce-open problem on rough roads.
Recognizing a Problem Striker Position
Before adjusting anything, confirm the striker actually needs movement. Signs include:
- The hood feels loose when closed, with noticeable play
- The latch only engages partially, requiring excessive force to close
- The key turns stiffly or binds when locking
- The hood vibrates audibly at highway speeds
- Water leaks into the cowl area near the latch
If none of these symptoms exist, the striker may already be close enough to optimal and simply needs minor tweaking rather than major relocation.
Understanding Striker Adjustment Directions
The striker plate adjusts in two primary axes:
Vertical adjustment moves the striker up or down relative to the hood latch. Higher positioning increases latch engagement depth, creating a firmer close. Lower positioning reduces engagement, potentially causing bounce-open issues.
Horizontal adjustment shifts the striker left or right. This correction addresses asymmetric latch engagement where one side of the hood closes tighter than the other.
Most factory strikers use two adjustment bolts that loosen when you remove their retaining nuts. Aftermarket striker plates often provide wider adjustment ranges with slotted mounting holes.
Step-by-Step Striker Adjustment Process
Begin by loosening the striker retaining nuts just enough to allow movement. Do not remove them completely. Next, make small positional changes:
For vertical adjustment:
- Use a box-end wrench or socket on the adjustment bolt
- Turn in quarter-turn increments
- Test latch engagement after each adjustment
- Aim for firm closure with moderate latch lever force
For horizontal adjustment:
- Shift the striker laterally based on which side exhibits weaker engagement
- Small movements, approximately one-sixteenth of an inch per adjustment
- Close the hood and evaluate latch behavior
- Repeat until engagement feels balanced across both sides
Checking Lock Cylinder Alignment
After positioning the striker, verify the lock cylinder operates smoothly. Insert the key and cycle the lock through multiple open-close cycles. The locking pin should engage the striker hole without binding or excessive force.
If operation remains stiff after striker repositioning, the lock housing itself may need adjustment.
Some installations benefit from relocating the entire lock mechanism slightly forward or backward on the hood to improve cylinder-to-striker alignment. This adjustment requires removing the lock housing bolts and repositioning before retightening.
Verifying Final Striker Position
Once satisfied with latch and lock operation, perform these final checks:
- Close the hood firmly and confirm positive latch engagement
- Pull up on the hood to verify secure retention
- Cycle the lock mechanism several times to ensure smooth operation
- Check for any water intrusion paths around the striker area
- Test drive and re-evaluate latch security on rough surfaces
Proper striker adjustment transforms a marginal hood installation into one that latches securely and operates smoothly for years. Taking time during this phase prevents premature hardware failure and maintains weather sealing integrity. If you also plan to upgrade your windshield seal area during this process, reviewing a cowl seal replacement guide can help ensure the rubber sealing strip seats properly underneath the hood edge.
Lock Cylinder and Hood Prop Installation
Securing your hood with proper locking and prop mechanisms enhances both security and convenience. Whether you retain the factory lock cylinder or upgrade to aftermarket solutions, proper installation ensures reliable operation and long-term durability.
Transferring or Upgrading the Lock Cylinder
If your new hood does not include a pre-installed lock cylinder, you will need to transfer the factory unit or install an aftermarket replacement. Begin by removing the existing cylinder from the stock hood. This typically involves depressing a release tab or removing a retaining clip while pulling the cylinder outward.
Clean the mounting hole thoroughly before inserting the new or transferred cylinder. Apply a small amount of white lithium grease to the cylinder shaft to ensure smooth operation. Insert the cylinder until it seats fully, then secure it with the retaining mechanism specified by your product.
Test the cylinder operation multiple times before finalizing installation. The key should turn smoothly through lock and unlock positions without binding. If resistance occurs, verify proper alignment and reapply lubrication as needed.
Aligning the Lock Mechanism with the Striker
Proper lock cylinder alignment depends heavily on correct striker positioning, discussed in the previous section. Once the striker is optimally placed, verify that the locking pin engages the striker hole squarely. Misalignment here causes premature wear and potential failure.
If adjustment proves difficult, consider using an aftermarket lock housing with broader positional tolerance. These components often include slotted mounting points that accommodate minor frame mismatch without requiring extensive fabrication.
Installing a Hood Prop Rod or Gas Strut
Factory JK hood props can fail over time, especially on higher-mileage vehicles. Upgrading to a reliable prop system improves usability and safety during hood work.
Traditional fold-down prop rods remain popular for their simplicity and strength. Replacement units typically bolt directly to existing mounting points using provided hardware. Ensure the prop engages securely at full open position without slipping.
Gas strut conversions offer smoother operation and consistent lifting force. When selecting replacement struts, match the stroke length and force rating to your hood’s weight and opening requirements. Improperly sized struts can cause the hood to close unexpectedly or fail to stay open entirely.
Installation generally involves removing the factory prop mounting hardware and bolting in the new component. Some gas strut kits require drilling additional mounting holes, so consult your product instructions carefully. Always verify that the prop or strut clears all surrounding components throughout the full opening range.
Verifying Hood Security Features
After completing lock and prop installation, conduct thorough functionality tests:
- Cycle the lock mechanism multiple times to confirm smooth operation
- Verify the hood remains securely latched during simulated driving vibrations
- Test prop or strut engagement at various open angles
- Ensure keys can lock and unlock without excessive force
- Check that emergency release mechanisms remain accessible
Proper lock and prop installation completes your hood upgrade while enhancing security and usability. Taking time during this phase prevents operational issues and ensures reliable performance across diverse driving conditions.
Choosing Between Steel, Aluminum, and Composite Hoods
Selecting the right hood material significantly impacts your Jeep’s performance, appearance, and long-term ownership costs. Each material offers distinct advantages and trade-offs that warrant careful consideration based on your specific driving needs and preferences.
Steel Hoods: The Budget-Friendly Standard
Steel remains the most common and affordable hood material available for JK owners. OEM replacements and many aftermarket options utilize formable steel that mirrors factory specifications closely.
Advantages of steel hoods:
- Lower cost compared to aluminum and composite alternatives
- Easier dent repair using traditional body work techniques
- Direct OEM fitment with minimal modification required
- Available in vented and non-vented designs
- Proven durability across decades of Jeep production
Considerations for steel hoods:
- Heavier weight increases strain on hinges and prop mechanisms
- Prone to rust and corrosion, especially in salt-prone regions
- May require additional reinforcement for extreme off-road use
- Paint finish quality varies significantly between manufacturers
For off-road enthusiasts prioritizing budget and straightforward replacement, steel hoods represent a solid choice. However, if you frequently encounter heavy rock crawling or extended trail use, you may want to explore reinforced options or consider upgrading your hinge hardware accordingly. Review our analysis of the top hood choices for the JK to compare specific steel model options available in the current market.
Aluminum Hoods: Lightweight Performance
Aluminum hoods have gained substantial popularity among serious off-road enthusiasts and competitors seeking weight reduction without sacrificing durability. Modern aluminum hood manufacturing utilizes advanced forming techniques that produce panels rivaling steel in structural integrity.
Benefits of aluminum construction:
- Significant weight savings reduce hinge and prop stress
- Natural corrosion resistance eliminates rust concerns
- Excellent heat dissipation properties
- Often feature integrated vent designs for engine cooling
- Superior strength-to-weight ratio for aggressive trail use
Factors to evaluate:
- Higher purchase price compared to steel alternatives
- Difficult dent repair requiring specialized aluminum welding
- Potential for galvanic corrosion when contacting steel components
- Thermal expansion differences may affect gap consistency over time
If you run a substantial lift package and notice excessive hinge sag or prop fatigue, switching to aluminum may address those concerns effectively. Our review of lifted JK setups examines suspension-related considerations that often accompany weight-conscious modifications like aluminum hoods.
Composite and Carbon Fiber Options
Composite materials, including fiberglass and carbon fiber constructions, occupy the premium segment of hood offerings. These materials excel in custom applications and extreme performance scenarios where weight saving and unique styling take priority.
Composite hood strengths:
- Extremely lightweight compared to metal alternatives
- Custom shaping possibilities for unique styling
- Excellent resistance to environmental degradation
- Potential for integrated design features impossible with metal
- Minimal thermal expansion maintains consistent gaps
Composite limitations:
- Highest cost category among hood materials
- Impact damage often requires professional repair or replacement
- Limited availability in vented configurations
- Potential UV degradation without proper coating maintenance
- Fitment may require additional modification for proper alignment
For show vehicles or specialized competition builds where appearance and weight matter most, composites deliver distinctive results. Daily drivers and utility-focused builds typically benefit more from steel or aluminum options.
Material Selection Decision Matrix
When choosing between materials, evaluate these key factors against your usage patterns:
| Usage Pattern | Recommended Material | Primary Reason |
|---|---|---|
| Daily driving, stock suspension | Steel | Cost-effective, easy repair |
| Moderate off-roading, budget conscious | Steel or Aluminum | Balanced performance and value |
| Serious trail use, lifted suspension | Aluminum | Weight savings, durability |
| Competition builds, show vehicles | Composite | Lightweight, custom styling |
| Salt country, corrosion concerns | Aluminum | Natural rust resistance |
| Extreme rock crawling | Steel (reinforced) | Impact resilience |
Your decision should balance immediate budget constraints against long-term ownership costs and performance requirements. Consider also how material choice affects related components like hinges, props, and latch mechanisms. Heavier steel hoods may necessitate upgraded hardware, while aluminum and composite options often work with factory components without modification.
Understanding how weight distribution affects overall vehicle dynamics helps inform hood material choices that complement your complete build strategy. A well-balanced rig with the right storage solution, like an ARB drawer system, benefits from lighter body panels just as much as it benefits from proper weight management elsewhere.
Taking time to research and compare these material options ensures your hood selection supports both current needs and future plans. Each material category offers viable solutions when matched appropriately to your driving style and maintenance capabilities.
Common Alignment Mistakes to Avoid
Even experienced builders make avoidable errors during hood installation. These mistakes often stem from rushing the process or skipping critical verification steps. Learning from others’ missteps saves time, money, and frustration.
Over-Torqueing Hinge Bolts
One of the most damaging mistakes involves applying excessive torque to hinge bolts. Aluminum mounting tabs on JK frames are softer than steel hardware. Forcing bolts beyond specification strips threads or cracks the surrounding material.
Once damaged, these tabs require expensive repair or replacement brackets.
Manufacturer specifications typically call for 18 to 22 foot-pounds on hinge hardware. Use a calibrated torque wrench rather than guessing by feel. If a bolt resists tightening, stop and investigate.
Binding usually indicates cross-threading or debris in the holes, not a need for more force.
Ignoring Hinge Looseness
Loose hinges create their own set of problems. A slightly loose hinge allows the hood to vibrate against its stops during driving. This movement produces annoying rattles and gradually wears away paint and metal.
Over time, the panel shifts out of alignment, recreating gap problems you worked hard to solve.
After achieving proper alignment, verify each hinge moves smoothly without play. If you feel any looseness when attempting to shift the hood manually, tighten the hinge mounting hardware incrementally. Retest after each adjustment to maintain your carefully achieved gaps.
Forcing the Latch Mechanism
Another common error involves forcing the hood shut when latch engagement feels resistant. Pushing hard on a misaligned hood damages the latch mechanism, bends the striker, or warps the hood opening flange. This creates a vicious cycle where each subsequent close attempt causes more damage.
If the hood refuses to close evenly, back off and reassess alignment. Check whether the striker position matches the latch centerline. Verify that both sides of the hood meet equal resistance during closure.
Small adjustments to hinge placement or striker positioning resolve most forcing-related issues.
Skipping the Full-Open Clearance Check
Many installers focus exclusively on closed-gap appearance while neglecting open-position clearance. A hood that looks perfect when latched may still contact the windshield, wiper arms, or hood props during normal opening. This oversight becomes apparent only after installation is complete.
Always perform a full range-of-motion test before final torquing. Open the hood completely and hold it there. Check every potential contact point from multiple angles.
Look specifically at the leading edge, side corners, and rear area near the cowl. Address any clearance concerns immediately while hardware remains adjustable.
Leaving Hardware Unsecured
Incomplete hardware installation creates safety hazards and installation headaches. Missing washers, loose retaining nuts, or unsecured cable connections allow components to vibrate loose during driving. Small hardware pieces fall into engine bays or cowl areas, creating foreign object damage risks.
Before considering the install complete, verify every bolt, nut, washer, and clip is present and secure. Double-check cable connections at both ends. Ensure lock cylinders engage properly without hanging hardware.
A methodical final inspection prevents numerous post-install problems.
Not Rechecking After Initial Driving
Installation is not truly finished until you have driven the vehicle. Road vibration settles components and reveals alignment shifts that static checks miss. Returning to the garage after initial driving to recheck and adjust gaps completes the process properly.
Plan to revisit alignment within the first 50 to 100 miles of driving. Retorque hinge bolts to specification after this break-in period. Adjust striker positioning if latch behavior has changed.
This follow-up ensures your installation remains optimal through real-world use.
Avoiding these common mistakes transforms a potentially frustrating experience into a smooth, professional-quality installation. Taking time to work methodically pays dividends in appearance, function, and long-term reliability.
Dealing with Lift Kits and Clearance Issues
Lifted Jeeps introduce unique challenges to hood installation that stock vehicles never face. Changed suspension geometry alters hinge arcs, increases wind exposure, and creates new clearance requirements. Understanding these dynamics prevents costly fitment problems.
How Lift Height Changes Hood Geometry
Every inch of lift changes the relationship between hood, fenders, and frame. Taller suspensions raise the vehicle body relative to the ground while maintaining similar hood-to-frame attachment points. This shift affects how the hood opens and closes through its entire arc.
The primary concern involves wind flare at speed. Taller hoods catch more air, creating lifting forces that fight the latch mechanism. At highway speeds, insufficient latch engagement can cause the hood to bounce open partially or fully.
This danger demands careful attention to strike positioning and latch security.
Checking Clearance with Increased Ride Height
Lifted applications require additional clearance verification beyond standard procedures. Measure carefully between the open hood and any elevated components:
- Windshield deflectors or rain guards
- Taller wiper arms
- Aftermarket hood props or gas struts
- Upper radiator support modifications
- Auxiliary lighting mounts
Some lift kits require longer hinge bolts to maintain proper engagement depth. Others necessitate reordered shims or spacers to restore correct hinge angles. Consult your lift kit documentation for specific hood-related recommendations.
Our deep dive into lift kit considerations can help you understand how height changes ripple through the entire front end.
Resolving Wind Flap Problems
Wind flap occurs when aerodynamic lift overcomes latch holding power. Symptoms include audible slapping at speed, visible hood movement in mirrors, or complete opening on steep downgrades. Solving this issue requires multiple approaches working together.
First, optimize striker positioning for maximum latch engagement depth. Lower the striker slightly to increase bite while maintaining smooth operation. Second, upgrade to heavy-duty latches designed for lifted applications.
Many manufacturers produce reinforced latch assemblies specifically addressing wind load concerns.
Third, consider installing hood pins as a backup security measure. While not replacing proper latch adjustment, pins provide mechanical positive retention for extreme off-road use. Finally, evaluate whether your lift kit includes fender flares or extensions that alter airflow patterns around the hood perimeter.
Adjusting for Taller Hinges
Some aftermarket hinge systems offer vertical adjustment to compensate for lift-induced geometry changes. These adjustable hinges allow raising or lowering the hood attachment point without modifying the frame itself.
When using adjustable hinges:
- Begin with manufacturer-recommended baseline settings
- Make incremental changes, testing after each adjustment
- Verify equal adjustment on both sides to maintain symmetry
- Check full open and closed positions frequently
- Document final settings for future reference
When Custom Solutions Become Necessary
Occasionally, stock or off-the-shelf solutions simply cannot address severe clearance or wind load issues. In these cases, custom fabrication becomes necessary. Options include:
- Relocated striker plates with extended adjustment ranges
- Custom hood pins with reinforced mounting
- Modified hinge geometry through bracket fabrication
- Aerodynamic fairings to reduce wind capture
- Raised hood designs specifically engineered for tall lifts
Before investing in custom solutions, exhaust all standard adjustment possibilities. Many apparent clearance issues resolve through careful striker positioning and latch optimization rather than permanent modification.
Properly addressing lift-related hood challenges ensures your installation remains secure, functional, and visually appealing across diverse driving conditions. Taking time to evaluate these factors upfront prevents dangerous situations and costly corrections later.
Final Torque Specs and Safety Checks
Completing your hood installation requires precise final torque application and comprehensive safety verification. These concluding steps ensure your work withstands years of vibration, weather exposure, and normal vehicle operation.
Recommended Torque Values
Jeep factory service information specifies particular torque values for hood-related hardware. While exact specifications vary slightly between model years, general guidelines apply across the JK platform:
| Component | Torque Specification | Notes |
|---|---|---|
| Hinge-to-frame bolts | 18 to 22 ft-lbs | Do not exceed 25 ft-lbs |
| Hinge-to-hood bolts | 15 to 18 ft-lbs | Lighter torque protects hood flange |
| Striker retaining nuts | 10 to 15 ft-lbs | Allows minor adjustment after torque |
| Lock cylinder housing | 8 to 12 ft-lbs | Prevents cracking plastic components |
Always prioritize manufacturer specifications over general guidelines. If your aftermarket hardware includes specific torque recommendations, those supersede generic values. When in doubt, err on the side of lighter torque rather than risking thread damage.
Systematic Safety Verification Process
Before considering your installation complete, methodically verify these critical safety items:
Latch Security Testing:
- Close the hood normally and pull upward firmly on the center
- Attempt to open the latch without using the key
- Shake the hood vigorously by hand to check for looseness
- Listen for any clicking or movement indicating inadequate engagement
Lock Function Verification:
- Cycle the key through lock and unlock positions repeatedly
- Confirm the locking pin extends and retracts fully
- Test operation with the hood both closed and open
- Verify emergency release remains accessible and functional
Clearance Confirmation:
- Open and close the hood multiple times through full range
- Watch for any contact with surrounding components
- Check that the prop or gas strut engages securely at full open
- Ensure no wiring or cable interference exists throughout motion
Driving Preparation Checks:
- Verify all tools and hardware are removed from engine bay
- Confirm no protective materials remain under the hood
- Double-check that the hood prop is stowed securely for driving
- Review that all access panels and covers are reinstalled
Post-Installation Driving Protocol
Your first drive after hood installation deserves special attention. Follow these guidelines to confirm everything functions correctly under real conditions:
Begin with short, local drives on smooth roads. Pay attention to any unusual noises, vibrations, or visual changes in gap appearance. Stop periodically to recheck latch security and gap consistency.
After 25 to 50 miles, perform a thorough inspection including retorquing hinge bolts to specification.
Return to the dealership or a qualified technician if you notice persistent issues such as:
- Latch loosening during normal driving
- Gaps changing significantly after vibration exposure
- Unusual noises originating from the hood area
- Difficulty operating locks or latches smoothly
Documentation and Future Reference
Complete your installation by documenting final settings and observations. Record striker position relative to mounting holes, hinge bolt lengths used, and any aftermarket hardware installations. Take photographs of the completed installation from multiple angles.
This documentation proves invaluable if you need to reverse modifications, troubleshoot future issues, or prepare the vehicle for sale. Buyers appreciate knowing exactly what hardware was installed and how it was adjusted.
Meticulous final torque application and comprehensive safety verification separate professional installations from amateur attempts. Taking time during these concluding steps ensures years of reliable, trouble-free hood operation.
Typical Costs for a JK Hood Swap
Budgeting appropriately for your hood installation helps prevent financial surprises and ensures you select components matching your actual needs. Costs vary dramatically based on material choices, brand selections, and whether you handle the installation yourself or hire professional help.
Aftermarket Hood Pricing Ranges
Current market pricing reflects significant variation across material types and quality levels:
Economy Steel Hoods:
- Basic replacement panels: $300 to $600
- Ventilated steel options: $400 to $800
- Painted premium steel models: $600 to $1,200
Mid-Range Aluminum Hoods:
- Standard aluminum replacements: $800 to $1,500
- Performance vented designs: $1,200 to $2,500
- Premium branded aluminum options: $1,500 to $3,000
High-End Composite Options:
- Fiberglass custom designs: $1,200 to $2,800
- Carbon fiber-reinforced panels: $2,500 to $5,000+
- Limited edition specialty styles: $3,000 to $6,000+
Prices fluctuate based on availability, brand reputation, and current market demand. Shopping during holiday sales or bundle promotions can yield meaningful savings on complete upgrade packages.
Hardware and Accessory Costs
Beyond the hood itself, budget for essential installation hardware:
- Adjustable hinge kits: $80 to $250
- Heavy-duty latch assemblies: $50 to $150
- Hood pin kits: $40 to $120
- Lock cylinder upgrades: $30 to $100
- Gas strut conversions: $60 to $200
- Striker plate replacements: $20 to $60
These components sometimes sell bundled in complete upgrade packages offering better per-item value than individual purchases.
Professional Installation Costs
If professional installation suits your situation better, expect these general cost ranges:
- Simple hood swap without complications: $150 to $300
- Additional alignment work required: $200 to $400
- Complex installations involving modifications: $300 to $600+
- Emergency correction of botched DIY installs: $250 to $500
Labor rates vary significantly by region and shop specialization. Always obtain written estimates before authorizing work. Some shops offer discounts when purchasing hardware through their parts departments.
Hidden Costs to Anticipate
Several expenses commonly catch first-time installers by surprise:
Potential Additional Purchases:
- Replacement hinge bolts if originals stretch or strip
- Thread locker compounds for vibration-prone applications
- Paint touch-up supplies for minor rock chips during installation
- New weather stripping if old seals deteriorate during removal
Corrective Work Expenses:
- Repairing stripped aluminum tabs: $100 to $400 depending on severity
- Professional paint correction for installation scratches: $200 to $800
- Frame realignment if existing damage affects fitment: $500 to $2,000+
- Custom fabrication for severe clearance issues: $300 to $1,000+
Planning for these potential additional costs prevents budget overruns and ensures you can address problems promptly when they arise.
Cost-Saving Strategies
Several approaches help minimize total installation expenses without sacrificing quality:
- Purchase complete hardware bundles rather than individual components
- Shop multiple vendors and compare shipping costs carefully
- Consider gently used OEM hoods from reputable salvage sources
- Perform installation yourself if comfortable with basic mechanical work
- Schedule professional installation during shop promotional periods
- Buy quality hardware upfront to avoid repeat visits and labor charges
Investing time in research and comparison shopping often yields substantial savings. The cheapest option rarely provides the best value when durability and fitment quality matter significantly.
Understanding realistic cost expectations empowers informed decision-making throughout your hood upgrade process. Balancing upfront expenses against long-term satisfaction produces the most financially sound results.
Maintenance and Long-Term Optimization
Keeping your newly installed hood in peak condition requires consistent attention to a few key areas. Regular maintenance prevents minor issues from becoming major problems down the road. A little preventive care goes a long way toward preserving both function and appearance.
Routine Inspection Schedule
Perform visual inspections of your hood installation every 3,000 to 5,000 miles or during regular service intervals. Look for any changes in gap consistency, latch behavior, or lock operation. Early detection of problems makes correction simpler and less expensive.
Check these specific areas during each inspection:
- Gap uniformity between hood and fenders
- Striker engagement depth and condition
- Lock cylinder smoothness and key operation
- Hinge bolt security and any movement
- Weather stripping integrity around the opening
- Paint condition on the hood surface and edges
Cleaning and Protection Practices
Regular cleaning preserves both the finish and mechanical function of your hood components. Use gentle automotive soap and water for routine washing. Avoid high-pressure washers directed at seal edges or hardware openings.
Pressurized water can force its way past seals and cause corrosion or electrical issues.
Apply UV-protectant products to painted surfaces quarterly. This prevents fade and oxidation, especially important for hoods exposed to intense sunlight during off-road use. For unpainted aluminum or composite surfaces, use appropriate protectants recommended by the manufacturer.
Lubricate moving parts periodically to ensure smooth operation:
- Latch mechanism pivot points
- Lock cylinder keyway
- Striker contact surfaces
- Hood prop pivot points
- Hinge grommet areas
Use white lithium grease or silicone-based lubricants rather than penetrating oils. These provide longer-lasting protection without attracting excessive dirt and grit.
Weather Seal Preservation
Rubber weather seals keep water, dust, and debris out of the engine compartment. Over time, these seals dry out, crack, or lose elasticity. Inspect them during each routine check and replace when deterioration becomes visible.
Clean seals with mild soap and water before applying conditioners. Silicone-based seal conditioners help maintain flexibility and prevent drying. Apply these products every six months or as needed based on climate conditions.
In cold climates, check for ice accumulation around seals during winter months. Ice buildup can damage seals during hood operation and compromise weather protection. Use commercially available de-icers formulated for automotive applications rather than household ice melt products.
Hardware Monitoring
Hood-related hardware experiences vibration stress during normal driving. Periodically verify that all bolts, nuts, and retainers remain secure. Pay special attention to hinge mounting points and striker attachment hardware.
If you notice any fasteners working loose despite proper initial torque, investigate potential causes. Vibration resonance, frame flex, or damaged threads may contribute to recurring loosening. Address underlying issues rather than simply retightening problematic hardware repeatedly.
Consider applying thread-locking compound to critical fasteners if vibration remains a persistent issue. Use medium-strength compounds that allow future removal with standard tools rather than permanent locking formulations.
Seasonal Considerations
Different seasons present unique challenges for hood maintenance:
Spring: Inspect for winter damage, clean accumulated road salt residue, verify seal condition after temperature cycling.
Summer: Check for UV degradation, ensure ventilation components function properly, monitor for heat-related latch softening.
Fall: Prepare for cold weather, test lock operation in varying temperatures, check for seal deterioration.
Winter: Monitor for ice buildup, avoid forcing frozen latches, address salt corrosion promptly.
Adjusting your maintenance approach seasonally helps address environment-specific wear patterns before they escalate into serious problems.
When to Seek Professional Help
Certain situations exceed the scope of DIY repair and require professional expertise. Recognizing these scenarios protects your investment and ensures safety. Knowing when to call in specialists prevents costly mistakes and potentially dangerous conditions.
Complex Structural Damage
If your Jeep’s frame or body exhibits significant damage near hood mounting points, professional assessment becomes essential. Bent frame rails, crushed rocker panels, or compromised mounting bosses require specialized equipment and expertise to correct properly.
Attempting to force a new hood onto a damaged frame produces persistent alignment problems that worsen over time. Professional body shops can diagnose underlying structural issues and perform necessary repairs before hood installation proceeds.
Electrical System Complications
Modern Jeeps incorporate increasingly complex electrical systems connected to hood switches, lock actuators, and warning indicators. Problems involving wiring harnesses, control modules, or integration with other vehicle systems often require diagnostic expertise beyond basic mechanical skills.
If you encounter electrical faults during installation, such as nonfunctioning locks, incorrect dashboard warnings, or intermittent latch problems, seek professional assistance. Incorrect electrical work can cause system failures affecting other vehicle functions.
Advanced Fabrication Requirements
Some installations demand custom fabrication beyond standard bolt-on procedures. Examples include:
- Relocated mounting points for extreme lift configurations
- Custom hinge modifications for unusual clearances
- Fabricated striker reinforcements for heavy-duty applications
- Integrated hood pin installations requiring structural modification
Professional fabricators possess the tools, expertise, and experience to execute these modifications safely and correctly. Attempting custom fabrication without proper equipment risks structural integrity and personal safety.
Repeated Adjustment Failures
If you have attempted multiple alignment corrections without achieving satisfactory results, professional assistance may be warranted. Persistent problems often indicate underlying issues that are not apparent during standard diagnosis.
Common indicators that professional help is needed:
- Gaps remain inconsistent after multiple adjustment attempts
- Latch operation improves temporarily then deteriorates again
- Visible frame or body irregularities affect alignment
- Component damage discovered during troubleshooting
Experienced technicians can identify root causes that DIY approaches miss. Their expertise saves time and prevents further damage from continued trial-and-error attempts.
Warranty and Certification Concerns
Certain installations may affect vehicle warranties or require certification for regulatory compliance. If your Jeep is under factory warranty or subject to inspection requirements, professional installation ensures proper documentation and adherence to standards.
Professional installers often provide warranties on their workmanship in addition to manufacturer product warranties. This dual coverage provides peace of mind and protection against future issues related to the installation itself.
Recognizing when professional expertise is necessary demonstrates sound judgment rather than inadequacy. The best installations combine appropriate DIY effort with timely professional intervention when situations exceed comfortable skill levels.
Real-World Installation Scenarios
Examining actual installation scenarios helps illustrate how theory translates to practice. Different situations present unique challenges that require adaptive problem-solving approaches. Understanding these real-world examples prepares you for variables you may encounter.
Scenario One: Straightforward Replacement
A 2012 JK Sport with moderate trail use brings in a direct replacement steel hood. The original hood sustained minor dent damage from falling branches. The installation proceeds with minimal complications:
- Factory hinges transfer directly to replacement panel
- Original striker position requires only minor adjustment
- Key cylinder mates without modification
- Total installation time: approximately 90 minutes
This scenario represents ideal conditions most installers encounter with moderate-use vehicles. Proper preparation and methodical execution yield professional results efficiently.
Scenario Two: Lift Kit Integration
A 2010 JK Unlimited running a 4-inch lift requires an aftermarket aluminum vented hood. The taller suspension creates clearance concerns and wind load issues:
- Standard hinges provide insufficient clearance at full open
- Aftermarket extended hinges resolve opening geometry
- Striker relocated downward for improved wind resistance
- Hood pins installed as backup security measure
- Total installation time: approximately 3 hours including modifications
This scenario demonstrates how lift modifications necessitate complementary hood system adjustments. Planning ahead for these interactions prevents post-installation problems. If you are considering a full lift upgrade alongside your hood work, understanding the complete suspension impact helps you plan compatible body modifications from the start.
Scenario Three: Damage Assessment Correction
A 2014 Rubicon with accident damage requiring both hood and fender replacement presents complex alignment challenges:
- Frame measurement reveals minor front end deviation
- Professional frame pulling corrects underlying structure
- New hood and fenders installed with careful gap management
- Multiple adjustment cycles achieve acceptable alignment
- Total installation time: approximately 6 hours including correction work
This scenario illustrates how underlying damage affects seemingly simple component replacements. Proper diagnosis and correction of root causes proves essential for lasting results.
Scenario Four: Aftermarket Upgrade Combo
A 2011 Sport model owner pursues a complete front-end aesthetic upgrade including hood, grille, and fender flares:
- Coordinated color matching across multiple components
- Custom bracket fabrication for flare integration
- Strategic gap planning across overlapping panels
- Integrated lighting installation during assembly
- Total installation time: approximately 8 hours for complete package
This scenario shows how multiple component replacements interact and require coordinated planning. Thinking holistically about the complete assembly produces superior results compared to isolated component swaps. Coordinating electrical work like professional lighting installation alongside body panel work can streamline the entire process and ensure all systems integrate cleanly.
Learning from these documented scenarios helps prepare for variables you may encounter. Each situation demands adaptive thinking while maintaining core principles of careful measurement, incremental adjustment, and thorough verification.
Troubleshooting Guide
Even well-planned installations encounter unexpected problems. Having a systematic troubleshooting approach saves time and frustration when issues arise. This guide addresses common problems and their solutions in logical order.
Problem One: Hood Won’t Latch Securely
If the hood closes but feels loose or fails to stay latched:
- Check striker position relative to latch centerline
- Verify striker has not worked loose during operation
- Inspect latch mechanism for wear or contamination
- Test with increased striker engagement depth
- Consider latch replacement if internal components show excessive wear
For persistent latching issues, measure the exact distance between hood surface and striker face when closed. Compare this measurement to factory specifications and adjust accordingly.
Problem Two: Uneven Gaps Persist After Adjustment
When repeated alignment attempts fail to produce even gaps:
- Verify frame mounting points are square and undamaged
- Check for hidden damage to hood flange or frame tabs
- Measure diagonal distances across the hood opening
- Inspect hinge grommets for compression or deterioration
- Consider professional frame measurement if underlying structure is suspect
Sometimes persistent gap issues indicate structural problems invisible during casual inspection. Professional assessment may reveal necessary corrections.
Problem Three: Key Cylinder Binding
If the lock cylinder turns stiffly or will not engage:
- Verify striker alignment allows free pin movement
- Lubricate cylinder mechanism with appropriate product
- Check for binding in the linkage cable
- Inspect housing mounting for proper alignment
- Consider cylinder replacement if internal components damaged
Proper striker positioning usually resolves most lock binding issues. Ensure the locking pin encounters minimal resistance throughout its travel range.
Problem Four: Wind Flap at Highway Speeds
When the hood vibrates or appears to move at speed:
- Increase striker engagement depth slightly
- Verify latch mechanism operates smoothly without play
- Check for excessive hinge looseness allowing panel movement
- Consider upgraded heavy-duty latch assembly
- Evaluate need for supplemental hood pin retention
Wind flap problems often trace back to inadequate latch engagement or loose hinge hardware. Systematic verification of both areas usually identifies the root cause.
Problem Five: Clearances During Full Open
If the hood contacts surrounding components when fully opened:
- Verify prop or strut length matches requirement
- Check for interference with wiper arms or deflector
- Assess whether lift kit changed opening geometry
- Consider alternative prop positioning or length
- Evaluate whether deflector removal or replacement is necessary
Full-open clearance problems frequently relate to suspension modifications or accessory additions. Identifying the specific interference point enables targeted solutions.
Systematic Diagnostic Approach
When facing installation problems, follow this diagnostic sequence:
- Clearly define the specific symptom or issue
- Verify all hardware is present and initially secure
- Measure and document current conditions
- Compare measurements to expected specifications
- Identify the component or interaction causing deviation
- Implement corrective action incrementally
- Test results before proceeding to next adjustment
This methodical approach prevents random adjustments that often compound problems rather than resolving them. Patience and systematic verification yield reliable solutions.
FAQs About How to Install a Jeep JK Hood
Can one person install a JK hood?
Yes, a single person can successfully install a JK hood with proper preparation and technique. You must support the hood securely throughout the process using a helper, specialized holding tools, or strategic blocking. Many solo installers use a second ratchet handle or wooden support to maintain position while adjusting hardware.
However, having a second person significantly simplifies the process and reduces risk of damage or injury during installation.
How long does the job usually take?
Most JK hood installations require one to three hours for experienced DIYers working methodically. First-time installers should plan for two to four hours, allowing extra time for careful measurement and adjustment. Complications like corroded hardware, damaged mounting tabs, or severe misalignment can extend timelines considerably.
Budget additional time if you are simultaneously upgrading related components like hinges, latches, or locks.
Will a replacement hood fit if the frame has minor damage?
Minor frame damage often complicates hood fitment but rarely prevents installation entirely. Visible denting, creased mounting areas, or bent attachment points cause gap inconsistencies and alignment difficulties. Assess damage severity before purchasing replacement hardware.
Significant structural damage may require frame straightening or modification before a new hood aligns properly. Consult a professional body technician if frame damage appears extensive or affects multiple mounting points.
Do I need to adjust the cowl or deflector?
Most hood installations do not require cowl or windshield deflector modifications. However, lifted JKs sometimes necessitate deflector adjustment or replacement to maintain proper clearance. If your new hood sits at a different angle or height than the original, verify adequate space between the hood leading edge and any cowl-mounted components.
Minor deflector repositioning using existing mounting hardware usually resolves clearance concerns without permanent modification.
Can I reuse the factory hinges on an aftermarket hood?
Factory hinges frequently transfer to aftermarket hoods, but compatibility depends on specific product designs. Many replacement hoods include pre-installed hinges configured for immediate installation. Others require transferring factory hardware or purchasing separate hinge adaptation kits.
Always verify hinge compatibility with your specific aftermarket hood before beginning installation. Mismatched hinge configurations cause alignment difficulties and may require customization or alternative mounting solutions.
What is the best way to fix a hood that won’t stay closed?
A hood failing to stay closed typically indicates striker misalignment, worn latch mechanisms, or inadequate latch engagement depth. Begin by checking striker positioning and adjusting vertically or horizontally as needed. Inspect the latch mechanism for wear, contamination, or debris requiring cleaning and lubrication.
Consider upgrading to heavy-duty latch assemblies if factory components show significant wear. Proper adjustment usually resolves closure issues without component replacement.
Are aftermarket hood pins worth adding?
Hood pins provide valuable security for off-road enthusiasts navigating rough terrain at speed. They serve as backup retention preventing accidental hood opening if latch failure occurs. Daily drivers on paved roads rarely need hood pins, as proper latch adjustment provides adequate security.
Off-road competitors and frequent trail users benefit substantially from hood pin installation. Choose quality pins with reliable locking mechanisms and reinforce mounting points appropriately.
Final Recommendation and Decision Guide
Completing your Jeep JK hood installation successfully depends on thoughtful decision-making throughout the process. This final guide helps you choose the right approach for your specific situation and ensures confident completion.
Decision Framework for Material Selection
Choose your hood material based on these primary factors:
Select Steel If: Budget constraints dominate, you prioritize easy dent repair, daily driving dominates your usage, salt country corrosion protection is not critical, or you prefer proven traditional materials.
Select Aluminum If: Weight reduction matters significantly, you run a lifted suspension experiencing hinge fatigue, corrosion resistance provides long-term value, premium appearance justifies higher cost, or you pursue serious off-road performance.
Select Composite If: Custom styling defines your priorities, weight saving remains paramount despite cost, you pursue competition-level builds, unique shaping requirements exist, or budget allows premium investment.
Installation Approach Recommendations
Match your installation approach to your skill level and situation:
DIY Approach Works Best When: You possess basic mechanical comfort, own appropriate tools, value cost savings, enjoy hands-on projects, have access to reference materials, and can dedicate sufficient time without pressure.
Professional Installation Preferred When: Complex modifications become necessary, electrical integration proves challenging, structural corrections are required, warranty protection matters significantly, time constraints limit DIY feasibility, or confidence in personal skills remains low.
Quality Verification Checklist
Before considering your installation complete, verify these critical items:
- All gaps measured within specified tolerances
- Latch engages firmly with appropriate closing force
- Lock cylinder operates smoothly throughout range
- Hood opens and closes without interference
- Prop or strut secures hood at full open position
- No unusual noises develop during operation
- All hardware torqued to specification
- Protective materials removed from engine bay
- Test drive completes without issues
- Final inspection confirms everything secure
Long-Term Success Factors
Sustaining excellent hood installation results over time depends on:
- Regular inspection and maintenance scheduling
- Prompt attention to emerging issues
- Appropriate cleaning and protection practices
- Timely replacement of worn components
- Documentation of settings and modifications
- Professional consultation when needed
Investing properly in your initial installation pays dividends throughout ownership. Taking time to do things correctly initially prevents costly corrections later.
Your Jeep JK hood installation represents both a functional upgrade and an expression of personal style. Making informed decisions, executing methodically, and maintaining properly ensures years of satisfying ownership.