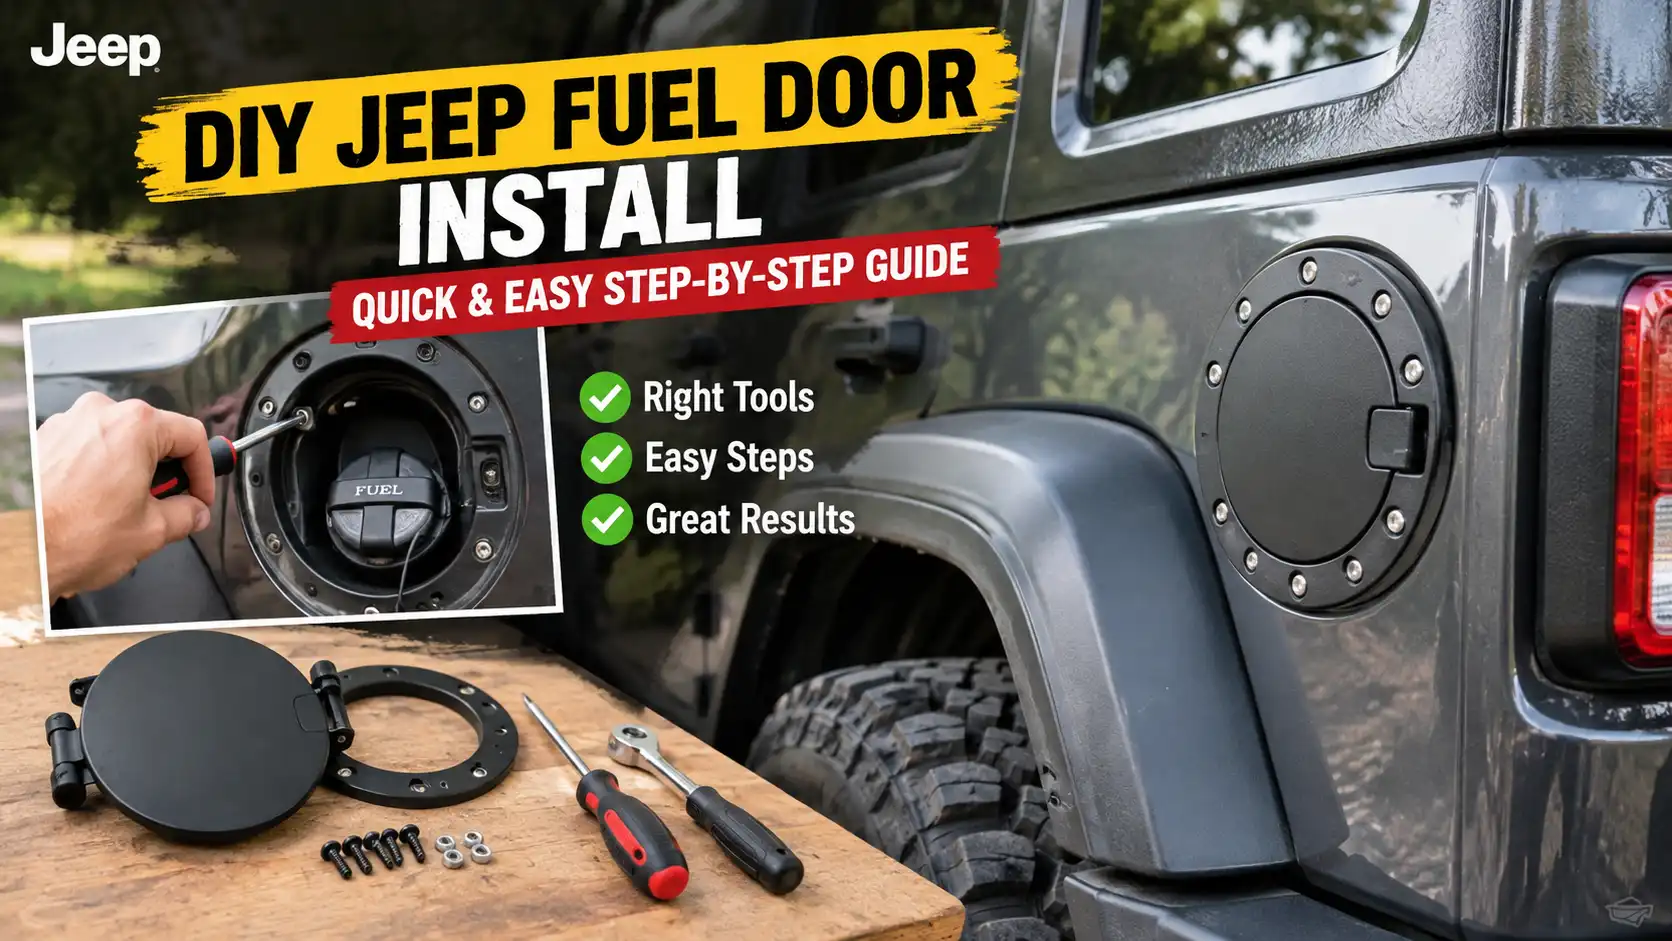
Your Jeep’s fuel door looks like it survived a trail run through hell. Cracks, a missing latch, maybe a fuel smell that won’t quit. The good news is that fixing it is one of those rare jobs that actually delivers what it promises.
You won’t need special equipment or a dealership appointment.
A solid fuel door replacement takes about 45 minutes with basic hand tools and costs between $25 and $120 depending on whether you stay with stock black plastic or upgrade to a body-colored unit. The entire process hinges on understanding how the quick-connect fitting releases from the filler neck and what happens when those old trim clips refuse to budge. Let’s walk through what you’re actually working with before we dive into the steps.
Quick Answer
Replacing a fuel door on most Wranglers and Cherokees requires just a few essential tools and minimal patience. You’ll need socket extensions, a Torx bit set, and a trim panel removal tool. The job typically takes 30 to 60 minutes for someone doing it for the first time.
Budget roughly $30 to $150 for parts depending on the style you choose. Most of the difficulty comes from removing brittle trim clips and disconnecting the fuel line without damaging the quick-connect collar.
Understanding Your Jeep’s Fuel Door Problem
Why This Job Matters (And When It Actually Becomes Urgent)
A compromised fuel door is more than an aesthetic issue. It directly impacts your EVAP system performance and keeps water, mud, and road debris out of your fuel filler neck. When the seal fails or the door won’t latch, you’re looking at fuel vapor escaping and potential check engine lights from pressure imbalances in the evaporation control system.
The urgency really kicks in when you notice a persistent gas smell near the rear of the vehicle, see visible cracks spreading across the door plastic, or find the cap refuses to click into the retention loop. Each of these symptoms points to something that needs attention before it causes bigger problems. Ignoring a broken fuel door for too long lets moisture and dirt work their way into the filler neck area.
Over time that erosion can compromise the neck itself, turning what should be a straightforward replacement into a much more expensive repair involving the fuel tank area.
Which Jeeps Are Affected — TJ, JK, JL, Cherokee XJ, KL Breakdown
Every generation of Wrangler and Cherokee experiences fuel door failures, though the specific fasteners and clip styles shift noticeably over the years. The TJ models from 1997 through 2006 use simpler 10mm hex bolts and straightforward push-type clips that are easy to find replacements for. The JK generation spanning 2007 to 2018 introduced T25 Torx bolts and a more integrated latch assembly that requires a bit more care during removal.
The newer JL models keep the Torx fastener approach while adding some refinements to the latch mechanism and interior access panels. Cherokee owners face a similar pattern. The older XJ uses basic hardware while the KL requires somewhat different panel removal sequences.
If you’ve already worked on other body components like our hood installation guide, you’ll notice similar panel removal patterns across the Wrangler lineup.
Quick Answer: What to Expect Before You Start
You can reasonably expect to finish this job in under an hour once you get past the initial learning curve. Most of the time people spend on this job comes from dealing with stuck trim clips and trying to figure out how the quick-connect fuel line fitting releases. Plan on replacing those clips anyway because the old ones nearly always crack during removal.
Budget around $30 to $50 for a basic black plastic replacement door if you’re sticking with factory style. Upgrade to a body-colored unit and you’re looking closer to $100 to $180 depending on whether you go OEM Mopar or an aftermarket brand. Having a basic understanding of EVAP system function helps, but you don’t need to be a mechanic to do this right.
What’s Inside the Assembly — Key Parts You’ll Work With
Fuel Door Shell vs Latch Mechanism vs Seal
The fuel door assembly breaks down into three distinct components that serve different functions. The outer shell is simply the visible door panel you see from the outside of the vehicle. The latch mechanism sits behind that panel and does the actual work of securing the door closed, including the spring-loaded catch and the striker plate that the latch engages with.
The rubber seal runs around the perimeter and creates the vapor-tight barrier between the door and the body opening.
When you’re buying a replacement, you need to know which version you’re getting. Some doors arrive as complete assemblies with the latch and seal already mounted. Others come as bare shells that require you to transfer your existing hardware.
Always verify what’s included before purchasing. Missing the latch or seal means an extra trip to the parts store mid-job.
The Quick-Connect Fuel Line Fitting Explained
This is the component most people struggle with, and it’s worth understanding before you start. The fuel line connects to the filler neck through a quick-release fitting that uses an internal ball-and-spring mechanism. You don’t pull it off by yanking straight back.
That destroys the fitting and creates a much more expensive problem.
The release method involves pressing or squeezing a collar ring inward while gently pulling the line away from the neck. On many Jeep applications, that collar can be stubborn because fuel residue and age cause it to bind. A dedicated fuel line disconnect tool makes this infinitely easier, though you can sometimes work it with a small flathead screwdriver if you’re careful not to damage the O-ring inside.
This part deserves extra attention because a damaged fitting leads to vapor leaks that trigger check engine lights.
Trim Clips, Mounting Bolts, and Striker Hardware
The interior access panel uses plastic push-type retainers that seat into molded holes. These are single-use items. Once you pop them out, they lose their clamping tension and won’t hold securely on reinstall.
Keep a handful of spare clips on hand because you’ll almost certainly break at least one or two during removal.
The mounting bolts that secure the fuel door to the body vary by generation. TJ models use standard 10mm hex bolts. JK and later models predominantly use T25 Torx fasteners.
Having the right bit on hand prevents stripping the heads, which would turn a 45-minute job into a multi-hour nightmare involving bolt extraction. The striker plate on the body side is often overlooked. It’s a small metal tab that the latch catches against, and if it shifts during removal, your new door won’t align properly on reinstall.
Tools and Supplies You’ll Actually Need
Essential Hand Tools
Most of what you need is already sitting in a basic garage toolbox. Here’s what you’ll consistently reach for:
- Socket set with 8mm, 10mm, and 11mm options
- Ratchet with both standard and universal joints
- Extension bar, preferably 3 to 6 inches
- Phillips and flathead screwdrivers
- Trim panel removal tool (plastic, not metal)
- Needle-nose pliers
A basic toolkit covers the core requirements, and if you’re working on a Jeep for extended periods, upgrading your socket selection makes sense. Something like a spacer lift installation shows how having quality sockets saves time and frustration on repeated jobs.
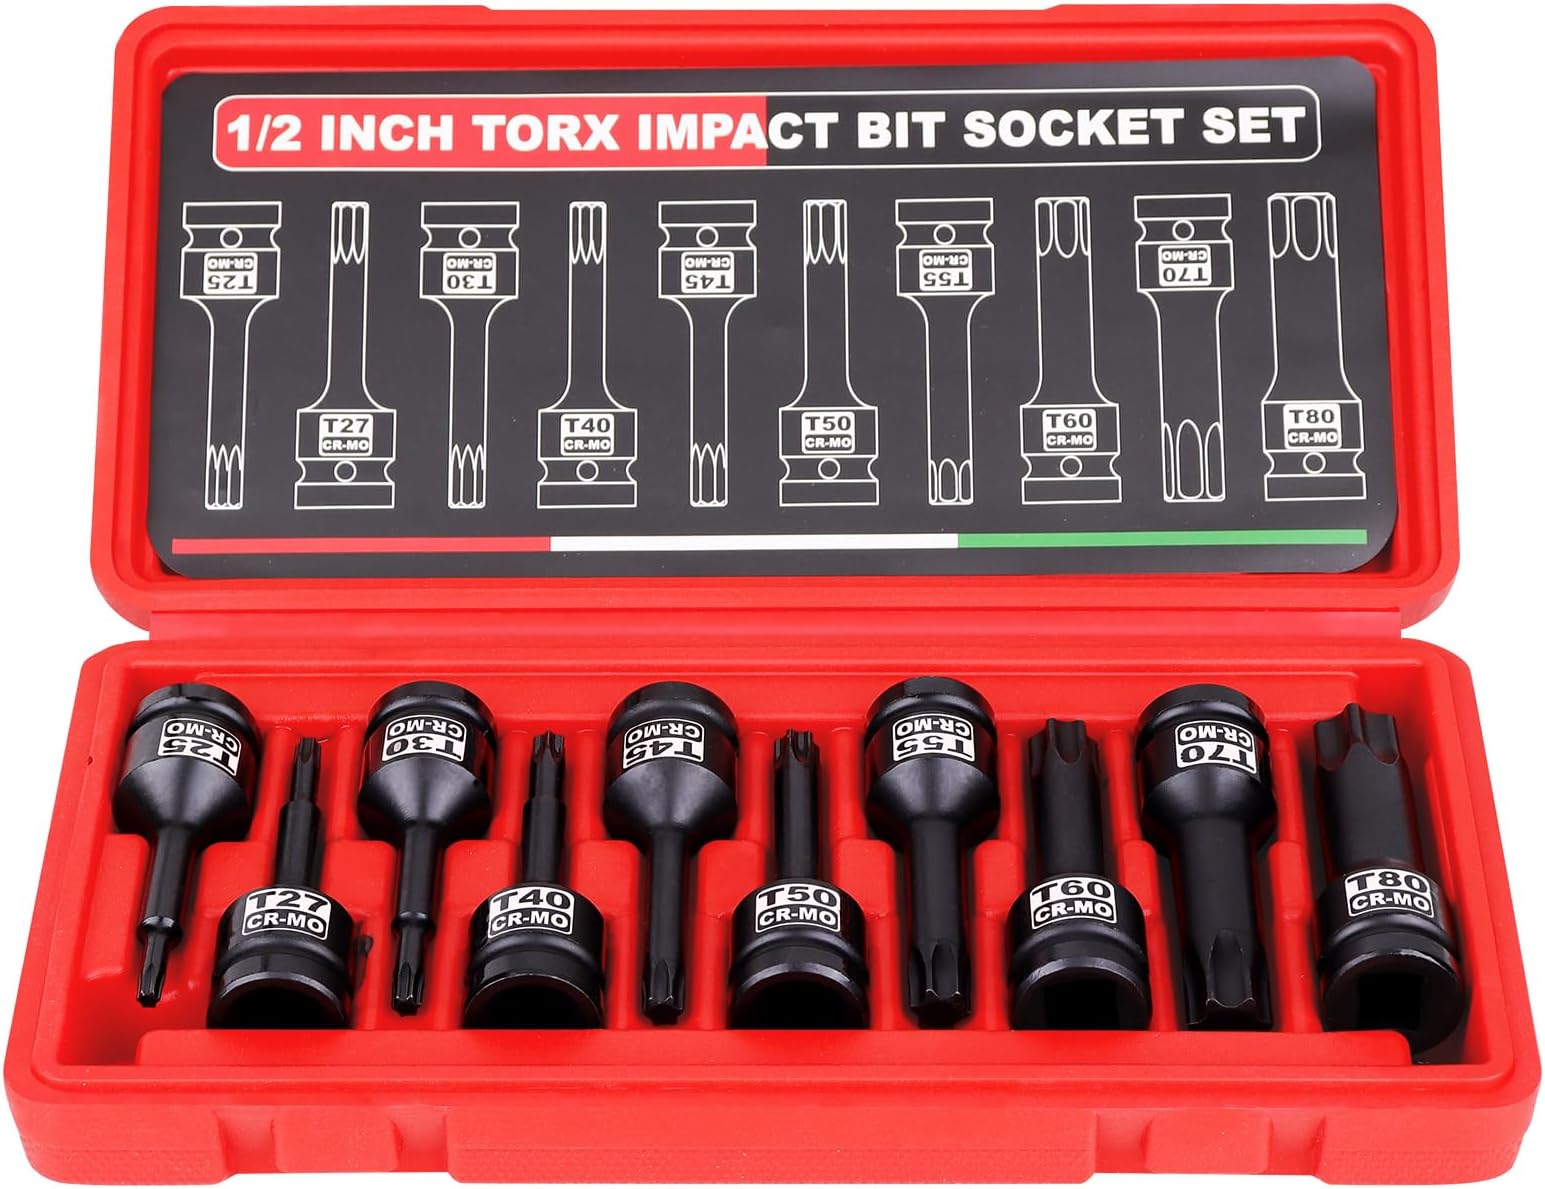
Image source: Bing (Web (fair-use with source credit))
Specialty Items (Torx Bits, Fuel Line Tool, Panel Tools)
These are the items that separate a smooth job from a frustrating one. A T25 Torx bit is non-negotiable for JK and JL models. Cheap bits strip under torque.
Buy a decent branded one from a tool supplier. Fuel line disconnect tools cost about $8 and pay for themselves the first time you use them. They prevent damage to the quick-connect collar and save you from guessing how much force is appropriate.
A proper trim panel removal tool is also worth the investment. Metal screwdrivers work in a pinch but they scratch painted surfaces and crack brittle clips. Plastic tools slide in without damaging anything.
If you’re doing more Jeep body work, consider picking up a set that includes various widths and curves.
Shop Supplies Worth Grabbing
- Clean rags or shop towels
- Small container for holding removed bolts
- Flashlight or work light
- Safety glasses
- Nitrile gloves
- Brake cleaner or mild solvent for wiping residual fuel
Keep a magnetic parts tray nearby so you don’t lose small hardware. Nothing kills momentum faster than fishing for a dropped bolt inside a wheel well cavity.
Safety First — Working Around Fuel Systems Correctly
Ventilation, Fire Precautions, and Spill Response
Fuel vapors are heavier than air and they accumulate in low spots. Always perform this work in a well-ventilated area with the garage door open or outdoors if possible. Never smoke, and keep any open flames, sparks, or running equipment at a safe distance from the work area.
Even a running compressor near the fuel door can be a hazard.
Keep a Class B fire extinguisher within arm’s reach. If you spill fuel, wipe it up immediately with absorbent materials. Do not drive the vehicle until the area is completely dry and free of vapor.
Read OSHA guidelines on flammable liquid handling for workplace-standard safety practices.
Relieving Fuel System Pressure Safely
The fuel line you disconnect at the filler neck carries residual pressure from the tank. You don’t need to depressurize the entire fuel system the way you would when working on injectors or the fuel rail. Still, cracking the filler cap slowly before you begin gives any built-up tank pressure a controlled release path.
Remove the cap fully, step back briefly, then proceed with the disconnect.
Some technicians also recommend loosening the fuel filler neck clamp slightly before disconnecting the line to ensure no residual pressure remains trapped in the neck assembly. This is a small step that reduces the chance of fuel spraying when you break the fitting connection.
Battery Disconnection Best Practices
While this job doesn’t involve direct electrical work on the fuel pump circuit, disconnecting the negative battery terminal is still good practice. The fuel door on some model years has an integrated lamp circuit or sensor wiring routed through the hinge area. A quick disconnect prevents any chance of a short.
Remove the negative terminal first and insulate it with a piece of tape or a terminal cover. Work in a cool area away from sparks or ignition sources. Keep your tools organized and away from the battery to avoid accidental contact.
Step-by-Step: Replacing Your Fuel Door the Right Way
Removing the Interior Access Panel
Start by locating the interior trim panel you need to remove. On Wrangler models, this sits in the rear quarter panel area behind the rear seat or along the side sill, depending on your year. On Cherokee models, it’s typically behind the rear upholstery panel on the same side as the fuel door.
Use your plastic trim tool to gently pry the panel loose. Work around the edges systematically. You’ll feel the clips releasing one by one.
Don’t rush this step. Applying too much force on one clip stresses the surrounding ones and increases the chance of breaking them. Note how any wiring harnesses are routed if your model has an interior fuel door light.
Take a photo with your phone before disconnecting anything. It saves confusion on reassembly.
Disconnecting the Fuel Line and Unbolting the Old Door
With the access panel removed, you can see the back of the fuel door assembly. Locate the mounting bolts securing the door to the body. These are usually two or three fasteners depending on the model.
Remove them and set them in your magnetic tray or small container.
Next, tackle the fuel line connection. This is where most people make mistakes. Position yourself so you have a clear view of the quick-connect fitting.
Look for the release collar on the fitting body.
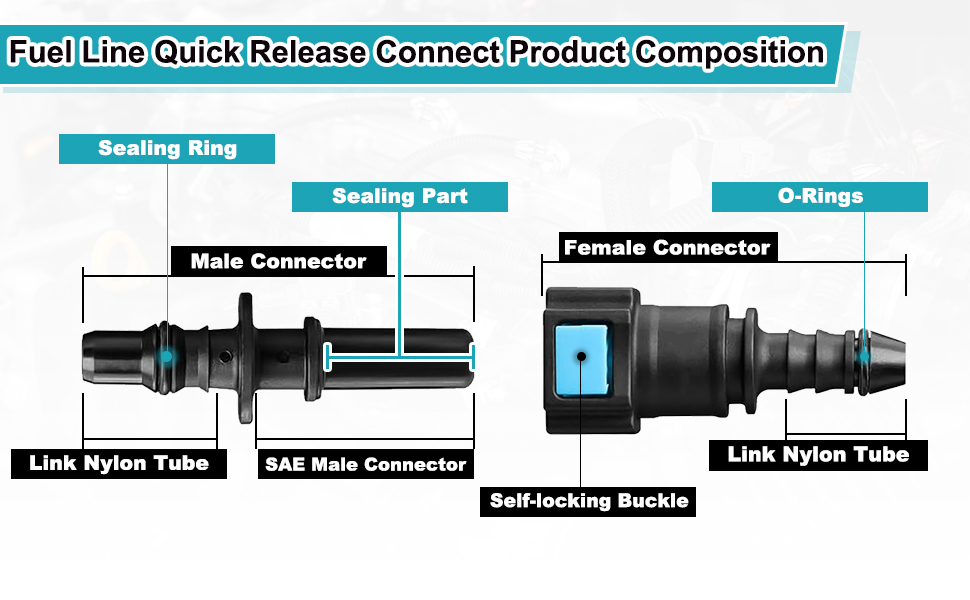
Image source: Bing (Web (fair-use with source credit))
Using your fuel line disconnect tool or a carefully positioned screwdriver, compress the collar ring inward. While maintaining that compression, pull the line straight away from the filler neck. It should slide free with moderate resistance.
If it resists significantly, stop and reassess. Forcing it will damage the O-ring and the fitting simultaneously.
Place a rag underneath the disconnect point to catch any dripping fuel. A small amount is normal. Wipe it clean before proceeding further.
Consider reviewing our cowl seal installation tips if you want to expand your knowledge of sealing systems, since the same attention to gasket alignment applies here.
Preparing the New Door — Transferring Latch, Emblems, and Hardware
Before installing the new door, inspect what came with it. Some replacements include the latch pre-installed. Others require you to move yours over.
Either way, verify the latch moves freely and the spring tension is intact before committing to the new door.
If your new door is a bare shell and your old one had an emblem or decal, transfer it carefully. Some emblems use adhesive backing that transfers cleanly. Others are pressed on and may need gentle prying.
Handle anything electronic or adhesive with clean hands. Oils from skin degrade adhesives over time. Also compare the old and new doors side by side to confirm the mounting bolt pattern matches exactly.
Check that the rubber seal is properly seated in its channel on the new door. It should sit flush with no twists or gaps. A misseated seal is the fastest route to a fuel vapor leak after the install is complete.
Run your finger around the entire seal perimeter to confirm even seating before proceeding.
Mounting and Securing the Replacement
Position the new door assembly onto the filler neck from the interior side. Guide the fuel line fitting back onto the filler neck stub. You should feel and hear a distinct click when the quick-connect seats properly.
Give it a gentle tug to confirm it’s locked. Never assume it’s connected just because it looks seated.
Thread the mounting bolts back in by hand first. Cross-threading is the most common mistake at this stage, and a damaged bolt hole in the body panel is an expensive problem. Once the bolts are started correctly, tighten them to a snug fit.
Over-torquing these plastic-mounted fasteners cracks the housing. Hand-tight plus a quarter turn is generally sufficient.
Reconnecting Everything and Testing the Latch
Reattach any interior wiring harnesses you disconnected for the fuel door light circuit, if applicable. Snap the access panel back into place. Work around the perimeter evenly, pressing each clip location until you hear it seat.
Replace any clips that lost tension during removal.
Close the fuel door firmly. It should latch with a solid click. Insert the fuel cap and turn it clockwise until it clicks.
Cycle the latch open and closed two or three times to confirm smooth operation. Check that the door sits flush with the body panel and the seal makes even contact around the entire perimeter.
Final Check — Seal Alignment and Vapor Leak Verification
Stand back from the vehicle and look at the installed door from multiple angles. The gap between the door and the surrounding body panel should be consistent on all sides. An uneven gap usually means the seal is pinched or the door isn’t seating squarely.
Adjust the mounting bolts slightly if you notice misalignment.
Get down low and visually inspect the fuel line connection from underneath. Look for any signs of fuel weeping around the fitting. If you see moisture forming, the line didn’t seat fully.
Release and reconnect it. Close the fuel cap and confirm it locks into the retention strap on the door. Some doors have a small hook or loop that secures the cap so it doesn’t dangle loose.
Make sure that engagement is clean.
Model-Year Differences That Change the Job
TJ (1997–2006): Bolt Sizes, Clip Styles, and Quirks
TJ models keep things relatively straightforward, but they have their own personality quirks. The mounting hardware uses standard 10mm hex bolts rather than Torx, which means most mechanics already have the right socket. The trim clips are simpler push-type retainers that pop out with a firm pull using a flathead screwdriver or trim tool.
One quirk specific to TJs involves the fuel filler neck gasket sitting between the neck and the tank inlet. When you remove the fuel door assembly, this gasket often stays stuck to the neck or falls into the wheel well cavity. Losing track of it means reinstalling without a proper seal, which causes vapor leaks.
Mark your gasket or stick it to a rag before pulling the door free.
Another TJ-specific concern is the condition of the quarter panel behind the fuel door. Water drainage channels in this area can clog with debris over time. Inspect them while you have access and clear any leaves or dirt buildup before reinstalling your new door.
JK (2007–2018): T25 Torx, Updated Latch, Interior Panel Tips
The JK generation shifted to T25 Torx mounting bolts, which requires a dedicated bit rather than a standard socket. Buy a quality T25 bit before starting because cheap ones strip under even moderate torque. A Milwaukee or Wiha bit handles this job cleanly.
Interior access panels on JKs use a different clip pattern than TJs. You’ll encounter both plastic push clips and some metal-clip retainers depending on the exact year and trim level. Take photos before removing anything.
The routing of wiring harnesses for the interior fuel door lamp differs between sport and Rubicon models.
The latch mechanism on JKs is more integrated than previous generations. Some replacement doors come with the latch pre-mounted, while others require transfer. Verify your purchase includes everything before beginning, and compare the old assembly against the new one to confirm all brackets and striker plates align correctly.
JL (2018–Present): Latest Fasteners and Any Notable Changes
Latest Wrangler models maintain the Torx fastener approach with minor refinements to the latch geometry and improved clip retention designs. Some JL years feature a redesigned interior access panel that removes more easily but requires careful handling to avoid breaking the newer clip styles.
A few owners report that JL fuel doors arrive with a slightly different striker alignment compared to the factory unit. If your new door doesn’t catch the latch smoothly on the first close, check whether the striker plate needs minor repositioning rather than forcing the latch mechanism.
Also verify that your replacement door matches your specific trim level if you have body-color matching. JL production introduced some paint code variations that can affect color match accuracy if you’re ordering an aftermarket painted door rather than an OEM Mopar part.
Cherokee XJ vs KL: What’s Different
Cherokee owners face distinct challenges compared to Wrangler workflows. The XJ fuel door sits on the driver side for most model years, and the interior access requires removing rear seat cushion sections rather than a quarter panel trim piece. The fuel line quick-connect fitting on the XJ follows the same basic design but may have more accumulated grime from years of road exposure.
KL Cherokee models use a completely different interior architecture with the access panel located along the rear cargo area trim. The mounting hardware and clip patterns differ from Wrangler applications, though the fundamental process remains similar. Always verify your specific year and model before purchasing parts.
If you’re tackling other Cherokee-specific projects like our running boards guide or adjustable toe link replacement, you’ll notice consistent quality patterns across Jeep body hardware that apply here as well.
Mistakes Most People Make (And How to Avoid Them)
Destroying Trim Clips — The #1 Frustration
This happens to nearly everyone on their first attempt. The plastic clips become brittle with age and UV exposure, then snap the moment you pull too hard on one corner of the panel. You end up shopping for replacement clips mid-job, which adds cost and delays.
Prevent this by warming the clips gently with a hair dryer on medium heat before attempting removal. Warm plastic retains more flexibility and releases without cracking. Keep a bag of replacement clips in your toolbox at all times when working on older Jeeps.
They cost pennies each and save significant frustration.
Forcing the Fuel Line Fitting Off
Yanking the fuel line straight off the filler neck is probably the most common destructive mistake. This bends the quick-connect collar, damages the internal ball bearings, and tears the O-ring seal. The result is a leaking connection that won’t hold pressure.
Always compress the release collar fully before attempting separation. Use your disconnect tool or a small screwdriver positioned carefully against the collar. Pull straight back with steady, moderate force while maintaining collar compression.
If the fitting resists significantly, spray a small amount of brake cleaner or penetrating oil around the O-ring area and let it soak for a few minutes before trying again. Never use excessive force.
Cross-Threading Bolts in Tight Quarter-Panel Access
Working in the confined space of the rear quarter panel makes it easy to start a bolt at an angle. Cross-threading strips the aluminum housing threads inside the body panel, turning a simple swap into a costly repair involving thread insertion or panel replacement.
Always start every bolt by hand, feeling for smooth engagement before applying any tool torque. If a bolt resists immediately, back it out, realign, and try again. Using a magnetic socket or extension helps you maintain control in tight spaces where your fingers can’t reach freely.
Losing or Misaligning the Rubber Seal
The rubber seal around the fuel door perimeter is critical for preventing vapor escapes and water intrusion. During removal, it sometimes sticks to the old door shell and comes away with it instead of staying seated in the body groove. If you miss placing it back correctly on the new door, you’ll have a leaky installation despite everything else being perfect.
Lay the seal flat on a clean surface before installing it on the new door. Work it into the channel gradually around the entire perimeter, checking for twists or bunches as you go. A properly seated seal lies flush and uniform with no gaps or overlapping sections.
Skipping the Click-Check on the Quick-Connect
Assuming the fuel line is connected because it looks seated is a dangerous shortcut. The quick-connect fitting only seals properly when the collar locks audibly and visibly. An incomplete connection allows fuel vapor to escape and liquid fuel to seep out under pressure.
After reconnecting the fuel line, perform a firm tug test pulling straight away from the filler neck. The connection should not move or separate. Then visually inspect the gap between the fitting collar and the neck stub.
A properly engaged connection shows minimal gap with the collar seated flush against the coupling shoulder.
Body-Colored vs Black Plastic vs Aftermarket — Picking the Right Door
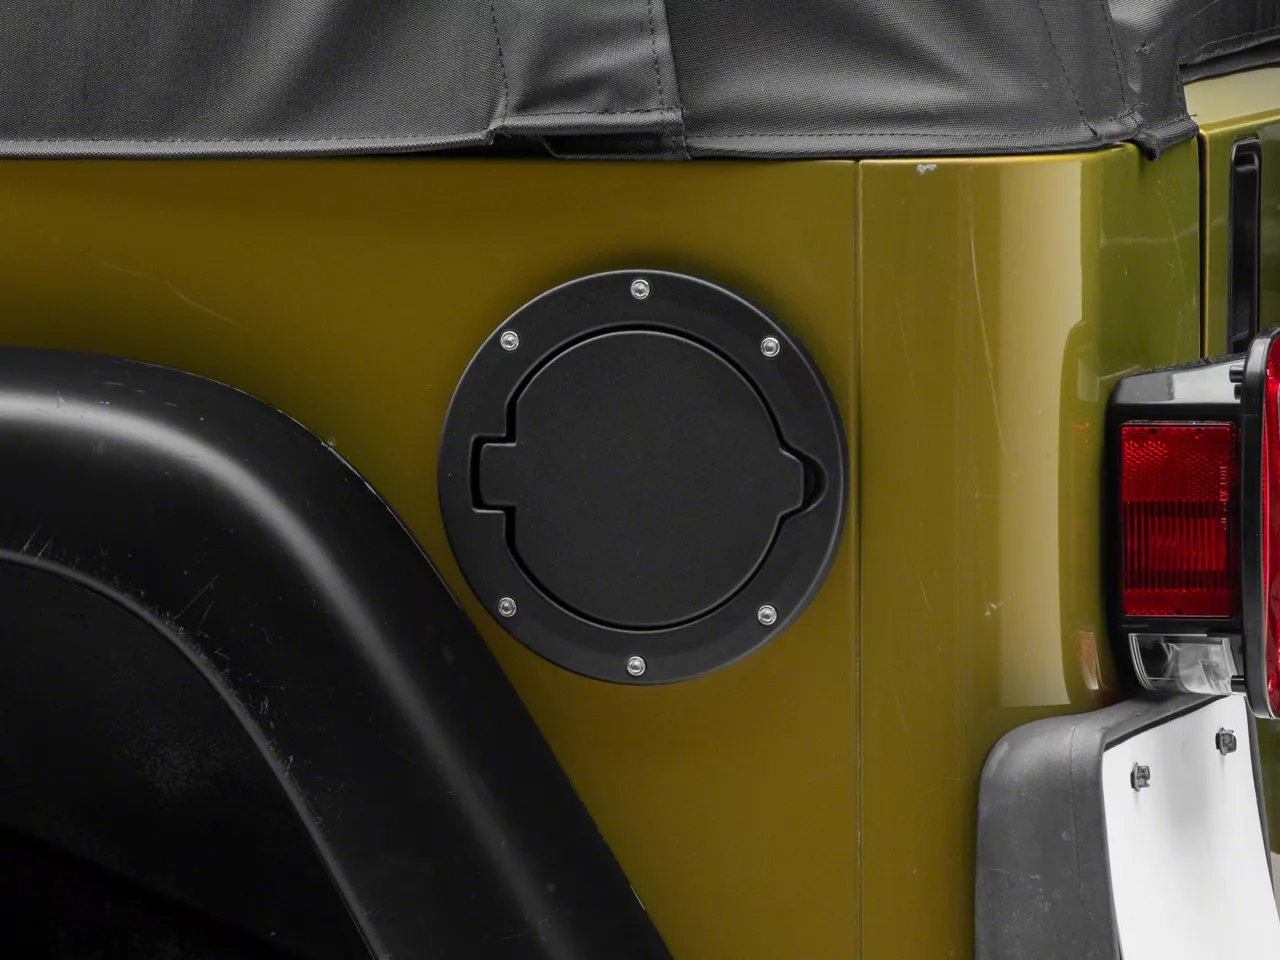
Image source: Bing (Web (fair-use with source credit))
OEM Mopar Reproductions
Factory-style reproductions offer the safest bet for most owners who want a direct fit without modification. Mopar and authorized distributors supply doors that match original specifications for bolt patterns, seal dimensions, and latch geometry. These units typically come in textured black plastic finish.
The advantage of OEM-spec doors is predictability. Everything fits as designed without fabrication or adjustment. Color match isn’t a factor with black plastic, and the fitment accuracy reduces installation errors.
The downside is that these doors don’t address aesthetic upgrades if you’ve already painted your vehicle’s exterior.
Painted Body-Colored Options
Body-colored doors look seamless against your painted body panels and can significantly improve the vehicle’s visual appeal. Factory-painted versions from Mopar deliver the closest color match but carry a premium price tag. Aftermarket painted options vary widely in quality depending on the manufacturer’s finishing standards.
When choosing a painted door, verify the paint type matches your existing finish. Modern Jeep paints include base coat with clear coat layers, and inferior aftermarket finishes may fade or chip prematurely. Several reputable suppliers offer powder-coated options that provide durable, consistent finishes at competitive prices.
Consider the long-term maintenance implications if you plan to keep the vehicle for several years.
Premium Aftermarket Aluminum or ABS Upgrades
Aftermarket brands like Smittybilt, Rugged Ridge, and AEV produce upgraded fuel doors in materials beyond factory specifications. Aluminum constructions offer enhanced durability against impact damage and resist UV degradation better than standard plastic. ABS plastic alternatives provide improved impact resistance over the factory thermoplastic.
These upgraded doors often include reinforced latch mechanisms and heavier-duty striker plates. The trade-off is typically higher cost and occasional fitment adjustments required during installation. Some models require minor trimming or bracket modification to achieve proper alignment with the body opening.
What’s Worth the Upgrade?
Upgrade to a body-colored or premium material door if you’re restoring a vehicle for resale, detailing work, or personal satisfaction. Stick with a quality black plastic replacement if your priority is function, budget, and simplicity. The core safety and sealing performance is equivalent across all options when installed correctly.
Cost Breakdown — DIY vs Professional Install
Parts Pricing by Tier
Parts costs vary significantly based on material and brand selection. Basic black plastic replacement doors run $20 to $45 at most auto parts stores and online retailers. Body-colored painted doors range from $60 to $150 depending on finish quality and brand.
Premium aftermarket aluminum or reinforced ABS options typically cost $100 to $250.
Don’t overlook ancillary supplies. Replacement trim clips run $5 to $10 for a pack of ten. A fuel line disconnect tool costs approximately $8.
A quality T25 Torx bit runs $5 to $12. Budget roughly $15 to $30 in supplemental supplies alongside your parts purchase.
Tool Investment if You Don’t Already Own Them
If you lack basic socket sets, ratchets, or trim tools, a starter kit costs $30 to $60. However, most Jeep owners already possess these fundamentals from other maintenance tasks. The specialized items worth purchasing specifically for this job include the Torx bit set and fuel line disconnect tool.
Consider whether you’ll perform additional body panel work or fuel system maintenance down the line. Investing in quality tools now pays dividends across multiple future projects. Tools from reputable brands like Craftsman, Snap-on, or Mac last significantly longer than budget alternatives and reduce the risk of damaging fasteners during use.
Labor Costs If You Take It to a Shop
Professional installation at a body shop or mechanic runs $80 to $200 depending on labor rates in your area and any additional services requested. Most shops quote a flat rate for this straightforward replacement since it doesn’t involve complex diagnosis or specialty procedures.
Take it to a professional if you lack confidence working around fuel systems, don’t own the necessary tools, or prefer having someone else verify the seal integrity after installation. For anyone comfortable with basic hand tools and following step-by-step instructions, DIY delivers substantial savings with equivalent results when performed correctly.
When DIY Makes Sense vs When to Call a Pro
DIY makes sense when you have basic mechanical aptitude, access to standard hand tools, and willingness to follow detailed instructions. The fuel door replacement ranks among the easier body panel jobs on any Jeep. Most first-time installers complete it successfully on their initial attempt.
Call a professional if you notice the filler neck itself is cracked, corroded, or damaged. Replacing a compromised filler neck requires dropping part of the fuel tank or working in confined spaces beneath the vehicle that demand additional safety precautions. Similarly, seek professional help if your vehicle has known EVAP system trouble codes that may indicate a deeper issue beyond just the fuel door seal.
Maintaining Your New Fuel Door — Keeping It Sealed and Trouble-Free
Inspecting the Seal During Regular Maintenance
Make it a habit to visually inspect your fuel door during routine vehicle checks. Look for cracks in the plastic shell, especially around the latch pivot points and mounting bolt areas. Check that the rubber seal maintains uniform contact around the entire perimeter without flattening, splitting, or pulling away from its channel.
Pay attention to any fuel odor when refueling or shortly after driving. A returning smell indicates seal degradation or improper latching that warrants immediate inspection. Address minor issues early before they develop into vapor leak problems that trigger check engine lights.
Cleaning and Condition Tips
Clean your fuel door periodically using automotive-safe cleaners and a soft microfiber cloth. Avoid harsh solvents like acetone or strong degreasers that degrade plastic and deteriorate rubber seals over time. A mild automotive soap and water solution works effectively for routine cleaning.
Apply a silicone-based protectant to the rubber seal annually to maintain flexibility and prevent premature cracking. Products like 3M Internal Car Care Protectant or similar silicone dressings keep the seal supple without attracting excessive dirt. Reapply every six months in extreme climates where UV exposure accelerates rubber aging.
Recognizing Early Warning Signs of Failure
Watch for these indicators that your fuel door seal or mechanism needs attention:
- Visible fuel odor near the rear quarter panel
- Check engine light with EVAP-related trouble codes
- Fuel cap refusing to engage the latch retention loop
- Water pooling or dripping from the fuel door area after rain
- Cracks or brittleness visible in the door plastic
- Latch mechanism feeling loose or failing to stay engaged
- Uneven gaps around the door perimeter suggesting misalignment
Addressing these signs promptly prevents minor issues from escalating into expensive repairs involving the fuel filler neck or EVAP system components.
Advanced Troubleshooting — When Things Don’t Go as Planned
Fuel Line Fitting Won’t Release
Stuck quick-connect fittings are more common than you’d think. Years of heat cycling, fuel residue buildup, and road debris create a seal that defies normal removal force. Before escalating to force, try these approaches in sequence.
First, spray penetrating oil around the fitting collar and let it soak for ten minutes. Use a dedicated fuel line disconnect tool rather than improvised screwdrivers. Position the tool’s jaws evenly around the collar to apply uniform compression.
Some mechanics find that tapping the fitting gently with a rubber mallet while maintaining collar compression helps break the bond.
If the fitting absolutely refuses to budge, inspect whether the locking ball bearings inside have deformed or collapsed. A damaged fitting sometimes requires cutting the line and installing a new section rather than forcing separation. Keep this as a last resort because cutting creates additional connections that can leak over time.
Latch Mechanism Binding or Not Engaging
A fuel door that won’t latch properly usually points to alignment issues rather than component failure. Check three things in order: striker plate position, latch spring tension, and seal interference. The striker plate should sit squarely against the body with no lateral play.
If it shifted during your work, loosen the bolts, reposition, and retighten.
Examine the latch spring for proper tension. Some aftermarket doors ship with weak replacement springs that don’t provide enough closing force. Consider upgrading to an OEM-spec spring kit if the latch feels mushy or inconsistent.
Finally, verify the rubber seal isn’t creating excessive friction against the striker path. A thin layer of silicone spray on the seal edge reduces binding without damaging the material.
Persistent Fuel Odor After Installation
Fuel odor following a fuel door swap typically indicates one of three problems: seal misalignment, incomplete quick-connect seating, or an undetected filler neck crack. Start by pressing firmly along the entire seal perimeter while the door is closed. Feel for air escaping or listen for hissing sounds.
Any gaps suggest the seal isn’t making uniform contact.
Next, disconnect and reconnect the fuel line one more time, ensuring you hear and feel the full click engagement. Sometimes the fitting appears connected but hasn’t reached its locked position. Inspect the filler neck for cracks around the mounting flange where it meets the body panel.
Hairline fractures in older plastic necks can allow vapors to escape even with a perfect door installation.
Paint Adhesion Issues on Body-Colored Doors
Painted fuel doors occasionally show peeling, cracking, or poor adhesion within months of installation. This usually stems from improper surface preparation before painting rather than product defects. If your newly painted door shows problems early, sand the affected area with 600-grit paper, clean thoroughly with wax and grease remover, and apply a fresh base coat using products designed for automotive trim.
Prevention matters more than repair here. Always prep unpainted plastic doors with a dedicated plastic adhesion promoter before applying color. Follow manufacturer instructions for flash times between coats.
Avoid thinning paint excessively, which compromises durability and UV resistance.
Parts Sourcing and Compatibility Verification
Identifying Your Exact Part Number
Jeep fuel door part numbers vary significantly across model years, trim levels, and market regions. The safest approach is removing your current door and reading the molded part number directly on the back or side of the assembly. Cross-reference this number through Mopar catalogs or authorized dealer parts systems to confirm exact replacements.
Aftermarket suppliers often list compatibility charts, but errors occur frequently. Verify bolt pattern, latch type, and fuel line fitting style match your vehicle before purchasing. Some suppliers sell doors labeled for your year that actually require modification for proper fitment.
Read customer reviews specifically mentioning your exact model and year when possible.
Recognizing Quality vs Budget Replacement Doors
Quality indicators for replacement fuel doors include consistent wall thickness, smooth molding finish without flashing or burrs, and sturdy latch mechanisms with proper spring tension. Cheap reproduction doors often feel lightweight, have uneven seam lines, and use inferior plastic that remains brittle even when new.
Inspect packaging and documentation. Reputable manufacturers provide warranty information, compatibility guarantees, and detailed installation instructions. Avoid no-name brands offering suspiciously low prices without technical specifications.
The $20 doors sometimes deliver acceptable results, but the $80 to $120 range typically produces components with better fitment accuracy and longer durability.
When to Source From Mopar vs Aftermarket Suppliers
OEM Mopar parts guarantee exact fitment and factory-spec materials. They represent the gold standard for restoration projects or vehicles being prepared for resale. However, Mopar parts carry significant markup compared to quality aftermarket alternatives.
Reputable aftermarket brands like Rugged Ridge, Smittybilt, and AEV produce doors that often exceed factory specifications in durability. These companies understand off-road abuse patterns and engineer their components accordingly. For daily drivers and trail-focused Jeeps, aftermarket options frequently provide better value and performance.
Reserve Mopar purchases for period-correct restorations or when aftermarket availability doesn’t cover your specific configuration.
Post-Installation Testing and Break-In Period
Initial Driving Checks
After completing your fuel door installation, take the vehicle for a short drive before declaring success. Listen for rattles or vibrations near the fuel door area that might indicate loose hardware or improper seal seating. Park indoors overnight if possible, then check the floor beneath the fuel door location for any moisture or fuel residue the next morning.
Return home and re-inspect all connections. Temperature changes during driving can reveal seal imperfections that weren’t apparent at ambient temperature. Pay special attention to the quick-connect fitting area and the mounting bolt holes for any signs of weeping or leakage.
Refueling Procedure Verification
Perform your first refueling carefully after the installation. Open the door smoothly and watch how the latch engages. Insert the fuel nozzle and begin filling normally.
Observe whether vapor returns through the filler neck during fast filling, which could indicate seal issues or venting problems unrelated to your work.
Close the door securely and verify the fuel cap clicks into the retention mechanism. Drive to a well-ventilated area and sniff around the rear quarter panel for any gasoline odor. Absence of smell confirms successful sealing.
Any detectable fuel scent warrants immediate inspection of the seal and fittings.
Long-Term Monitoring Schedule
Check your fuel door condition every oil change or at minimum every other maintenance interval. Look for UV degradation, cracking around high-stress areas, and latch mechanism wear. Apply silicone protectant to the seal annually or more frequently in extreme climates.
Document any issues that develop over time, including seasonal behavior patterns. Some seals harden faster in high-UV environments and may require replacement every two to three years in southern states. Tracking these patterns helps you plan maintenance proactively rather than reactively.
When This Job Reveals Bigger Problems
Cracked or Damaged Fuel Filler Neck
Your fuel door removal might expose pre-existing damage to the filler neck that you hadn’t noticed before. Look carefully at the neck where it mounts to the body and where the fuel line connects. Hairline cracks, corrosion, or deformation in these areas compromise the entire system and require immediate attention.
Replacing a fuel filler neck is significantly more involved than swapping a door. The procedure often requires partial fuel tank lowering or removal depending on your model year. If you discover neck damage, assess whether professional assistance makes sense versus attempting the repair yourself.
The added complexity and risk justify expert help in most cases.
EVAP System Components Showing Wear
Removing and reinstalling the fuel door disrupts connections in your evaporative emissions system. While doing so, inspect nearby hoses, charcoal canister lines, and purge valves for cracks, disconnections, or deterioration. Older Jeeps especially benefit from a thorough EVAP inspection since these systems degrade gradually over time.
Consider performing an EVAP smoke test if you notice persistent check engine lights or fuel odor issues after your fuel door work. Smoke testing reveals leaks that visual inspection misses, including small cracks in hoses or faulty valve operation. Many auto parts stores offer free or low-cost smoke testing services as part of diagnostic appointments.
Rust or Corrosion in the Quarter Panel Area
Exposed steel around the fuel door opening may show signs of rust, especially on older vehicles or those driven in salt-heavy climates. Minor surface rust can be cleaned and treated with rust converter before reinstalling your new door. Serious corrosion eating through the panel structure requires professional fabrication work.
Assess rust severity by probing suspect areas with a screwdriver or pick tool. Soft, crumbly metal indicates advanced deterioration requiring panel repair or replacement. Firm metal with surface discoloration suggests manageable oxidation that cleaning and treatment can address effectively.
Resources for Ongoing Learning
Factory Service Manual References
Jeep factory service manuals provide detailed procedures, torque specifications, and troubleshooting guides for fuel system components. These manuals cost money to obtain legally but represent the most authoritative source for your specific model. Chrysler Group made many service manuals available through Mopar or third-party publishers like Bentley Publishers.
Use factory procedures as your primary reference when working on fuel systems. Supplement them with model-specific forum discussions and community knowledge bases for real-world tips that manuals sometimes omit. Combining official documentation with experienced owner insights produces the best results.
Online Communities and Technical Forums
Dedicated Jeep forums house extensive discussions about fuel door replacements across all model generations. Sites like JeepForum.com, WranglerForum.com, and CherokeeForum.com contain step-by-step guides, photos, and problem-solving threads created by owners who’ve completed similar jobs.
Search these forums using specific keywords combining your model year with “fuel door replacement” or “gas door install.” You’ll likely find threads addressing your exact situation with photos showing clip locations, bolt positions, and common pitfalls. Community members often share videos demonstrating tricky steps like quick-connect removal that complement written guides perfectly.
Video Tutorials for Visual Learners
Visual learners benefit enormously from video demonstrations showing the actual processes described in written guides. Search YouTube using your specific Jeep model plus “fuel door replacement” to find model-specific tutorials. Pay attention to videos demonstrating trim panel removal sequences, fuel line disconnection techniques, and proper latch adjustment methods.
Compare multiple videos before starting your job. Different model years sometimes use different procedures that vary significantly from what you observe online. Always verify that tutorial content matches your exact year and model rather than assuming generality across the Jeep lineup.
Legal and Regulatory Considerations — Staying Compliant
EPA Evaporative Emissions Standards
Fuel door replacements directly impact your vehicle’s evaporative emissions system compliance. The EPA requires all light-duty vehicles to maintain sealed fuel systems that prevent hydrocarbon vapor release into the atmosphere. A properly installed fuel door maintains this seal integrity and prevents potential violations during emissions inspections.
Some states conduct strict EVAP system testing during annual inspections. A damaged or improperly seated fuel door seal can cause test failures even when the rest of the emissions system functions correctly. Budget extra time for diagnostic work if your vehicle fails emissions testing after installation.
Addressing the root cause rather than bypassing components ensures long-term compliance and environmental responsibility.
State-Specific Inspection Requirements
Inspection programs vary significantly across states and local jurisdictions. Some regions require visual checks of fuel door condition and proper latch engagement during safety inspections. Others focus exclusively on tailpipe emissions measurements and onboard diagnostic system readings.
Research your local requirements before beginning the replacement to avoid unexpected complications.
California and other states following CARB standards often enforce stricter fuel system inspection protocols than federal requirements. Vehicles registered in these jurisdictions may face additional scrutiny during smog checks. Ensuring your replacement door meets OEM specifications helps satisfy these more demanding requirements without modification or workaround attempts.
Commercial Vehicle and Fleet Regulations
If you operate your Jeep for commercial purposes or maintain a fleet, additional regulations may apply. Commercial vehicles sometimes face different inspection intervals and documentation requirements. Fleet managers should establish standardized procedures for fuel door replacement that include proper documentation of parts used and installation verification.
Commercial operators should consult their insurance providers and regulatory bodies for specific compliance requirements. Keeping detailed records of all fuel system maintenance helps demonstrate due diligence during audits or investigations. Professional-grade installation practices reduce liability exposure and ensure consistent vehicle readiness across fleet operations.
Professional Installation Scenarios — When to Call in Help
Complex Multi-System Failures
Professional assistance becomes essential when your fuel door problem represents a symptom of larger systemic issues. If you discover cracked filler necks, damaged fuel lines, compromised tank fittings, or extensive body rust around the door opening, the job escalates well beyond simple panel replacement. These conditions require specialized tools, safety precautions, and technical expertise.
Mechanics working on complex fuel system issues have access to diagnostic equipment like smoke machines for leak detection, pressure testers for system validation, and proper lift equipment for safe under-vehicle work. The additional investment in professional service pays dividends in completed work quality and long-term reliability.
Warranty and Certification Concerns
Vehicles still under manufacturer warranty may require certified installation procedures to maintain coverage. Independent repair shops performing fuel system work should follow OEM specifications and document all procedures according to manufacturer guidelines. Some warranty claims get denied when improper installation methods cause subsequent component failures.
Professional installation from certified technicians provides documentation that may be necessary for warranty claims or insurance purposes. These records show proper procedures were followed using approved parts and equipment. Building a relationship with a trusted mechanic familiar with Jeep fuel systems pays off during future repairs and maintenance needs.
Insurance and Liability Considerations
Insurance claims involving fuel system damage may require professional assessment and repair documentation. Accidents, collisions, or off-road incidents damaging fuel doors often trigger insurance adjustments that need proper work order records. Professional installations provide the paper trail insurers typically require for claim processing.
Liability protection matters significantly when working with pressurized fuel systems. Professional shops carry insurance covering potential incidents during repair work. DIY mistakes causing fuel leaks, fires, or emissions violations create personal liability that insurance policies may not cover.
Evaluate the risk-reward balance before attempting complex fuel system work yourself.
Environmental Impact and Disposal Requirements
Proper Disposal of Old Components
Discarded fuel doors and related hardware require careful handling due to residual fuel contamination. Plastic components may absorb fuel vapors over their service life, making them regulated waste in some jurisdictions. Check local hazardous waste disposal guidelines before throwing old parts in regular trash.
Many auto parts stores accept used plastic automotive components for recycling through manufacturer take-back programs. Mopar and aftermarket suppliers sometimes run environmental initiatives encouraging proper part disposal. Using these programs reduces landfill waste and supports sustainable automotive aftermarket practices.
Fuel System Cleanup Best Practices
Any fuel spills during replacement work need immediate and thorough cleanup. Petroleum-based contaminants damage soil and water systems when improperly disposed. Use absorbent materials like cat litter or commercial spill pads to contain and collect spilled fuel.
Never hose fuel residues into storm drains or soil areas.
Store contaminated cleanup materials in sealed containers until proper disposal through hazardous waste facilities becomes available. Some auto parts retailers accept used shop rags and absorbent materials for proper solvent disposal. Following proper cleanup protocols protects both personal safety and environmental compliance requirements.
Eco-Friendly Repair Alternatives
Before replacing entire assemblies, consider whether repair options exist for minor damage. Some latch mechanisms can be rebuilt using manufacturer repair kits containing new springs, pins, and sealing components. Seal replacements alone address many vapor leak complaints without full assembly purchases.
Repair-focused approaches reduce material waste and environmental impact compared to complete replacement cycles. Evaluate each damaged component individually to determine whether targeted repair achieves the same functional results. This selective approach aligns with sustainable maintenance practices while addressing immediate mechanical needs.
Seasonal Maintenance Planning
Winter Preparation Procedures
Cold weather exposes fuel door vulnerabilities through thermal contraction and ice formation. Inspect seals for hardening or cracking before winter months arrive. Apply silicone-based protectants to maintain rubber flexibility in freezing temperatures.
Check latch mechanism operation to ensure it closes properly despite potential ice buildup.
Plan winter-ready installations by completing fuel door work before sustained freezing temperatures begin. Late fall represents the ideal window for addressing seal degradation that worsens dramatically in cold conditions. Vehicles equipped with snow-plow attachments or salt-heavy driving routines benefit from more frequent inspection intervals during winter months.
Summer UV Protection Strategies
Extended sun exposure accelerates plastic degradation and seal hardening in warm climates. Interior parking whenever possible extends fuel door component lifespan significantly. UV-protectant sprays formulated for automotive trim help slow oxidative breakdown of exposed plastic surfaces.
Schedule summer inspections focusing on heat-related damage patterns. Look for blistering, discoloration, or softening in plastic components most exposed to direct sunlight. These thermal stress indicators appear well before catastrophic failure occurs.
Early detection allows preventive replacement before complete failure strands you away from service facilities.
Extreme Climate Adaptations
Owners in desert environments face unique challenges from intense UV radiation and temperature extremes exceeding 120°F. These conditions accelerate material aging significantly compared to moderate climates. Consider upgrading to premium UV-resistant materials when replacing doors in harsh environments.
Northern climate owners encounter freeze-thaw cycling that stresses seal interfaces repeatedly. Moisture intrusion followed by freezing expansion damages mating surfaces over time. Apply appropriate weather-stripping treatments during seasonal transitions to maintain optimal sealing performance throughout changing conditions.
Common Misconceptions About Fuel Door Replacement
Thinking It’s Too Complicated for Beginners
Many owners assume fuel door replacement requires specialized knowledge beyond their capability. This misconception prevents countless DIY repairs that prove straightforward with proper guidance. The fundamental process involves bolt removal, line disconnect, part swap, and reassembly.
No welding, calibration, or specialty equipment beyond basic hand tools is typically required.
Beginner success rates improve dramatically when following detailed step-by-step instructions with model-specific variations clearly identified. Taking time to understand each component’s function and relationship builds confidence for similar future projects. Many owners report completing their first fuel door swap successfully after recognizing how simple the actual procedure proves once barriers are removed.
Assuming Only OEM Parts Work Properly
Some enthusiasts believe only genuine Mopar parts deliver acceptable results for critical fuel system components. This assumption overlooks decades of aftermarket engineering advancement producing quality replacement components meeting or exceeding original specifications. Multiple manufacturers now produce doors with improved materials offering better durability than factory originals.
Quality aftermarket alternatives undergo rigorous fitment testing against original specifications before market release. Independent verification through owner communities and professional installers confirms compatibility across extensive vehicle populations. Smart shoppers compare features, warranties, and pricing rather than automatically defaulting to expensive OEM sources when equally capable alternatives exist.
Believing Cheap Parts Save Money Long-Term
Budget-conscious buyers sometimes select the lowest-priced replacement doors available without evaluating quality differences. These cost-cutting decisions frequently result in premature failures requiring repeat purchases, wasted installation time, and potential secondary damage from leaking connections. The true cost of cheap parts includes hidden expenses often overlooked during initial purchasing decisions.
Evaluating total ownership cost versus initial purchase price reveals quality components delivering better value over extended service periods. Premium doors resist cracking, maintain seal integrity longer, and retain proper latch engagement through repeated use cycles. Spending moderately more upfront prevents costly mid-life replacements and associated labor expenses.
Documenting Your Installation for Future Reference
Creating Personal Service Records
Maintaining detailed installation records helps track component lifespans and predict future maintenance needs. Record the date of installation, part numbers used, supplier information, and any model-specific observations during the process. These notes become invaluable when comparing replacement intervals or troubleshooting related issues years later.
Digital photography documenting each disassembly and reassembly step creates a personal reference library for future work. Photos showing clip locations, bolt sequences, and fitting orientations help both you and anyone else performing similar work understand the exact procedure for your specific vehicle configuration. Share these resources with online community members to help others facing identical jobs.
Tracking Performance Over Time
Document any issues developing after installation including seal hardness, latch operation changes, or odor occurrences. These performance trends help identify component quality variations and environmental factors affecting longevity. Patterns emerging across multiple vehicles inform future purchasing decisions and installation technique refinements.
Annual reviews of fuel door condition as part of broader vehicle maintenance schedules establish baselines for normal wear patterns. Deviations from established norms prompt investigation before small issues develop into major failures. Consistent monitoring transforms reactive repairs into proactive maintenance scheduling based on actual component condition rather than arbitrary time intervals.
Frequently Asked Questions About DIY Jeep Fuel Door Install
Can I drive if my fuel door is broken or missing?
Yes, you can drive short distances with a broken or missing fuel door, but it’s not recommended. An open fuel filler neck exposes your fuel system to water, mud, and debris. Vapor emissions increase, potentially triggering check engine lights.
Repair it as soon as practical rather than driving extensively in this condition.
Will a bad fuel door trigger a check engine light?
A compromised fuel door seal can definitely trigger a check engine light. The EVAP system monitors pressure and vacuum in the fuel system. A leaking door seal allows unmetered air into the system, causing the computer to detect a leak and illuminate the malfunction indicator lamp.
Common codes include P0440 through P0455 series.
Do I need to replace the fuel filler neck at the same time?
You don’t need to replace the filler neck unless it shows visible cracks, corrosion, or damage. Inspect it while you have access during the fuel door replacement. If the neck is intact, continue using it with your new door and seal.
Replacing a filler neck requires additional disassembly and increases job complexity significantly.
How long does a quality replacement fuel door last?
A quality replacement fuel door typically lasts five to ten years under normal driving conditions. Exposure to extreme UV radiation, frequent off-road impacts, and harsh environmental conditions can shorten lifespan. Premium materials like ABS or aluminum construction generally outlast standard thermoplastic doors in demanding applications.
Can I use a generic fuel door on any Jeep?
No. Fuel door designs vary significantly across Jeep models and model years. Mounting bolt patterns, latch geometries, seal profiles, and fuel line fitting sizes differ across platforms.
Always verify compatibility with your specific year and model before purchasing. Generic or universal doors rarely fit correctly and may compromise safety and seal integrity.
What’s the trick to getting a stuck quick-connect line off?
Work penetrating oil around the fitting O-ring area and let it soak for five to ten minutes. Then use a proper fuel line disconnect tool to compress the release collar evenly while applying steady, moderate pulling force. Avoid excessive force that damages the fitting.
Repeat the process if the collar feels resistant rather than forcing separation.
Before you consider the job done, do one final walk-around inspection. Check that the fuel door opens and closes smoothly three times in a row. Confirm the fuel cap seats properly in the retention loop every time.
Look for any tools, rags, or hardware left behind in the work area. Park the vehicle outside or in a well-ventilated space for a few hours, then return to sniff around the fuel door area one last time. If everything checks out, you’ve just saved yourself a shop visit and added years of trouble-free use to your Jeep’s rear quarter panel.