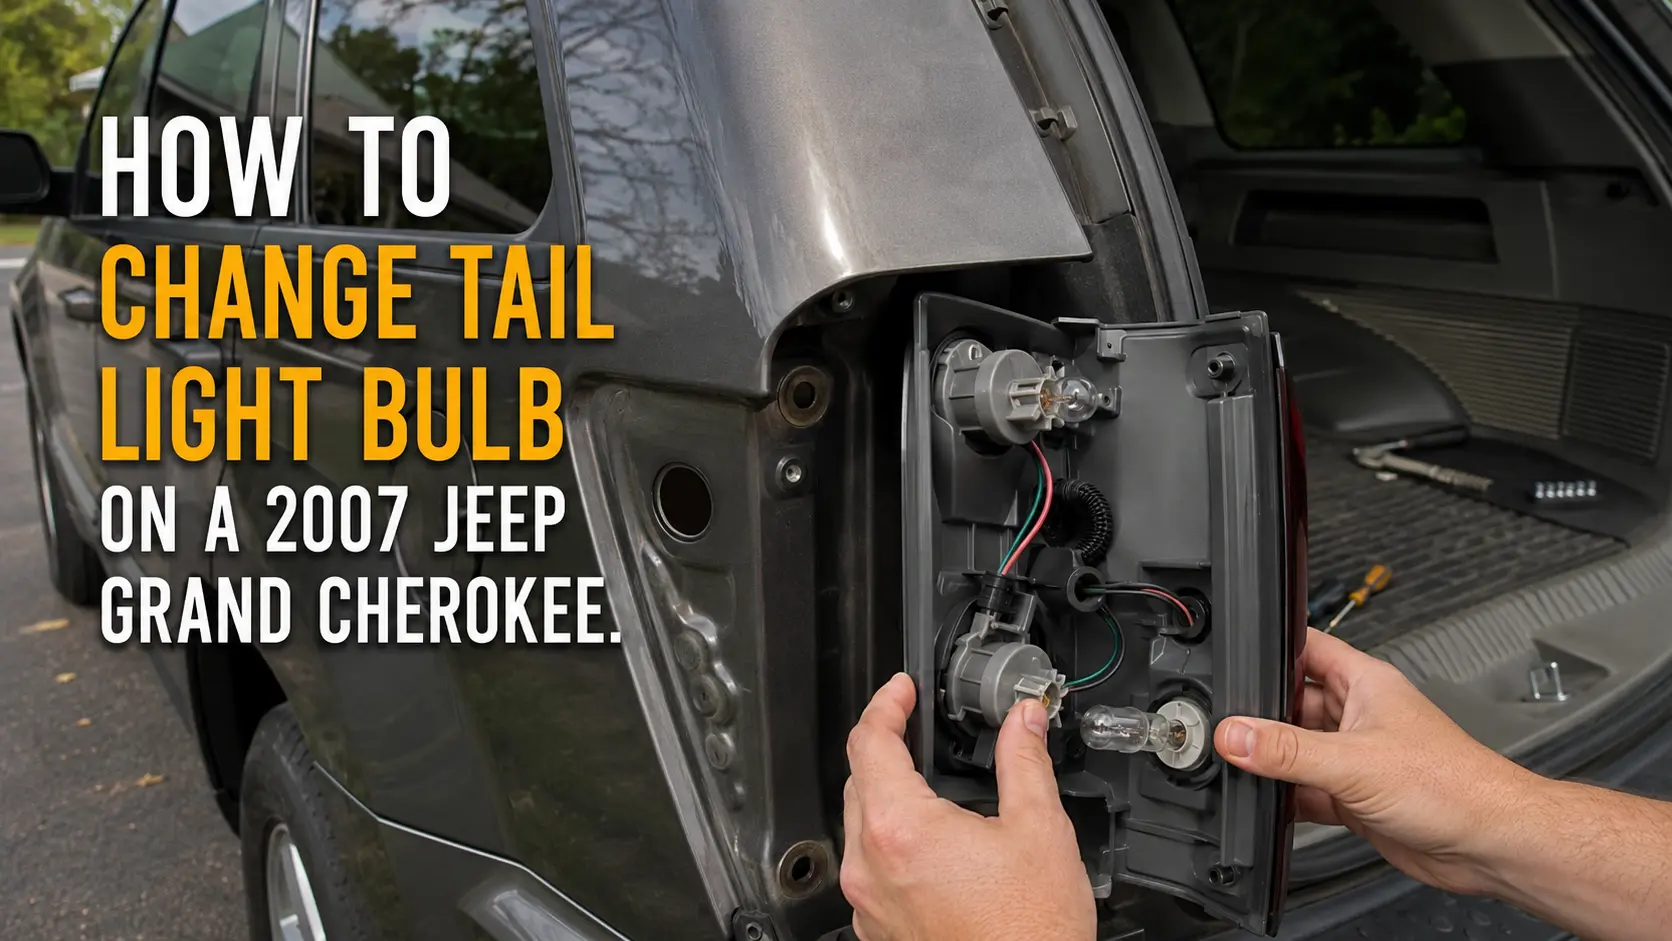
A burned-out tail light on a 2007 Jeep Grand Cherokee is usually one of those repairs you can handle at home without paying a shop. You do not need to remove the bumper or take apart the interior trim. In most cases, you only need the correct replacement bulb, a Torx driver, and a few minutes.
The basic job is simple: open the liftgate, remove the tail light housing, access the bulb socket, replace the failed bulb, test the light, and reinstall the housing.
The most important part is buying the correct bulb before you start. North American and export-market Grand Cherokees may use different rear-light configurations, so always confirm the bulb against your owner’s manual, VIN, or the old bulb before purchasing. Mopar maintains official owner resources for Jeep vehicles, including the 2007 Grand Cherokee.
What Tail Light Bulb Does a 2007 Jeep Grand Cherokee Use?
For many North American-spec 2007 Jeep Grand Cherokee WK models, the rear stop/tail light uses a 3157K dual-filament bulb. The rear turn/tail position uses a 3157-family bulb.
Because the rear lamp contains more than one bulb, do not assume every socket takes the same replacement.
| Rear Light Function | Common North American Bulb | What It Does |
|---|---|---|
| Stop/Tail light | 3157K | Running light and brake light |
| Rear Turn/Tail | 3157 family | Turn signal and rear lighting function |
| Reverse light | Verify before purchase | Illuminates when reversing |
The safest approach is to remove the failed bulb and compare the number printed on its base with the replacement.
What About UK and Australian Models?
The 2007 Grand Cherokee was sold in different markets and may be identified as a WK or WH, depending on the region.
Export-market vehicles can use different lamp housings, bulb specifications, or lighting arrangements. Terms can also differ. What drivers in the United States call a tail light may be described as a rear position lamp or rear running light elsewhere.
If your Jeep was originally sold in the UK, Australia, or another export market, check the owner’s manual or the existing bulb instead of ordering a 3157K based only on the model year.
Which Bulb Has Actually Failed?
Before taking the tail light apart, identify which function is not working. This prevents you from replacing the wrong bulb.
Tail or Running Light
Turn on the parking lights or headlights.
If one rear lamp stays dark while the other side glows normally, the tail-light circuit or filament may have failed.
Brake Light
Ask someone to press the brake pedal while you stand behind the Jeep.
If the running light works but becomes no brighter when the brake is pressed, one filament in a dual-filament bulb may have failed.
Rear Turn Signal
Switch on the left and right turn signals separately.
A fast-flashing turn signal can be a clue that an exterior turn-signal bulb has failed, although wiring, socket, or LED compatibility problems can cause similar symptoms.
Reverse Light
Put the vehicle in reverse only while it is safely parked, with the parking brake applied and another person helping if necessary.
Do not confuse a failed reverse bulb with the tail/brake bulb. They perform different jobs and may use different bulb types.
Tools and Parts You Will Need
This is a fairly simple DIY repair. Have these items ready before you start:
- Correct replacement bulb
- T25 Torx driver or suitable Torx tool
- Clean gloves or a clean cloth
- Flashlight
- Small amount of dielectric grease, optional
- Owner’s manual or old bulb for comparison
You normally do not need a jack, wheel removal, or special electrical tools for a straightforward bulb replacement.
If the socket is burned, melted, or badly corroded, however, replacing the bulb alone may not solve the problem.
How to Change a Tail Light Bulb on a 2007 Jeep Grand Cherokee
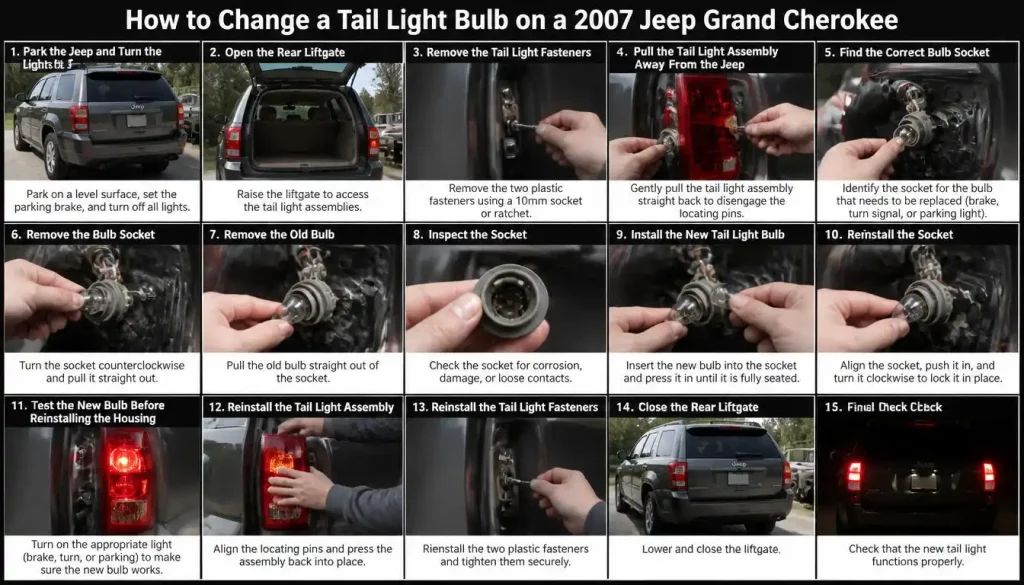
Work on a flat surface with the engine off. Give yourself enough room behind the Jeep to open the liftgate fully.
Step 1: Park the Jeep and Turn the Lights Off
Shift into Park and apply the parking brake.
Turn off the ignition and exterior lights. This prevents the lamp from being powered while you are handling the socket.
You normally do not have to disconnect the battery simply to change a rear bulb.
Step 2: Open the Rear Liftgate
Raise the liftgate.
Look at the inside edge of the tail light assembly. With the liftgate open, you can access the fasteners holding the lamp to the body.
Keep the liftgate raised while you work so you have enough room to remove the housing safely.
Step 3: Remove the Tail Light Fasteners
Use a T25 Torx driver to remove the fasteners along the inside edge of the tail light housing.
Place the screws somewhere safe. They are small and easy to lose.
If a screw is tight, apply steady pressure instead of forcing the tool at an angle. Stripping the head will turn a quick bulb change into a much longer repair.
Step 4: Pull the Tail Light Assembly Away From the Jeep
Once the fasteners are out, gently pull the tail light assembly straight away from the body.
Do not twist the housing hard or pry against the painted body panel with a screwdriver.
The lamp may feel tight because locating pins or clips help hold it in place. A controlled, straight pull is better than rocking it aggressively from side to side.
If it does not move, check again for a fastener you may have missed before applying more force.
Step 5: Find the Correct Bulb Socket
Look at the back of the removed tail light housing.
You will see the bulb sockets and wiring. Identify the socket for the failed tail or brake light before removing anything.
If you are unsure, compare its position with the visible section of the lens.
Taking a quick photo before disconnecting anything can also help you remember where each socket belongs.
Step 6: Remove the Bulb Socket
Release the socket from the lamp housing.
Depending on the socket design, you may need to rotate it or release its retaining tabs before pulling it free.
Hold the socket itself rather than pulling on the wires.
If the socket is difficult to remove, inspect it closely before forcing it. Old plastic can become brittle after years of heat exposure.
Step 7: Remove the Old Bulb
Grip the old bulb at its base and pull it straight out of the socket.
Check the bulb after removal.
A darkened glass envelope or visibly broken filament often confirms the bulb has failed. However, a bulb can still be bad even when it looks normal.
This is also the best time to confirm the bulb number printed on the base.
Step 8: Inspect the Socket
Before installing the new bulb, look inside the socket.
Watch for:
- Green or white corrosion
- Burned contacts
- Melted plastic
- Moisture
- Loose terminals
- Dark heat marks
A new bulb will not reliably fix a badly damaged socket.
Minor dirt can be cleaned carefully. If the socket is burned or melted, replace or repair the socket rather than repeatedly installing new bulbs.
Step 9: Install the New Tail Light Bulb
Push the correct replacement bulb firmly into the socket until it is fully seated.
Do not force it sideways.
With traditional incandescent 3157-style bulbs, touching the glass is generally less critical than it is with high-temperature halogen headlight bulbs, but keeping the new bulb clean is still good practice.
If you use dielectric grease, apply only a very small amount where appropriate. Do not pack the socket with grease.
Step 10: Reinstall the Socket
Return the bulb socket to its opening in the tail light housing.
Make sure it locks completely into place.
A socket that is not fully seated can allow moisture into the housing and may cause an intermittent electrical connection.
Step 11: Test the New Bulb Before Reinstalling the Housing
This step can save you from removing the assembly twice.
With the housing still accessible, test the appropriate functions:
- Parking/running lights
- Brake lights
- Turn signal
- Hazard lights, if relevant
Have another person operate the brake pedal while you watch the rear lamp.
If everything works normally, turn the lights and ignition off again before reinstalling the assembly.
Step 12: Reinstall the Tail Light Assembly
Align the housing with its locating points on the Jeep.
Press it into position gently. Do not force it if the pins and holes are not lined up.
Reinstall the Torx fasteners and tighten them until secure.
They do not need excessive force. Overtightening can damage the plastic housing or mounting points.
Close the liftgate and perform one final light check.
Why Does the Tail Light Work but the Brake Light Does Not?
This can happen with a dual-filament bulb.
A dual-filament bulb contains separate lighting elements for different brightness levels or functions. One filament can fail while the other continues working.
That means you may see the rear running light when the headlights are on, but nothing changes when the brake pedal is pressed.
The opposite can also happen.
Replacing the correct dual-filament bulb often solves the problem, but if the new bulb behaves the same way, inspect the socket and wiring.
Why Is the New Tail Light Bulb Still Not Working?
Do not immediately assume the replacement bulb is defective.
Several other problems can stop a rear light from working.
Check That the Bulb Is Fully Seated
Remove the bulb and reinstall it firmly.
A bulb that is sitting loosely in the socket may not make proper electrical contact.
Inspect the Socket Contacts
Corrosion and overheated contacts are common trouble spots in older lighting systems.
If you see damaged terminals or melted plastic, the socket may need replacement.
Check the Wiring Connector
Inspect the wiring behind the tail lamp for loose connectors, damaged insulation, or broken wires.
Do not pull on the wires while removing the lamp assembly.
Look for Moisture Inside the Tail Light
Condensation or standing water inside the housing can corrode electrical contacts.
A small amount of temporary condensation is different from a housing that repeatedly fills with water. Persistent moisture can point to a damaged seal, cracked lens, or housing problem.
Test With a Known-Good Bulb
New parts can occasionally be defective.
If possible, test another correct bulb before moving into deeper electrical diagnosis.
Consider an Electrical Fault
If the bulb, socket, and visible wiring all look good, the problem may be farther back in the lighting circuit.
At that point, proper voltage and ground testing with a multimeter is more useful than continuing to replace bulbs.
If several lighting functions fail at the same time, professional diagnosis may save time.
Do You Need a Bulb or a Complete Tail Light Assembly?
A failed light does not automatically mean you need an entire tail light housing.
Replace only the bulb when:
- The lens is intact
- The housing is dry
- The socket is undamaged
- The mounting points are secure
- Only the bulb has failed
Consider replacing or repairing the tail light assembly when:
- The lens is badly cracked
- Water repeatedly enters the housing
- Mounting tabs are broken
- The housing is damaged in a collision
- Internal components are damaged
If the socket is melted but the housing is otherwise good, you may only need a replacement socket or pigtail rather than a complete lamp.
Can You Install LED Tail Light Bulbs?
Yes, LED replacement bulbs are available for many 3157-style applications, but fitting one is not always as simple as installing an incandescent bulb.
Possible issues include:
- Bulb-out warnings
- Flickering
- Incorrect brightness difference between tail and brake functions
- Poor fit inside the housing
- Fast turn-signal flashing when LEDs are used in turn-signal circuits
- Different light distribution inside a reflector designed for incandescent bulbs
For the simplest replacement, a quality bulb matching the original specification is usually the least complicated choice.
If you choose LEDs, make sure they are designed for the exact socket and lighting function and comply with lighting rules where the vehicle is driven.
3157 vs. 3157K: Are They the Same?
They belong to the same general dual-filament bulb family and can look very similar, but you should not choose a replacement based on appearance alone.
The letter suffix can identify a different bulb specification or construction. When the vehicle documentation calls for a 3157K, the best practice is to use that specification or an explicitly listed equivalent from a reputable bulb manufacturer.
This is especially important when buying online, where product titles may group several similar bulb numbers together.
Does the Process Differ Between Laredo, Limited, Overland, and SRT8 Models?
The basic rear-lamp access procedure is similar across many 2007 Grand Cherokee WK trims, but equipment and lamp configurations can vary.
Do not rely on trim name alone when choosing a bulb.
Before ordering a replacement, check:
- Model year
- Market where the Jeep was originally sold
- Existing bulb number
- Lamp position
- VIN-based parts information when available
This is particularly useful for imported vehicles.
Common Tail Light Bulb Replacement Mistakes
A simple repair can become frustrating if one small detail is missed.
Buying the Wrong Bulb
The rear lamp contains multiple lighting functions. Verify the number before ordering.
Replacing the Wrong Socket
Identify whether the failed light is the tail, brake, turn, or reverse function before opening the housing.
Forcing the Tail Light Housing
If the lamp will not come out, check the fasteners and alignment points again. Forcing old plastic can break mounting tabs.
Pulling on the Wiring
Always hold the socket or connector, not the wires themselves.
Ignoring a Burned Socket
Repeated bulb failures may be a symptom of poor electrical contact or overheating.
Skipping the Test Before Reassembly
Test the new bulb while the housing is still accessible. It takes only a moment and can save you from removing everything again.
Overtightening the Fasteners
The tail light is held by plastic mounting points. Secure is enough.
How Long Does It Take to Change the Bulb?
If the fasteners and housing come apart normally, a first-time DIY owner can often complete the job in roughly 10 to 20 minutes.
Someone familiar with the vehicle may finish sooner.
Corroded sockets, damaged fasteners, broken clips, or electrical problems can make the repair take much longer.
How Much Does Tail Light Bulb Replacement Cost?
The bulb itself is usually the least expensive part of this repair.
DIY replacement normally costs much less than replacing the complete tail light housing because you are purchasing only the bulb and doing the labor yourself.
The total cost rises if you find:
- A melted socket
- Damaged wiring
- A cracked housing
- Water damage
- A larger electrical fault
For a simple burned-out bulb, replacing only the failed bulb is usually all that is required.
Frequently Asked Questions About Change Tail Light Bulb on a 2007 Jeep Grand
What size tail light bulb does a 2007 Jeep Grand Cherokee use?
Many North American 2007 Grand Cherokee WK models use a 3157K bulb for the rear stop/tail function. Other rear-light positions can use different bulbs. Always verify the existing bulb or vehicle-specific documentation before buying.
Is the brake light and tail light the same bulb?
On configurations using a dual-filament stop/tail bulb, the same bulb can perform both functions using separate filaments or circuits.
That is why the tail light can still work when the brake-light portion of the bulb has failed.
Can I use a 3157 instead of a 3157K?
They are closely related bulb types, but the safest choice is to follow the specification listed for your vehicle. If your Jeep specifies 3157K, use a 3157K or a replacement explicitly listed as compatible with that application.
How do I remove the tail light on a 2007 Jeep Grand Cherokee?
Open the rear liftgate, remove the accessible Torx fasteners along the inner edge of the tail light, and carefully pull the housing away from the body. Avoid prying against the paint or twisting the housing aggressively.
What size Torx bit is used for the tail light?
A T25 Torx driver is commonly used for the rear lamp fasteners on the WK-generation Grand Cherokee. Check the fastener before applying force in case yours has been replaced during a previous repair.
Do I need to disconnect the battery?
Normally, no. For a basic bulb replacement, turning off the ignition and exterior lights is generally sufficient.
Disconnecting power may be appropriate if you are repairing damaged wiring or performing more extensive electrical work.
Should I replace both tail light bulbs at the same time?
It is not required.
However, if both bulbs are the same age, the bulb on the opposite side may be approaching the end of its life. Some owners choose to replace them as a pair for convenience and more even light output.
Why is my turn signal flashing quickly?
A fast flash rate often indicates that the vehicle detects an exterior turn-signal lighting problem.
Check for a failed bulb first. If you recently installed LEDs, the lower electrical load of the LED may also affect turn-signal operation.
Can I drive with one tail light out?
Lighting laws vary by country, state, province, and territory, but driving with a required rear light not working can reduce visibility and may violate local road rules.
Replace a failed tail or brake light as soon as possible, especially before driving at night or in poor weather.
What if a new bulb keeps burning out?
Repeated failures can indicate a poor socket connection, corrosion, overheating, moisture, incorrect bulb type, or an electrical issue.
Inspect the socket and housing instead of continuing to install new bulbs.
Final Check Before Driving
Before considering the repair finished, walk around the back of the Jeep and verify everything.
Make sure:
- Both tail/running lights illuminate
- Both brake lights become brighter when the pedal is pressed
- Left and right turn signals work correctly
- The reverse lights were not disturbed
- The new bulb does not flicker
- The socket is locked into the housing
- The tail light housing sits flush with the body
- All fasteners are secure
- There is no loose wiring
Changing a tail light bulb on a 2007 Jeep Grand Cherokee is a manageable home repair for most owners. The job becomes much easier once you know which bulb has failed and avoid forcing the housing during removal.
Start by confirming the correct bulb for your exact Jeep, remove the rear lamp carefully, inspect the socket while it is open, and test the new bulb before putting everything back together. If the new bulb still does not work, move your attention to the socket, wiring, connections, and moisture rather than repeatedly replacing bulbs.