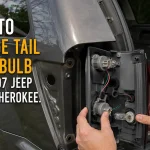
A cracked tail light, water inside the lens, broken mounting tabs, or a damaged housing can make the rear of your 2006 Jeep Liberty look rough and, more importantly, make your lights harder for other drivers to see.
Fortunately, replacing the complete tail light assembly is one of the more approachable DIY jobs on this Jeep.
For anyone searching for how to replace a tail light assembly Jeep Liberty 2006, the basic job is simple: open the rear swing gate, remove the two Torx fasteners, pull the rear lamp assembly away from the body, transfer or reconnect the bulbs and sockets as required, then install and test the replacement housing. Jeep’s 2006 Liberty owner’s manual confirms this basic removal sequence.
The job becomes slightly more complicated when the problem is not actually the housing. A failed bulb, damaged socket, poor electrical connection, or incorrect replacement assembly can leave you with a new tail light that still does not work.
This guide covers both the replacement and those common problems.
Quick Answer: How Do You Replace a 2006 Jeep Liberty Tail Light Assembly?
To replace the rear tail light assembly:
- Park the Jeep and switch off all exterior lights.
- Open the rear swing gate.
- Remove the two Torx fasteners securing the tail light.
- Carefully pull the rear lamp assembly away from the body.
- Remove or disconnect the bulb sockets from the old housing.
- Inspect the bulbs, sockets, connectors, and wiring.
- Transfer the reusable parts to the new assembly if necessary.
- Position the new housing correctly.
- Reinstall the Torx fasteners.
- Test the tail light, brake light, turn signal, hazards, and reverse light.
Jeep’s factory owner’s manual specifically calls for opening the swing gate, removing two Torx fasteners, removing the rear lamp assembly, and rotating the socket during bulb service.
Do not rush when pulling the assembly away from the vehicle. Old plastic mounting points can become brittle with age.
Should You Replace the Bulb, Socket, or Complete Tail Light Assembly?
Before ordering an entire housing, figure out what has actually failed.
A burned-out bulb does not automatically mean you need a complete tail light assembly.
| Problem | Most Likely Repair |
|---|---|
| One bulb has stopped working | Replace or test the bulb |
| Bulb works intermittently | Inspect socket and electrical connection |
| Socket is burned or badly corroded | Repair or replace socket |
| Lens is cracked | Replace complete assembly |
| Housing is broken | Replace complete assembly |
| Mounting tabs are broken | Usually replace complete assembly |
| Water repeatedly enters housing | Inspect seal; replacement may be required |
| New bulb still does not work | Check socket, connector, wiring, and circuit |
| Assembly does not sit securely | Inspect housing and mounting points |
If the lens and mounting structure are intact, start by checking the bulb and socket. Replacing an entire assembly before diagnosing a simple bulb failure wastes money.
On the other hand, tape and temporary sealants are poor long-term solutions for a badly cracked housing. If water can repeatedly enter the lamp, replacement is usually the cleaner repair.
Signs Your 2006 Jeep Liberty Tail Light Assembly Needs Replacement
A complete assembly makes sense when the physical housing itself can no longer do its job properly.
The Lens Is Cracked or Broken
A small surface mark is usually cosmetic. A crack that opens the housing to rain, washing water, or dirt is more serious.
Once contamination enters the lamp, you may start dealing with corrosion and unreliable electrical connections.
Water or Condensation Keeps Appearing Inside
A little temporary fogging is different from visible water collecting inside the housing.
If moisture repeatedly returns after the lamp dries, check for:
- Cracks in the lens
- Damaged housing seams
- Poor socket seals
- Incorrectly seated components
- Physical damage around the back of the lamp
The Mounting Tabs Are Broken
A tail light should sit securely against the body.
If broken mounting points allow it to shake, move, or sit unevenly, replacing the complete assembly is often better than trying to glue aged plastic back together.
The Housing Has Collision Damage
Even if the outer lens looks usable, inspect the back of the assembly after a minor rear-quarter impact.
Hidden cracks or damaged mounts can prevent a replacement bulb or socket from solving the problem.
What Bulb Does a 2006 Jeep Liberty Tail Light Use?
According to Jeep’s 2006 Liberty owner’s manual, the rear stop/tail light uses a 3157 P27/7W bulb. The manual separately lists a 3757 APY27/7W rear turn-signal bulb, so do not assume every bulb in the rear housing is identical.
That distinction matters when troubleshooting.
If your brake/tail function is out but another section of the assembly still works, identify which bulb performs that function before buying parts.
Bulb Replacement Tip
When installing a replacement bulb:
- Match the correct bulb specification.
- Make sure it sits securely in the socket.
- Inspect the socket for heat damage.
- Check the metal contacts for corrosion.
- Avoid forcing a bulb that does not fit correctly.
A correct housing cannot compensate for an incorrect or poorly seated bulb.
Make Sure You Buy the Correct 2006 Jeep Liberty Tail Light Assembly

This is one of the easiest places to make an expensive mistake.
Do not buy a housing simply because the product title contains the words “Jeep Liberty.”
Confirm the Model Generation
The 2006 Liberty belongs to the KJ generation. Jeep identifies the Liberty KJ as the 2002-2007 generation, with the later KK generation replacing it for 2008.
So if a listing is primarily for a 2008-2012 Liberty KK, it is not the same generation as your 2006 Liberty.
Useful fitment terms include:
- 2006 Jeep Liberty KJ tail light
- 2006 Jeep Liberty rear lamp
- Jeep Liberty KJ tail light assembly
- Jeep Liberty KJ rear light
Driver Side vs Passenger Side
Tail light housings are side-specific.
Before ordering, confirm whether you need:
- Left / driver-side assembly
- Right / passenger-side assembly
Do not assume that a listing showing a pair also includes both sides. Read the product description carefully.
Jeep Liberty KJ vs Jeep Cherokee KJ

International owners should pay particular attention here.
Jeep Australia identifies the KJ-era model as the Cherokee (KJ) in its market history, while the North American name is Liberty.
That means owners in markets such as Australia or the UK may encounter search terms such as:
- Jeep Cherokee KJ rear light
- Jeep Cherokee KJ tail lamp
- Jeep KJ rear lamp assembly
If you own a non-US-market vehicle, confirm the local vehicle specification rather than assuming a US-market lamp listing is automatically correct.
Do Not Rely on One Universal OEM Number
Mopar’s parts catalog lists multiple left- and right-side tail-stop-turn lamp assemblies for the 2006 Liberty, reflecting different vehicle configurations.
That is why the safest ordering process is:
- Confirm the model year.
- Confirm KJ generation.
- Confirm left or right side.
- Check the existing lamp.
- Match the seller’s compatibility information.
- Use the VIN when an OEM parts catalog provides that option.
Jeep/Mopar parts services specifically provide VIN-based vehicle identification for parts matching.
Check What Comes With the Assembly
A replacement housing may be sold:
- As the housing only
- With bulb sockets
- With some bulbs installed
- With a wiring pigtail
- As a complete lamp unit
Never assume bulbs and sockets are included.
Check before starting the repair so you do not remove the old lamp and discover that you are missing a part.
Tools and Parts You’ll Need
The job does not require a large tool collection.
Have these ready:
- Replacement tail light assembly
- Correctly fitting Torx driver or Torx bit
- Ratchet or driver handle if needed
- Clean gloves
- Flashlight
- Clean cloth
- Replacement bulb if required
- Replacement socket or connector if yours is damaged
Jeep’s factory procedure confirms that two Torx fasteners secure the rear lamp during this service. The owner’s manual does not specify the Torx bit size in that procedure, so use a bit that fits the fastener securely instead of forcing an incorrect size.
A loose-fitting bit can damage the fastener head and turn an easy job into an annoying one.
How to Remove the Tail Light Assembly on a 2006 Jeep Liberty
Removal is straightforward, but use controlled pressure.
Step 1: Park Safely
Park on a flat surface.
Put the transmission in Park, apply the parking brake, turn off the ignition, and switch off the exterior lights.
You do not want the lamps powered while you are handling bulb sockets and connectors.
Step 2: Open the Rear Swing Gate
Open the rear gate so you can reach the tail light fasteners.
Jeep’s 2006 owner’s manual begins the rear lamp procedure by opening the swing gate.
Step 3: Remove the Two Torx Fasteners
Locate the two Torx fasteners holding the rear lamp assembly.
Use a Torx bit that fits firmly and remove both fasteners.
Keep them somewhere safe. Small hardware has a habit of disappearing exactly when you are ready to finish the job.
Step 4: Pull the Tail Light Assembly Away From the Body
Once the fasteners are out, support the housing and carefully pull it away from the vehicle.
Do not jam a metal screwdriver between the lens and painted body panel.
If the assembly feels stuck, check that every fastener has been removed before applying more force.
The factory procedure calls for removal of the rear lamp assembly after the two Torx fasteners are removed.
Step 5: Access the Bulb Sockets
With the housing pulled away, you can access the sockets at the back.
Rotate the required socket to release it from the housing, following the orientation of the original components. Jeep’s manual specifically describes rotating the socket during rear-lamp bulb service.
Do not twist the wiring itself.
Hold the socket body.
How to Replace a Tail Light Assembly Jeep Liberty 2006

Now that the old housing is free, the rest of the job is mostly inspection, transfer, and reassembly.
Step 1: Compare the Old and New Assemblies
Before moving any parts, place the old and new housings next to each other.
Compare:
- Overall shape
- Left/right orientation
- Mounting positions
- Socket openings
- Electrical provisions
- Lens layout
- Rear housing depth
If something obviously does not match, stop.
It is better to discover a fitment problem on the workbench than after forcing the wrong assembly onto the Jeep.
Step 2: Inspect the Old Bulbs
Look at every bulb you plan to reuse.
Replace bulbs that show:
- Broken filaments
- Darkened glass
- Burned contacts
- Physical damage
For the rear stop/tail function, Jeep specifies a 3157 P27/7W bulb in the 2006 Liberty owner’s manual.
Step 3: Inspect the Bulb Sockets
Do not skip this step.
Look inside each socket for:
- Melted plastic
- Dark or burned areas
- Green or white corrosion
- Bent terminals
- Loose bulb fit
- Moisture
- Damaged seals
A fresh housing will not fix a failed socket.
Step 4: Inspect the Wiring and Connector
Follow the wires behind the lamp as far as you can easily see.
Look for:
- Cracked insulation
- Pinched wires
- Loose terminals
- Corrosion
- Previous repair work
- Damaged connectors
Do not pull a connector apart by tugging on the wires. Hold the connector body.
Step 5: Transfer the Bulbs and Sockets
If the replacement assembly is supplied without bulbs or sockets, move the usable components from the old lamp to the new one.
Install each component in the same relative position.
Do not mix the brake/tail and turn-signal bulbs simply because the bases appear similar. Jeep lists different bulb specifications for these rear functions.
Step 6: Seat Each Socket Correctly
Insert each socket into its opening and rotate it until it locks securely.
A socket that is only partly installed can allow movement or moisture into the housing.
Step 7: Position the New Assembly
Bring the new tail light into position.
Make sure:
- Wiring is not trapped
- No socket is loose
- The housing is correctly oriented
- Mounting points line up
- Nothing is caught between the lamp and body
Do not use the mounting screws to force a badly aligned housing into position.
Step 8: Reinstall the Torx Fasteners
Start both fasteners carefully.
Tighten them until the assembly is secure.
There is no benefit to crushing the plastic housing by overtightening the screws.
The goal is a lamp that sits firmly and evenly against the vehicle.
Step 9: Check the Fit
Look around the edge of the assembly.
It should:
- Sit evenly
- Feel secure
- Not rock when touched lightly
- Have no obviously trapped wiring
- Match the body opening properly
If the new housing sits crooked, remove it and inspect the mounting points instead of tightening the screws harder.
Step 10: Test the Lights
Do not close the job until every rear-light function has been checked.
How to Test the New Tail Light Assembly
Replacing the housing is only half the repair.
You also need to know that it actually works.
Test the following:
Running or Tail Lights
Switch on the parking or exterior lights.
Confirm that the tail-light function illuminates correctly.
Brake Lights
Ask another person to press the brake pedal while you stand behind the Jeep.
If you are working alone, use a safe method to verify operation without leaving the vehicle unsecured.
Turn Signal
Activate the turn signal for the side you repaired.
Make sure the lamp flashes normally.
Hazard Lights
Switch on the hazard flashers and inspect both rear lamps.
Comparing the repaired side with the working side can help you spot brightness or timing differences.
Reverse Light
With appropriate safety precautions, verify the reverse-light function as well.
The 2006 Liberty rear housing carries multiple rear-light functions, and Jeep’s manual groups the rear tail, stop, turn-signal, and back-up lights within the same service area.
What If the New Tail Light Assembly Still Doesn’t Work?
Do not immediately assume the new housing is defective.
Work through the electrical path logically.
Check the Bulb First
Remove the affected bulb and inspect it.
If you have a known-good correct bulb, testing with it can quickly eliminate one possible cause.
Inspect the Socket
Look closely for burned contacts or damaged plastic.
A bulb that feels loose inside the socket may not maintain a reliable connection.
Reseat the Socket
Remove and reinstall the socket.
Make sure it fully locks into the housing.
Check the Connector
Disconnect and reconnect the electrical connector if accessible.
Look for moisture, corrosion, pushed-back terminals, or a connector that does not lock properly.
Inspect the Wiring
Look for obvious wire damage near the tail light.
Pay particular attention if:
- The Jeep has previous collision damage
- Trailer wiring has been added
- The problem started after body work
- Someone previously modified the rear-light wiring
Check the Relevant Circuit Protection
If multiple lights on the circuit are not operating, consult the vehicle’s fuse and electrical information rather than repeatedly replacing bulbs.
A complete electrical diagnosis may require a multimeter and wiring information.
Compare With the Working Side
The opposite tail light can be a useful reference.
Compare:
- Bulb position
- Socket orientation
- Connector seating
- Brightness
- Housing installation
Sometimes the difference becomes obvious when you look at both sides together.
Why Does My Jeep Liberty Tail Light Keep Burning Out?
Repeated bulb failure is a clue.
Simply installing another bulb may only reset the clock until the next failure.
Check these areas.
Loose Bulb Connection
If the bulb does not sit tightly in the socket, vibration can cause intermittent operation and poor contact.
Damaged Socket
Heat-damaged terminals or plastic are reasons to inspect the socket instead of blaming every new bulb.
Moisture Inside the Lamp
Water and electrical contacts are a bad combination.
If condensation or water repeatedly appears inside the assembly, find the entry point.
Wiring Problems
Damaged insulation, poor terminal contact, or previous wiring modifications can create intermittent faults.
Incorrect Bulb
Use the correct bulb specification for the function.
The 2006 owner’s manual lists 3157 P27/7W for the rear stop/tail light and 3757 APY27/7W for the rear turn-signal lights.
How to Deal With Water or Condensation Inside the Tail Light
First determine whether you have light temporary fogging or actual water intrusion.
If water droplets, pooling, or repeated heavy condensation appear inside the housing, inspect:
- Lens cracks
- Housing seams
- Socket seals
- Rear housing damage
- Previous repairs
Drying the lamp without fixing the leak only treats the symptom.
If the housing itself is cracked or distorted, replacing the assembly is usually more reliable than repeatedly trying to reseal badly damaged plastic.
After installing a replacement, check the housing again after rain or a car wash.
Common Mistakes When Replacing a Jeep Liberty Tail Light
Most problems with this job come from rushing rather than from mechanical difficulty.
Ordering the Wrong Generation
A 2006 Liberty is a KJ, not the later KK generation. Jeep identifies the Liberty KJ as the 2002-2007 generation and the KK as its 2008 replacement.
Ordering the Wrong Side
Double-check left versus right before buying.
Assuming One Part Number Fits Every 2006 Liberty
Mopar lists multiple left- and right-side tail-stop-turn lamp configurations for this model year. Verify the actual vehicle rather than choosing a random number from a forum or marketplace listing.
Forcing the Wrong Torx Bit
Use a Torx driver that fits securely.
If the bit feels loose, stop before stripping the fastener.
Prying Against Painted Bodywork
Do not attack the lamp with a metal screwdriver.
The goal is to remove the light, not add a paint repair to the project.
Ignoring the Old Socket
If the socket is visibly damaged, moving it into a brand-new housing does not solve anything.
Pinching the Wiring
Check behind the assembly before tightening it.
Overtightening the Fasteners
The housing is plastic.
Secure is enough.
Forgetting the Final Test
Never assume the repair is successful just because the new housing looks good.
Test every lighting function before driving.
How Long Does It Take to Replace a 2006 Jeep Liberty Tail Light Assembly?
For a straightforward replacement with the correct part on hand, this is generally a short DIY project.
The actual time depends more on the condition of the Jeep than on the number of steps.
The job can take longer when:
- Fasteners are damaged
- The housing is stuck
- Sockets are corroded
- Wiring repairs are needed
- The replacement part does not match
- Previous collision repairs have changed alignment
If everything comes apart normally, the mechanical portion is simple because the factory procedure uses only two Torx fasteners before the rear lamp assembly is removed.
How Much Does a 2006 Jeep Liberty Tail Light Replacement Cost?
The total cost depends on what actually needs replacing.
Bulb Only
This is usually the least expensive repair.
If the housing and socket are healthy, there is no reason to buy the entire assembly.
Socket Repair
The cost increases slightly if a damaged bulb socket or connector must be replaced.
Complete Aftermarket Assembly
Aftermarket housings are often chosen when the lens or mounting structure is broken.
Check fitment and what components are included before comparing prices.
OEM Assembly
OEM parts can cost more, and Mopar catalogs show multiple lamp configurations for the 2006 Liberty. Verify the correct vehicle configuration before ordering.
Professional Installation
A shop will add labor and may charge diagnostic time if the light still does not operate after the assembly is installed.
If you are comfortable with basic hand tools and there is no electrical fault, doing the housing replacement yourself can eliminate the installation labor charge.
DIY vs Mechanic: Should You Replace It Yourself?
For most owners, replacing the physical housing is a reasonable DIY project.
| Situation | DIY Makes Sense | Mechanic May Be Better |
|---|---|---|
| Cracked housing | Yes | Optional |
| Broken mounting tab | Yes | Optional |
| Simple bulb transfer | Yes | Optional |
| Melted connector | Possible | Often |
| Damaged wiring | Only with electrical experience | Yes |
| Repeated fuse problem | Not ideal for guessing | Yes |
| Collision damage around lamp | Depends on severity | Often |
| New assembly still does not work | Basic checks first | Electrical diagnosis may help |
Replacing parts and diagnosing circuits are two different jobs.
If the housing replacement is easy but the light remains dead, knowing when to stop swapping parts can save money.
How to Prevent Future Tail Light Problems
A few simple habits can extend the life of the repair.
Deal With Cracks Early
Small damage can become a water-entry point.
Check for Moisture
If condensation suddenly appears after installing the new assembly, inspect the installation rather than ignoring it.
Keep Sockets Clean and Secure
Loose or contaminated connections can create intermittent lighting problems.
Use the Correct Bulbs
Jeep specifies different bulbs for the rear stop/tail and turn-signal functions on the 2006 Liberty.
Do Not Overtighten the Housing
More torque is not better when plastic mounting points are involved.
Test Your Rear Lights Regularly
A quick walk-around can catch a failed rear lamp before someone else points it out on the road.
Frequently Asked Questions
Can I replace a 2006 Jeep Liberty tail light assembly myself?
Yes. If the problem is limited to the housing, bulbs, or easily accessible sockets, the replacement is suitable for many DIY owners. Jeep’s factory procedure requires opening the swing gate, removing two Torx fasteners, and removing the rear lamp assembly.
How do you remove the tail light assembly on a 2006 Jeep Liberty?
Open the rear swing gate, remove the two Torx fasteners securing the lamp, and carefully remove the rear lamp assembly. Access the sockets from the back of the housing.
How many screws hold the 2006 Jeep Liberty tail light?
Jeep’s 2006 owner’s manual specifies two Torx fasteners for rear lamp removal.
What size Torx bit do I need?
The 2006 Jeep Liberty owner’s manual identifies the fasteners as Torx but does not state the Torx bit size in its rear-lamp replacement procedure. Use a bit that fits your fastener firmly instead of forcing an uncertain size.
What bulb does a 2006 Jeep Liberty use for the rear stop and tail light?
Jeep lists a 3157 P27/7W bulb for the rear stop/tail lights in the 2006 Liberty owner’s manual.
Is the rear turn-signal bulb also a 3157?
The owner’s manual separately lists a 3757 APY27/7W bulb for the rear turn-signal lights, so confirm which lighting function you are servicing before buying a bulb.
Should I replace the bulb or the entire tail light assembly?
Replace only the bulb when the housing, mounting points, sockets, and connections are in good condition.
Replace the complete assembly when the lens or housing is cracked, mounting points are broken, or physical damage prevents the lamp from sealing or mounting properly.
Why doesn’t my new Jeep Liberty tail light work?
Start with the bulb, then inspect the socket, connector, wiring, and relevant electrical circuit. A new housing cannot repair an electrical fault elsewhere in the vehicle.
Why is there water inside my Jeep Liberty tail light?
Check the lens, housing seams, socket seals, and rear housing for cracks or poor sealing. Repeated water entry usually means the source of the leak still needs to be corrected.
Are 2005, 2006, and 2007 Jeep Liberty tail lights all the same?
Do not assume interchangeability based on appearance alone. The 2006 Liberty is part of the 2002-2007 KJ generation, but Mopar lists multiple rear lamp configurations even within the 2006 model year. Verify your specific vehicle, side, configuration, and part fitment before ordering.
Is a 2006 Jeep Liberty a KJ?
Yes. Jeep identifies the Liberty KJ as the 2002-2007 generation.
Why do I see Jeep Cherokee KJ when searching for parts?
The KJ was marketed under different naming conventions in different regions. Jeep Australia’s history, for example, identifies the KJ-era vehicle as the Cherokee KJ. International owners should therefore verify local-market fitment rather than relying only on a US Liberty listing.
Do I need to disconnect the battery to change the complete housing?
For a straightforward housing and bulb-service procedure, Jeep’s owner’s manual describes opening the swing gate, removing the Torx fasteners, removing the lamp assembly, and servicing the sockets without listing battery disconnection as part of that rear-lamp procedure.
Turning the ignition and exterior lights off before working is still sensible. If you are repairing damaged wiring rather than simply replacing the lamp, follow appropriate electrical repair precautions.
How much does a 2006 Jeep Liberty tail light replacement cost?
It depends on whether you need only a bulb, a socket, an aftermarket housing, or an OEM lamp. Because Mopar lists multiple lamp configurations for the 2006 Liberty, verify fitment first before comparing prices.
Final Safety Check Before Driving
Before putting away your tools, run through this checklist:
- Tail light housing sits firmly against the body
- Both Torx fasteners are secure
- No wiring is trapped behind the housing
- Bulb sockets are fully locked
- Tail/running light works
- Brake light works
- Turn signal works
- Hazard light works
- Reverse light works
- No obvious moisture is inside the new housing
- The repaired lamp is similar in brightness and operation to the opposite side
Replacing the tail light assembly on a 2006 Jeep Liberty is not a complicated repair when the housing itself is the problem. The key is to diagnose before buying, order the correct KJ lamp for your vehicle, inspect the old bulb sockets and wiring instead of blindly transferring them, and test every function when the new assembly is installed.
Two Torx fasteners may be all that stand between you and the old housing, but the few extra minutes spent checking bulbs, sockets, wiring, fitment, and moisture can prevent you from having to do the same repair twice.