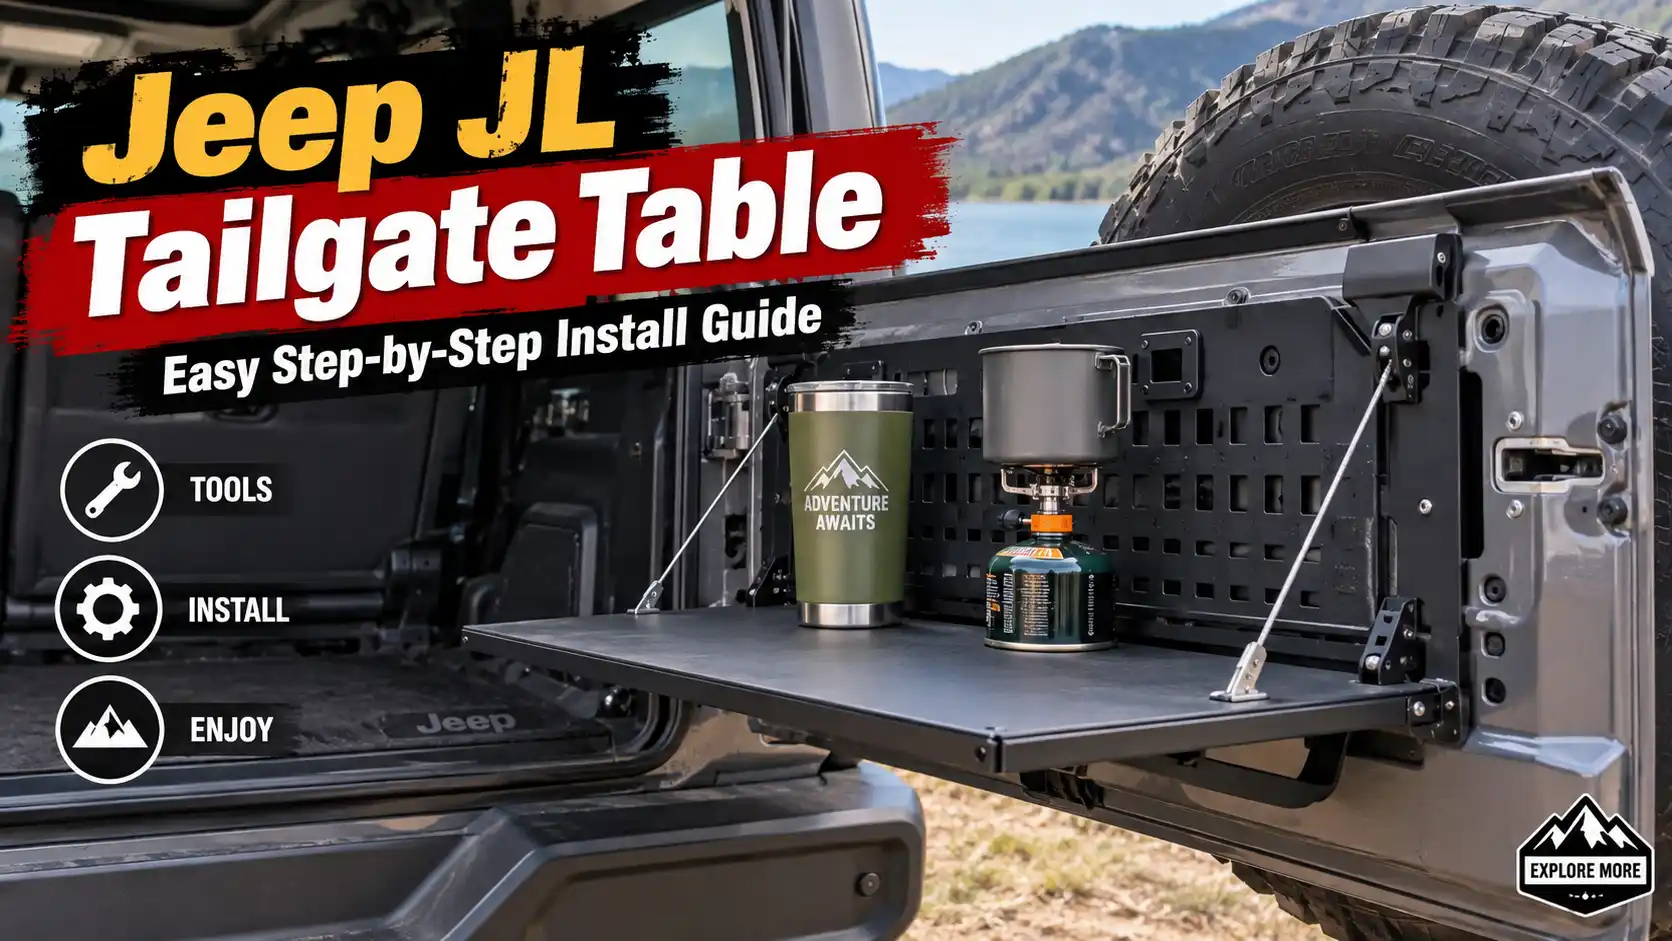
A Jeep Wrangler is built for adventure, but hauling a table is a chore. A tailgate table turns your vehicle's closing gate into an instant workstation or dining surface. This Jeep JL Tailgate Table Install Guide covers every step, from choosing the right mount to final torque checks.
The biggest decision factor is often your existing Jeep gear. A sport bar, heavy-duty rear bumper, or an oversized spare tire carrier changes everything. Factory tie-down rails under the tailgate provide a proven mounting point, but clearances vary.
Per manufacturer specifications, those rail slot spacing typically measures around 31 inches wide, which locks the compatible bracket designs for most aftermarket tables.

Quick Answer
The right Jeep JL tailgate table install starts with a simple compatibility check. Bolt-on models use the factory tie-down rails, while hitch-mount versions require a rear receiver tube. A fold-flat design saves space but may add some flex under load.
You can complete most installations with basic hand tools in about 45 minutes. Always verify that the table does not block the tailgate latch or brake lights before driving off-road.
The Problem: Why Tailgate Tables on Jeep JLs Often Fail or Wobble
You buy a table, bolt it to the rails, and it still shakes when you set a heavy coffee mug on it. That wobble usually comes from three places: mismatched rail hardware, an undersized support leg, or loose bolts after trail vibration. The factory tie-down loops are strong, but they are designed for cargo straps, not a rigid lever arm like a table.
When the table bracket sits outside the rail channel, it pivots and amplifies every bump.
Vibration loosens standard nuts quickly. Without lock washers or thread-locking compound, bolts back out over time. A second common failure point is the rear support foot.
Cheap tables use thin legs that bend or slide on uneven ground. Heavy loads concentrate stress on the mounting brackets, not the tabletop surface itself.
Clearance is another silent wreck. Sport bars, rear step bumpers, or aggressive tire carriers can hit the table folded edge. If the table touches the bar while stowed, it will not lay flat.
That same contact creates constant rubbing and loosens fasteners faster. You want a system that matches your exact Jeep setup, not a generic box-store find.
Quick Insight: Your Jeep JL Sport Bar Is the Biggest Decision Factor
Your sport bar dictates the table shape and mounting style. Most bolt-on tables extend upward from the tailgate rail area. They clear the floor but rise into the space just behind the rear seats and below the roofline.
A sport bar sits in that exact zone. It also frames the upper rear window opening, which affects how high the table can go before scraping.
Most Jeep Wrangler JL sport bars measure roughly 51 inches above the bed floor. Aftermarket bars sometimes sit higher or deeper. The table bracket must clear the bar lower cross-tube without forcing the tailgate closed.
If the bar is thick or has a forward-leaning angle, it blocks standard U-shaped brackets. You either need a low-profile table that slots underneath or a hitch-mounted unit that swings out clear of the bar entirely.
Hitch mounts completely sidestep this issue. They pivot away from the tailgate, resting on a rear receiver tube instead. This frees the sport bar area for tall gear or canopy setups.
The trade-off is you lose the rear bumper step feature and sometimes block access to the rear camera. Choosing the right mount depends on your daily driving priorities and how you use your Jeep. If you are planning other interior upgrades alongside your table, checking out a quality drawer system installation can help you maximize your cargo organization strategy.
Assessing Your Rig: Checking Sport Bar, Spare Tire, and Bumper Setup
Before ordering a table, walk around your Jeep and note the rear components. Start with the spare tire carrier. If you run a factory carrier with a full-size tire, the tire swings out and occupies the exact swing path of many fold-out tables.
Carrier clearance often exceeds 20 inches from the tailgate latch, which blocks most fixed-width tables. You need a table with a narrow vertical profile or a hitch-mount that clears the tire.
Next, examine your rear bumper. Factory bumpers have a clean, simple shape. Aftermarket rock sliders or bumpers introduce step treads, light mounts, or winch fairleads that change the available mounting space.
Some hitches mount to the receiver hole, but the bumper lower control arm might interfere with the table swing arm. Measure the distance from the hitch receiver tube to any protruding bumper parts.
Then, inspect the sport bar for width and position. Is it a tubular frame or a solid plate? Does it attach directly to the body or sit on extended gussets?
Gusseted bars sit farther back, giving slightly more room but changing the table leverage point. Record these measurements so you can compare them against product dimensions. The goal is knowing exactly what your Jeep looks like before picking a solution.
Make a simple checklist:
- Sport bar model and tube thickness
- Rear tire carrier type and swing radius
- Bumper style (factory, steel, aluminum, with or without step)
- Available height from tailgate floor to sport bar underside
- Clearance between tailgate latch and any fixed object behind it
This prep work eliminates guesswork and prevents returns. It also helps you ask the right questions when researching options.
How It Works: Bolt-On vs. Hitch-Mount vs. Fold-Flat Table Systems
Understanding the core mounting styles keeps you from mixing incompatible parts. A bolt-on table attaches directly to the Jeep Wrangler JL factory tie-down rails in the tailgate. These rails are built into the stamped steel of the tailgate itself, positioned on both sides near the bottom edge.
The table uses U-bolts or clamping brackets that slip into the rail channels and tighten against the rail flanges.
Bolt-on tables offer solid, direct force transfer. The load goes straight into the tailgate panel, which is surprisingly rigid when properly supported. However, they rely on the tailgate being down and locked.
The table becomes part of the tailgate assembly. If the tailgate sags over time, the table tilts forward. You may need periodic readjustment or shims to keep the surface level.
A hitch-mount table uses a different connection point. It inserts into a Class III rear receiver tube, typically 2 inches in diameter. The mount then features a long horizontal arm that swings outward from the rear bumper area.
The table platform sits at the end of that arm. This design completely removes the table from the tailgate and sport bar zones.
Hitch mounts excel in stability because the receiver tube is engineered for heavy towing loads. You can often carry 500 pounds or more of dynamic tongue weight, meaning the table easily handles cooking rigs or tool chests. The downside is loss of rear bumper functionality and potential interference with backup cameras or hitch covers.
You must also consider the Jeep tow package ratings if you plan to use the same receiver for other accessories. If your rig includes a trailer setup, reviewing a Mopar brake controller guide ensures your towing and table systems both operate safely.
Fold-flat tables take a middle-ground approach. Many models combine a bolt-on bracket with a hinge mechanism that folds the table top upward against the closed tailgate. When folded, the entire unit becomes a thin panel that matches the tailgate contour.
This preserves rear visibility and reduces wind noise at highway speeds.
When unfolded, fold-flat designs usually deploy a single central support leg that braces against the bed floor or a cross-member. That leg creates a triangular force triangle, distributing load away from the rail brackets. Some premium models add secondary braces or ratcheting tension arms to eliminate sag.
These mechanisms add complexity but reduce wobble significantly compared to simple drop-leg tables.
| Mounting Style | Attachment Point | Weight Capacity Range | Tailgate Interference | Best For |
|---|---|---|---|---|
| Bolt-on | Factory tie-down rails | 75–150 lbs | High | Daily use, fixed camp kitchen |
| Hitch-mount | Rear receiver tube | 100–500+ lbs | None | Heavy loads, off-road recovery |
| Fold-flat | Rails plus bed floor brace | 50–120 lbs | Medium | Visibility, highway driving, small parties |
Each system serves a different priority. Bolt-ons are simplest. Hitch-mounts handle the heaviest gear.
Fold-flats balance accessibility with rear visibility. Knowing these differences guides your choice before you ever touch a wrench.

Bolt-On Tables: Pros, Cons, and Perfect Fitment for Tie-Down Rails
Bolt-on tables dominate the market because they use existing Jeep hardware patterns. Most Wrangler JL models feature two longitudinal rails on each side of the tailgate opening. These rails contain multiple T-slot channels spaced evenly along their length.
The channels accept standard M10 or 3/8-inch U-bolts, which is why so many manufacturers design around them.
Perfect fitment means the table bracket aligns with those T-slots without modification. Before buying, measure the distance between the inner edges of your rail channels. Then compare that measurement to the bracket spread specified by the manufacturer.
If the bracket is too wide, it will not seat. Too narrow, and it will rattle. A correct match ensures even pressure distribution across the bracket face.
Several advantages make bolt-on the default choice for most owners. Installation requires no drilling into sheet metal. The factory rail already provides shear strength and vibration damping.
You can remove the table in minutes by loosening the corner nuts. This reversibility is valuable if you ever sell your Jeep or swap to a different rear setup. When considering additional accessories for your Wrangler, exploring corner guard options can complement your tailgate table by protecting your investment.
However, bolt-on systems have real limitations. The tailgate must stay down during use, which blocks your rear view and prevents cargo storage behind the seats. Opening the tailgate while loaded shifts the entire table plane downward, spilling liquids or dislodging gear.
You need a secondary locking strap or magnetic mat to secure items during transit. Additionally, repeated tailgate cycles stress the bracket bolts over time, requiring periodic re-torque checks.
Weight capacity remains a critical specification. Light-duty tables list 75 pounds of max load, suitable for a camp stove and a few plates. Medium-duty units handle 100 to 125 pounds, enough for a full grill or heavy tool chest.
Heavy-duty versions reach 150 pounds or more, often featuring dual cross-braces or reinforced corner joints. Choose based on your heaviest expected load, plus a safety margin of at least 20 percent.
Surface material matters too. Powder-coated steel offers maximum durability and scratch resistance but adds significant weight. Aluminum tops are lighter and resist rust, but softer surfaces dent more easily under sharp tools.
Some models integrate a removable cutting board or magnetic knife strip for added utility. These features improve daily usability without affecting structural integrity.
To achieve perfect fitment, follow these steps during selection:
- Verify rail channel width and T-slot depth
- Confirm bracket bolt pattern matches your Jeep trim
- Check overall table width against your spare tire carrier clearance
- Review load ratings for your intended use case
- Ensure fold-flat design aligns with your sport bar height
Hitch-Mount Tables: When You Need a Rear Receiver and Why
Hitch mounts answer the problem when bolt-on tables will not clear your rig. If you run a tall sport bar, oversized spare tire carrier, or aftermarket bumper with steps, a hitch mount keeps the table completely out of that conflict zone. The receiver tube sits below the bumper, so nothing interferes with rear visibility or tailgate operation.
You need a Class III receiver, typically a 2-inch square tube, rated for at least 500 pounds tongue weight. Most Jeep Wrangler JL models tow between 3,500 and 5,000 pounds depending on engine and axle ratio. Verify your tow package rating before installing heavy table systems.
Exceeding receiver ratings risks bent tubes or bracket failure while driving.
Hitch-mounted tables often feature a swing-away design. A manual latch or ratcheting mechanism tilts the entire platform sideways when you open the tailgate. This lets you access cargo without removing the table.
Some models add a tilt-adjustment feature so you can level the surface on uneven ground.
The main trade-off is rear step loss. Factory bumpers double as entry steps. Aftermarket bumpers usually include integrated stair treads.
A hitch mount occupies that space and blocks both functions. You must climb higher or use a separate step rung. Rear camera access can also suffer if the mount protrudes into the lens field of view.
Consider a hitch mount if you prioritize:
- Maximum load capacity for heavy cooking equipment
- Clearance around sport bars and tire carriers
- Ability to open the tailgate freely without disassembly
- Rear bumper step functionality is not critical
- Occasional trailside repairs requiring stable work surface
If rear step access and compact storage matter more, a fold-flat bolt-on system may serve you better. The receiver mount excels for serious overlanders hauling full camp kitchens. It struggles with casual weekend warriors who value easy rear access above all else.
Fold-Flat vs. Fixed Tables: Space-Saving vs. Stability Trade-Offs
Fixed tables stay rigid and level under heavy loads but block rear visibility when folded. Fold-flat designs collapse against the tailgate for clean highway driving but may introduce flex under dynamic stress. Neither option wins outright.
Each serves different driving styles and use cases.
A fixed bolt-on table maintains constant height regardless of position. The tabletop sits level when the tailgate lowers, then rises slightly as the gate closes. The surface remains parallel to the ground during normal use.
Heavy grills, tool chests, and cooler bags stay stable without shifting. Riders will not tip cups or spill drinks over rough terrain.
Fold-flat tables hinge upward when the tailgate closes. The platform swings parallel to the gate surface, creating a thin panel that matches the vehicle profile. Wind noise decreases noticeably at highway speeds.
Rear window visibility returns fully. Rock climbers or mountain bikers loading gear through the rear hatch can do so without removing the table.
The stability compromise comes from the folding mechanism itself. Hinges and pivot points introduce small amounts of play. Under heavy loads, this play translates into micro-movements across the surface.
Light camping gear and coffee mugs will not notice the difference. Heavy cast-iron skillets or full tool trays will. Users report wobble increasing with load weight on fold-flat designs.
Many modern fold-flat tables address this with secondary support braces. A telescoping leg extends downward from the hinged platform to brace against the bed floor or cross-member. This creates a three-point support triangle that locks out most flex.
Premium models add tension ratchets that pull the table tight against the tailgate when stowed. These systems close the gap between fold-flat convenience and fixed-table rigidity.
| Feature | Fixed Bolt-On Table | Fold-Flat Table |
|---|---|---|
| Surface stability | High | Moderate to High |
| Rear visibility when closed | Blocked | Full |
| Wind noise at speed | Higher | Lower |
| Installation complexity | Simple | Moderate |
| Load capacity range | 100–150 lbs | 50–120 lbs |
| Best for | Heavy gear, fixed campsites | Highway trips, multi-use loading |
Choose fixed tables when you camp in one spot for extended periods and value unwavering stability. Pick fold-flat models when you drive long distances daily and need rear access for loading gear frequently. Both options work well within their intended contexts.
Do not expect either to excel at everything simultaneously.
Step-by-Step: Installing a Bolt-On Tailgate Table on Your JL
Bolt-on installation follows a straightforward sequence if you prepare properly. Start by lowering the tailgate completely and inspecting the factory tie-down rails. Remove any debris, mud, or plastic clips lodged in the T-slots.
Clean surfaces ensure proper bracket seating and prevent bolt binding during installation.
Position the table brackets over each rail channel. The U-bolts should slip through the bracket holes and drop into the T-slot tracks. Align the bracket front edge with the recommended mounting position marked by the manufacturer.
This position typically sits 2 to 4 inches forward of the tailgate rear edge for optimal leverage.
Insert lock washers and nuts onto the U-bolts by hand first. Tighten until the bracket feels snug but still allows minor adjustment. Do not fully torque yet.
Both brackets need alignment before final tightening. Slide the table top onto the brackets if it mounts separately, or position the integrated platform to confirm level fit.
Level the table using a small bubble level placed across the surface. Adjust bracket position left or right until the platform sits perfectly horizontal. Check clearance against your sport bar again from this position.
The table should clear the bar by at least one inch when folded.
Once aligned, tighten all nuts in a cross pattern similar to lug nuts on a wheel. Start at 15 foot-pounds, then increase to 25 foot-pounds in stages. Over-torquing can deform the rail channels or crack the tailgate paint.
Follow the manufacturer specified torque value exactly.
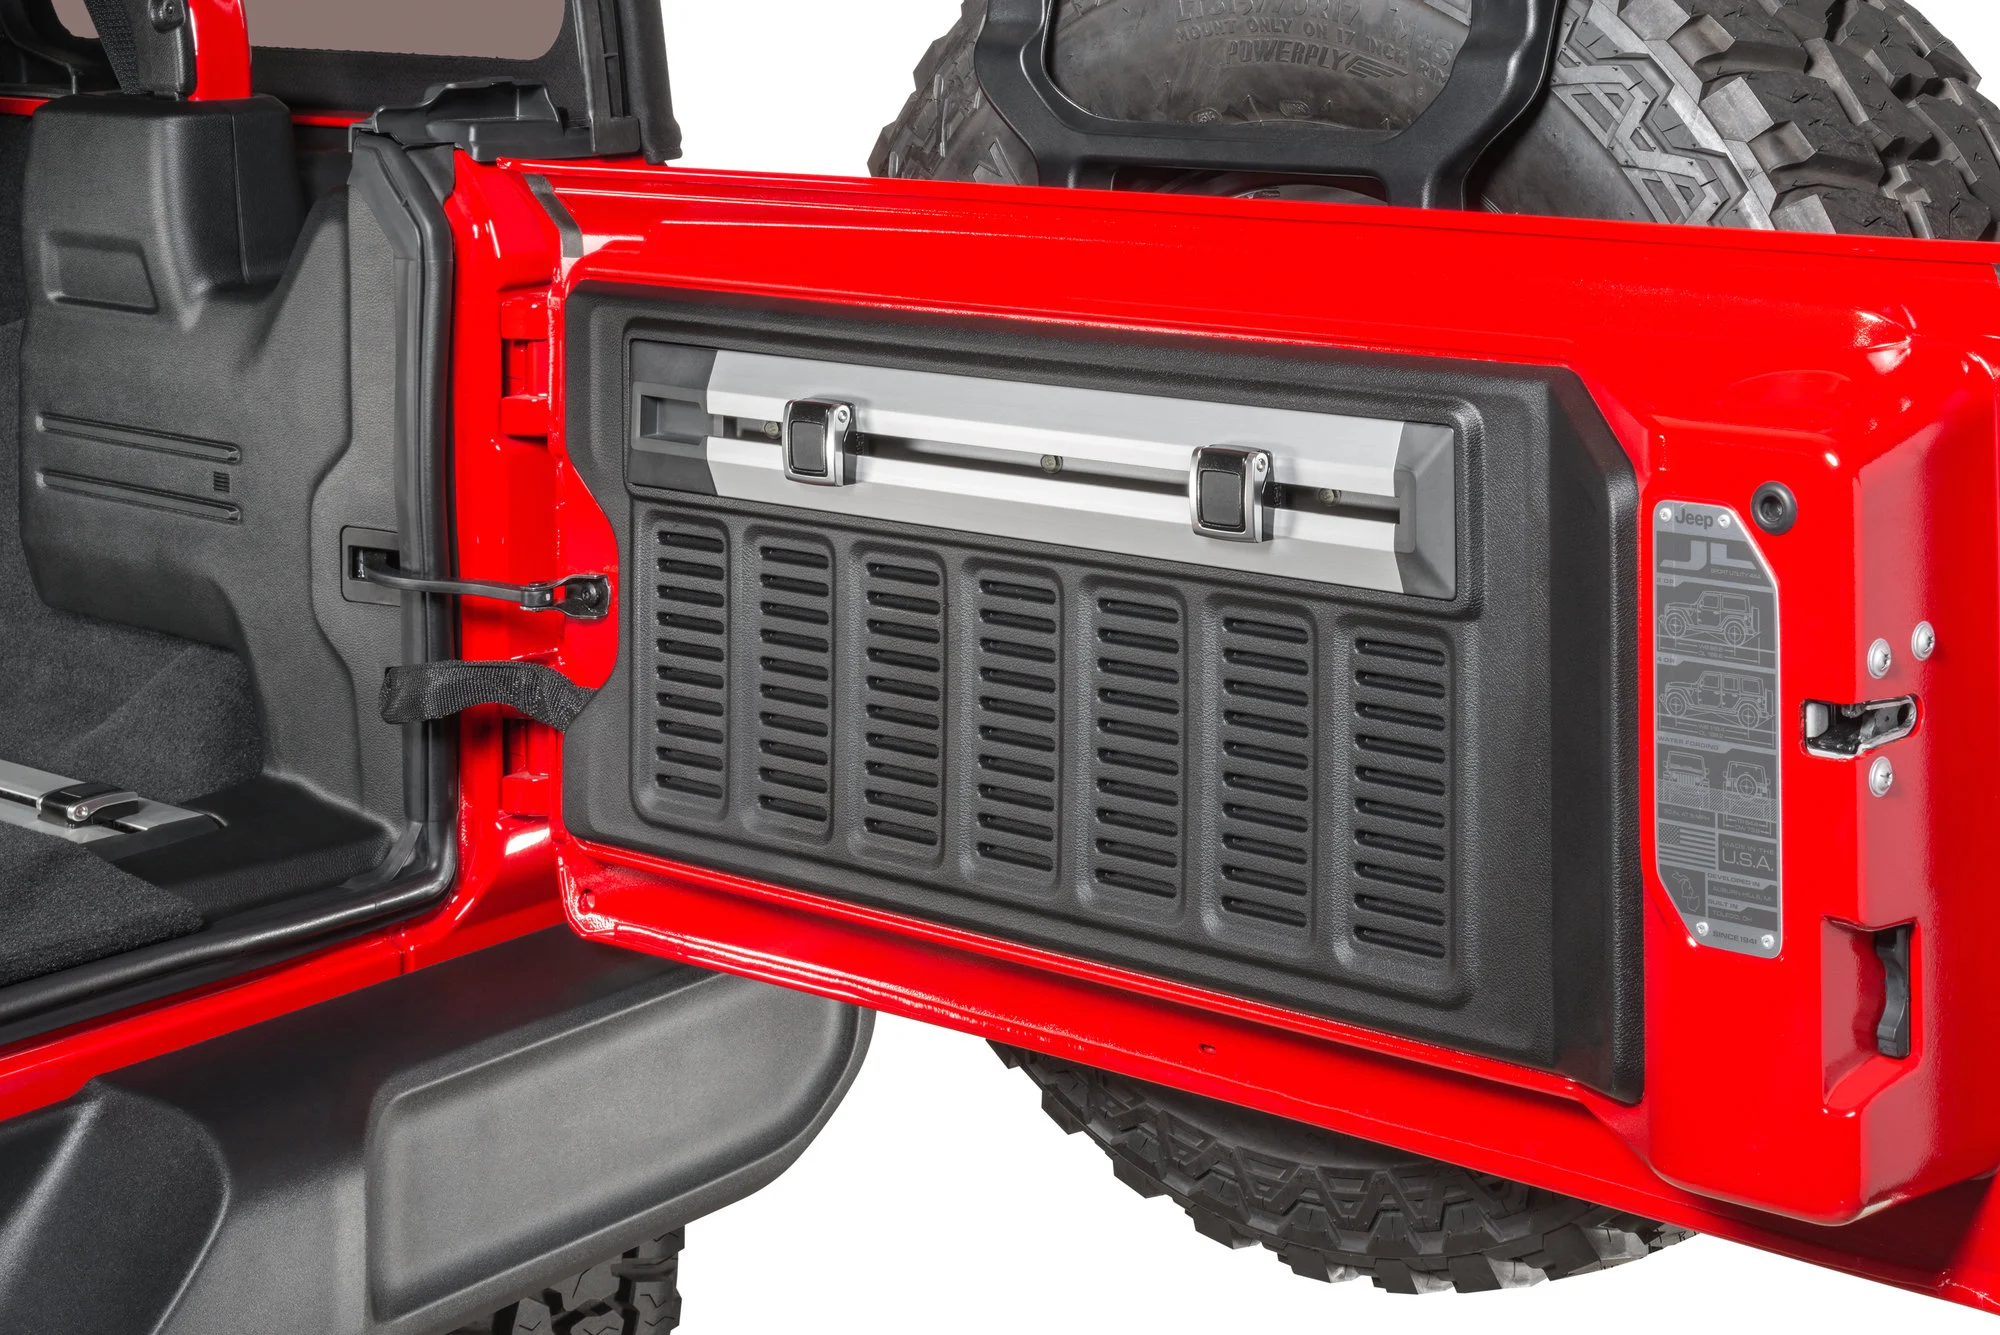
Test the tailgate closure with the table mounted. Lower the gate slowly and watch for contact with any part of the table frame. The latch should engage smoothly without obstruction.
Open and close the gate several times to confirm consistent operation.
Final verification includes a load test. Place 50 pounds of weight centered on the table surface. Check for any movement at the bracket rails or wobble at the support legs.
Re-torque all fasteners after the first week of use, as vibration initially loosens new connections. Repeat this check monthly thereafter for long-term reliability.
Step-by-Step: Hitch-Mount Table Installation for Jeep Wranglers
Hitch-mount installation requires matching your receiver tube to the table insert size. Most Jeep Wrangler JL models come with a Class III 2-inch receiver ready for accessories. Verify your receiver diameter before purchasing.
A 1.25-inch tube accepts smaller mount options but limits weight capacity significantly.
Begin by cleaning the receiver tube interior and exterior. Remove rust, road salt residue, and old grease from the mounting cavity. A wire brush and solvent work well here.
Dirty surfaces cause poor friction fit and accelerate corrosion inside the tube.
Slide the hitch receiver tube adapter into the receiver opening. The adapter should seat fully and sit flush against the receiver wall. Insert the anti-rattle bolt through the side hole and tighten until the adapter expands against the tube walls.
This eliminates vertical play that causes table vibration during driving.
Attach the table mounting arm to the adapter according to the manufacturer instructions. Most systems use a single large pin or bolt that passes through both the arm and adapter. Secure with a cotter pin or retaining clip to prevent loss during operation.
Double-check that the locking mechanism engages before applying any load.
If your table features a swing-away design, test the pivot action multiple times. The latch should hold firmly in both open and closed positions without drifting under gravity. Lubricate pivot pins with white Lithium grease if movement feels stiff.
Avoid petroleum-based greases that attract trail dust and grit.
Position the support leg if your model includes one. Lower the leg until it contacts the ground or bed floor evenly. Adjust height as needed for level surface operation.
Some models use a telescoping design with pin holes for quick height changes. Others employ ratcheting mechanisms for fine adjustments under load.
Secure the table platform and verify total system stability. Apply pressure to each corner and check for any shift at the receiver interface. The connection should feel solid with zero noticeable movement.
If flex appears, re-tighten the anti-rattle bolt and check for proper adapter seating. Repeat the load test described in the previous section to confirm safety margins.
Common Mistakes: Overtightening, Clearance Errors, and Wobble Fixes
Overtightening bolts damages the factory tie-down rails faster than almost any other mistake. Aluminum T-slots strip easily when forced beyond their design limits. Steel rails dent and warp under excessive clamping pressure.
Use a torque wrench and stop at the manufacturer specification. Hand-tight plus a quarter-turn usually suffices for these applications.
Clearance errors happen when owners assume universal fitment. Sport bar dimensions vary widely across brands and model years. Aftermarket bumper steps sit at different heights.
Spare tire carriers swing on varied radii. Measure every potential interference point before assuming the table will clear your specific setup. Generic product photos rarely show real-world clearances on customized Jeeps.
Wobble develops from multiple sources. Loose hardware is the most common. Trail vibration loosens standard nuts quickly without thread-locking compound.
Secondary causes include worn pivot points on folding mechanisms or bent support legs from impact. Address wobble by inspecting all fasteners, checking bracket seating on rails, and verifying support leg contact points are solid.
Small shim plates solve persistent rail-gap issues. If the bracket rocks slightly on the rail surface, thin metal shims between the bracket and rail flange eliminate play. Use flat washer stacks or purpose-made shim kits available from most Jeep accessory retailers.
Avoid rubber spacers that compress under load and shift over time.
Preventive maintenance intervals keep the system secure long-term. Inspect all bolts every 1,000 miles or after serious off-road use. Reapply anti-seize compound to threads annually to prevent rust binding.
Check fold-flat hinges for wear and lubricate pivot pins seasonally. Early attention prevents catastrophic failure while driving with loaded tables.
Watch for these warning signs during inspection:
- Visible movement at bracket-to-rail interface when pushing on table edge
- Audible clicking or rattling from mounting points during road driving
- Paint cracking or rail deformation around bolt contact areas
- Support leg base wear from dragging on rough surfaces
- Difficulty latching tailgate fully when table is mounted
Address any warning sign immediately. Minor wobble today becomes major failure tomorrow under trail stress. Proper installation and regular maintenance prevent most issues before they develop.
Safety First: Load Limits, Tailgate Latch Checks, and Legal Compliance
Safety issues around tailgate tables fall into three categories: structural failure, obstruction violations, and improper load securing. Each one carries real risk if ignored.
Structural failure happens when users exceed rated weight capacity. A table listed at 100 pounds can handle a portable stove and some dishes easily. But add a heavy cast-iron grill, fuel canisters, and tool storage and you push past design limits.
Metal fatigue sets in gradually. Then brackets snap or rails deform during a bumpy trail section. Always stay well under the published maximum load rating.
Tailgate latch interference is another serious concern. The table mount must never prevent the gate from fully closing or latching securely. An improperly latched tailgate can swing open while driving, sending your table and everything on it flying onto the road behind you.
Check the latch engagement point every time you close the gate with the table mounted. Some tables require a secondary latch strap or auxiliary lock for peace of mind on rough terrain.
Legal compliance varies by state and province but generally covers three areas: taillight visibility, brake light function, and license plate readability. Your table cannot block any of these required signals. Aftermarket setups sometimes shift mounting positions enough to obscure lights.
Verify all lighting functions before hitting public roads. Refer to local vehicle equipment regulations for exact requirements. In the United States, Department of Transportation guidelines outline federal motor vehicle safety standards for lighting and visibility requirements on all registered vehicles.
Securing items on the table while driving prevents them from becoming projectiles. Use bungee cords, ratchet straps, or built-in tie-down hooks found on many modern table designs. Heavy objects like coolers and grills should always be strapped down, not just set on the surface.
Vibration shakes loose items free over time.
Watch for these compliance red flags:
- Taillights partially or fully blocked by table structure
- License plate obscured when viewed from rear
- Tailgate unable to achieve full latch engagement
- Exceeding manufacturer weight rating by more than 10 percent
- No secondary securing method for loaded equipment
Address every red flag before driving. Legal violations carry fines. Safety hazards carry far worse consequences.
Costs and Specs: Pricing, Weight Capacity, and Dimensions Compared
Pricing for Jeep JL tailgate tables ranges from budget-friendly basic models to premium engineered systems. As of 2026, most quality options sit between $175 and $450 depending on materials and features. Cheap sub-$150 units often cut corners on bracket thickness, bolt quality, or finish durability.
Those savings disappear fast when hardware fails mid-trip.
Weight capacity directly correlates with price tier. Entry-level tables typically rate 75 pounds maximum. Mid-range models handle 100 to 125 pounds comfortably.
Premium heavy-duty versions reach 150 pounds or more with dual-brace support and reinforced rail clamps. Choose based on your heaviest expected load plus a 20 percent safety buffer.
Surface dimensions vary significantly across product lines. Common deployed sizes measure 36 to 48 inches long by 16 to 24 inches wide. Longer tables offer more workspace but increase wind resistance and tailgate stress.
Narrower profiles suit sport bar clearance challenges but limit usable area.
| Price Tier | Typical Weight Rating | Surface Area Range | Material Focus | Expected Durability |
|---|---|---|---|---|
| Budget ($100–$175) | 50–75 lbs | 32" × 14" | Basic steel | 1–2 years |
| Mid-range ($175–$300) | 100–125 lbs | 36" × 18" | Powder-coated steel or aluminum | 3–5 years |
| Premium ($300–$500+) | 125–150+ lbs | 42" × 20"+ | Reinforced aluminum or heavy-gauge steel | 5+ years |
Torque specifications remain consistent across reputable brands. Mounting bolts typically require 15 to 25 foot-pounds of tightening force. Over-torquing damages factory rail threads.
Under-torquing allows loosening from vibration. Use a calibrated torque wrench for initial installation and periodic checks.
Material selection affects both weight and maintenance needs. Steel tables run heavier but resist impact damage better. Aluminum models stay lighter for easier removal and transport but show dent marks more readily.
Powder coating protects both materials from rust and UV degradation. Inspect coatings annually for chips or scratches that expose bare metal.
Consider warranty coverage when comparing values. Reputable manufacturers offer one to three years on structural components. Lifetime warranties appear on some premium lines but often exclude wear items like pivot pins and rubber feet.
Read fine print carefully before purchasing.
Frequently Asked Questions
Will a tailgate table work with my Jeep Wrangler JL Rubicon trim?
Yes, tailgate tables fit all JL trims including Rubicon, Sahara, and Sport models. The factory tie-down rail pattern remains identical across trims. Only differences come from optional accessories like sport bars, bumpers, or tire carriers.
Verify those additions do not interfere with your chosen table mounting style.
Can I leave the table installed permanently on my Wrangler?
Technically yes, but most owners remove or fold tables when not in use. Permanent installation blocks rear visibility, reduces fuel economy slightly from wind drag, and risks unnecessary wear on mounting hardware. Fold-flat designs minimize these downsides when stowed against the closed tailgate.
How do I prevent my tailgate table from rusting in wet conditions?
Choose powder-coated steel or aluminum construction for maximum corrosion resistance. Clean salt and mud off the table after off-road trips. Apply a thin coat of automotive wax or metal protectant seasonally.
Store the table indoors during prolonged winter months when road salt exposure peaks.
What tools do I need for basic tailgate table installation?
Most bolt-on and hitch-mount tables install with standard hand tools. You will need a socket set, ratchet, torque wrench, screwdrivers, and possibly Allen keys depending on the brand. No drilling or fabrication equipment is required for properly designed aftermarket solutions.
Can a tailgate table hold a full-size charcoal grill safely?
Check the table weight rating first. Full-size charcoal grills often weigh 30 to 50 pounds unloaded. Add coal, cooking food, and accessories and you may approach or exceed 100 pounds.
Stick to lightweight propane burners or Coleman-style camp stoves unless your table rates above 125 pounds capacity.
Do I need to drill additional holes for a more secure mount?
Never drill extra holes unless the manufacturer explicitly instructs you to do so. Factory tie-down rails and receiver tubes provide sufficient mounting strength when hardware is torqued correctly. Drilling compromises structural integrity, voids warranties, and creates new failure points in the tailgate sheet metal.
Final Decision Guide: Choosing the Right Table for Your Jeep Setup
Your ideal tailgate table depends on three primary factors: your rear accessory configuration, your typical load requirements, and your usage patterns. Start by mapping your current setup against the compatibility matrix below.
If you run a tall sport bar combined with an oversized spare tire carrier, a hitch-mount table eliminates nearly all clearance conflicts. That solution costs more and sacrifices rear step access, but it delivers maximum stability for heavy gear. If your Jeep has mostly stock components, a bolt-on fold-flat model offers the best balance of convenience and capability.
Load expectations determine which weight class you should target. Casual coffee and snack setups need only 75-pound capacity tables. Weekend camp kitchen crews building full meals benefit from 125-pound minimum ratings.
Trail repair stations carrying tool chests and recovery gear should consider 150-pound heavy-duty options with dual cross-braces.
Usage frequency matters too. Daily highway commuters prioritize low-profile fold-flat designs that stay clean and quiet. Permanent overlanding rigs benefit from robust bolt-on installations that resist vibration and bear sustained loads without adjustment.
Seasonal users who deploy tables only on weekends can tolerate simpler mechanisms since wear accumulates slowly.
Follow this decision flow to land on your match:
- Step one: Identify your sport bar, bumper, and tire carrier setup
- Step two: Measure clearance gaps between those components and potential table paths
- Step three: Estimate your maximum expected load including safety margin
- Step four: Decide between bolt-on convenience versus hitch-mount capacity
- Step five: Select a table with matching specifications and verified warranty coverage
- Step six: Plan for periodic inspection and maintenance throughout ownership
No single table excels at every scenario. Matching your rig characteristics to the right mounting style and capacity rating ensures years of reliable service without frustration or costly returns.