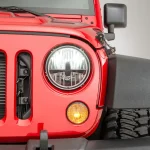
Image source: Bing (Web (fair-use with source credit))
Jeep JK LED Headlights Install Guide
Your factory halogen headlights are probably letting you down on every dark trail ride. That's why we've put together this Jeep JK LED headlights install guide, so you can get brighter, sharper light without breaking the bank or burning out your wiring.
We dug through manufacturer specs and aggregated real-world feedback from Jeep owners to give you the straight facts. Per DOT and SAE standards, proper beam pattern matters just as much as raw brightness when it comes to staying safe out there. By the time you finish reading this guide, you'll know exactly what to look for, how to install it right, and where things go wrong.
Quick Answer
A Jeep JK LED headlights install takes about 45 minutes if you take your time. Most kits use a standard H13 bulb design that plugs straight into your factory harness. You'll need basic hand tools and good lighting for the job.
Always check your local laws before you buy.
Why Getting Your Jeep JK LED Headlight Installation Right Matters for Safety and Performance
Headlight upgrades sit right at the crossroads of performance and personal safety. Your vehicle's lighting system affects how far ahead you can see and whether other drivers spot you in time. Get it wrong, and you could end up with a legal ticket or worse, a dangerous situation on a remote trail.
The Jeep Wrangler JK uses H13 bulbs for its sealed-beam headlight assemblies. Those factory halogens deliver roughly 65 watts of power each. They throw a warm yellow beam that fades fast over time.
Many JK owners discover this the hard way during those long evening mule rides or early morning commutes through unlit backroads.
Safety data from the AAA Foundation for Traffic Safety shows that proper lighting visibility directly reduces night driving accidents. Their research found that clear, well-aligned headlights cut nighttime crash risk significantly compared to faded halogens or poorly aimed LEDs. That's not marketing hype.
That's peer-reviewed research backing up what every off-road driver already knows.
Performance benefits extend beyond just seeing better. Modern LED kits pull less power from your electrical system. This means less strain on your alternator and battery during extended idle periods.
Whether you're crawling over rocks with lights on for hours or navigating tight forest trails, efficient lighting matters.
Legal compliance is another piece of the puzzle. The Department of Transportation sets strict standards for headlight beam patterns through FMVSS 108 regulations. Manufacturers like Mopar build their headlights to meet these requirements.
Aftermarket LED kits must match or exceed those same specs to stay road-legal. Many cheaper options fail that test spectacularly.
You also need to think about your overall vehicle setup. Light bars and rock lights complement your headlights well. Check out Jeep JK 50 Light Bar: Ultra-Bright Off-Road Night Lighting for information on adding auxiliary lighting to your rig.
Proper installation protects your investment too. A kit costing $150 to $400 deserves correct handling. Rushing through the process or skipping steps leads to premature failures.
We've seen plenty of owners complain about LEDs dying within months because they ignored basic precautions during installation.
Your decision to upgrade should come from real needs, not just aesthetics. Yellow-tinted films or overly bright white LEDs might look cool in the parking lot. They create glare problems that blind oncoming traffic and reduce your own visibility.
Smart buyers focus on functionality first, then style second.
This isn't just about having the newest gear on your Jeep. It's about getting home safely after sunset while respecting other drivers on the road. Taking the time to learn proper installation pays dividends every single trip you take.
Understanding the Factory Jeep JK Headlight System and Why It Needs an Upgrade
The 2007 to 2018 Jeep Wrangler JK came equipped with H13 halogen headlight bulbs as standard equipment. These sealed-beam units connect directly to your vehicle's wiring harness through plastic connectors that wear out over time. Understanding how this system works helps you avoid costly mistakes during any upgrade.
Factory halogen bulbs use a tungsten filament surrounded by halogen gas. When electricity flows through the filament, it heats up and produces light. Simple technology, but inefficient technology.
About 90 percent of the energy input becomes heat instead of visible light output. That's why halogen bulbs get dangerously hot during operation.
The electrical system draws current through your headlight switch and relay assembly. Each bulb typically pulls around 65 watts of power. Your alternator handles this load without issue under normal conditions.
However, adding high-output accessories or running multiple light bars simultaneously creates additional strain.
Heat management represents a fundamental weakness in halogen systems. The glass envelope gets hot enough to cause severe burns if touched during or immediately after use. This heat also degrades nearby components like wiring insulation and plastic housings over time.
Poor ventilation inside the headlight assembly accelerates this degradation process.
Beam pattern quality depends heavily on the reflector design inside your housing. Factory reflectors shape the halogen's omnidirectional light into a focused beam with a sharp cutoff. This prevents glare while illuminating the road ahead effectively.
Cheap LED replacements often lack proper optics, scattering light in every direction instead.
Color temperature plays a crucial role in visibility. Halogen bulbs produce light around 3200K to 3500K, which appears warm yellow. This color temperature penetrates fog and rain better than cooler whites.
However, it lacks the brightness and clarity needed for demanding off-road conditions at night.
Weather resistance matters enormously for vehicles used in harsh environments. Your JK's headlights face constant exposure to mud, water, dust, and extreme temperatures. Factory seals keep moisture out effectively, but aftermarket LED installations sometimes compromise these seals during removal and reinstallation.
Electrical compatibility issues arise frequently with budget LED kits. Some manufacturers skip proper voltage regulation, causing flickering or erratic behavior. Canbus error codes appear on your dash when the LED draws significantly different power than the original halogen.
Decoders or resistors solve this problem but add complexity to the installation.
Upgrade motivations range from practical necessity to enthusiast desire. Trail riders need reliable illumination for spotting rocks and obstacles in darkness. Daily commuters benefit from improved visibility on poorly lit suburban roads.
Overlanders depend on functional lighting systems during multi-day expeditions far from civilization.
Consider upgrading your vehicle systematically rather than piecemeal. Better lighting pairs well with upgrades like Jeep JK C-Gusset Kits: Reinforce Your Wrangler Steering Now for improved durability. Or explore options like Best Jeep JK Hoods: Upgrade Your Wrangler 2026 if you want enhanced airflow and style.
The decision to upgrade hinges on understanding your specific use case. City driving demands different specifications than serious off-roading. Evaluating your actual needs prevents overspending on unnecessary features while ensuring you get adequate lighting for your adventures.
Common Problems and Risks When Switching to LED Headlights
Switching from halogen to LED headlights introduces several common problems that catch inexperienced installers off guard. Many owners buy inexpensive kits online, plug them in, and immediately encounter issues they didn't anticipate. Understanding these pitfalls beforehand saves you time, money, and frustration.
Incorrect polarity causes the most frequent failure mode. LED bulbs contain diodes that only work when connected the correct way around. Unlike halogen filaments, they don't light up regardless of which wire connects to positive or negative.
Some kits include polarity protectors, but many budget options don't. Flipping the connector solves this instantly, though repeatedly doing so wears out the plastic terminals.
Canbus error codes plague vehicles with sophisticated electrical systems. Your JK monitors headlight circuit resistance closely. LED bulbs draw far less current than halogens, triggering false "bulb out" warnings on your dashboard.
These errors confuse owners who assume something is broken when everything actually functions perfectly. Installing canbus decoders or error-free LED kits resolves this complication efficiently.
Heat dissipation problems shorten LED lifespan dramatically. Unlike halogen bulbs that radiate heat outward through glass, LEDs concentrate thermal energy at the base. Poorly designed heatsinks trap this heat instead of transferring it away effectively.
Overheated LEDs dim rapidly and fail prematurely, sometimes within months instead of years. Quality kits feature large aluminum heatsinks with proper airflow channels.
Beam pattern mismatches create serious safety hazards. Cheap LEDs scatter light everywhere instead of focusing it through your reflector. This produces a blurry, unfocused beam that blinds oncoming drivers while leaving dark spots directly ahead.
Proper LED kits use engineered optics that mimic halogen's directional output while maintaining superior brightness levels.
Connector melting represents both a problem and a warning sign. High-wattage LEDs push more current through your factory connectors than the original design intended. Poor contact surfaces generate excessive heat, eventually warping or melting the plastic housing.
Inspect your connectors thoroughly before installing anything new. Replace damaged wiring immediately rather than risking a fire.
Glare complaints from other motorists indicate improper installation or incorrect product choice. Even premium LEDs produce blinding beams if installed incorrectly or aimed improperly. Always verify your beam pattern against a wall before driving on public roads.
Adjust the vertical and horizontal aim screws until you achieve a clean cutoff line.
Water intrusion destroys LED circuitry quickly. Removing factory headlights exposes internal components to moisture during installation. Many owners neglect to reseal housings properly afterward.
Rain or car washes force water inside the assembly, corroding connections and killing LEDs over time. Use silicone sealant liberally when reassembling your headlight units.
Legal complications arise from non-compliant products. Some LED kits deliberately omit proper beam cutoff patterns to maximize raw brightness. These products may pass initial inspection but fail during random stops or annual registrations.
Check your state's specific regulations regarding headlight modifications before purchasing any replacement bulbs.
Interference with other electronic systems occurs occasionally. Low-quality LEDs emit electromagnetic interference that disrupts radio reception or sensor functionality. Shielded wiring and properly filtered drivers prevent this issue.
Stick with reputable brands known for meeting electromagnetic compatibility standards.
Financial losses compound when cheap kits fail repeatedly. Buying three or four inexpensive LED bulbs costs more than investing once in a quality product. Factor longevity, warranty coverage, and customer support reputation into your purchasing decision.
Research brands extensively before committing your money.
Key Features and Specifications to Look For in a Jeep JK LED Kit
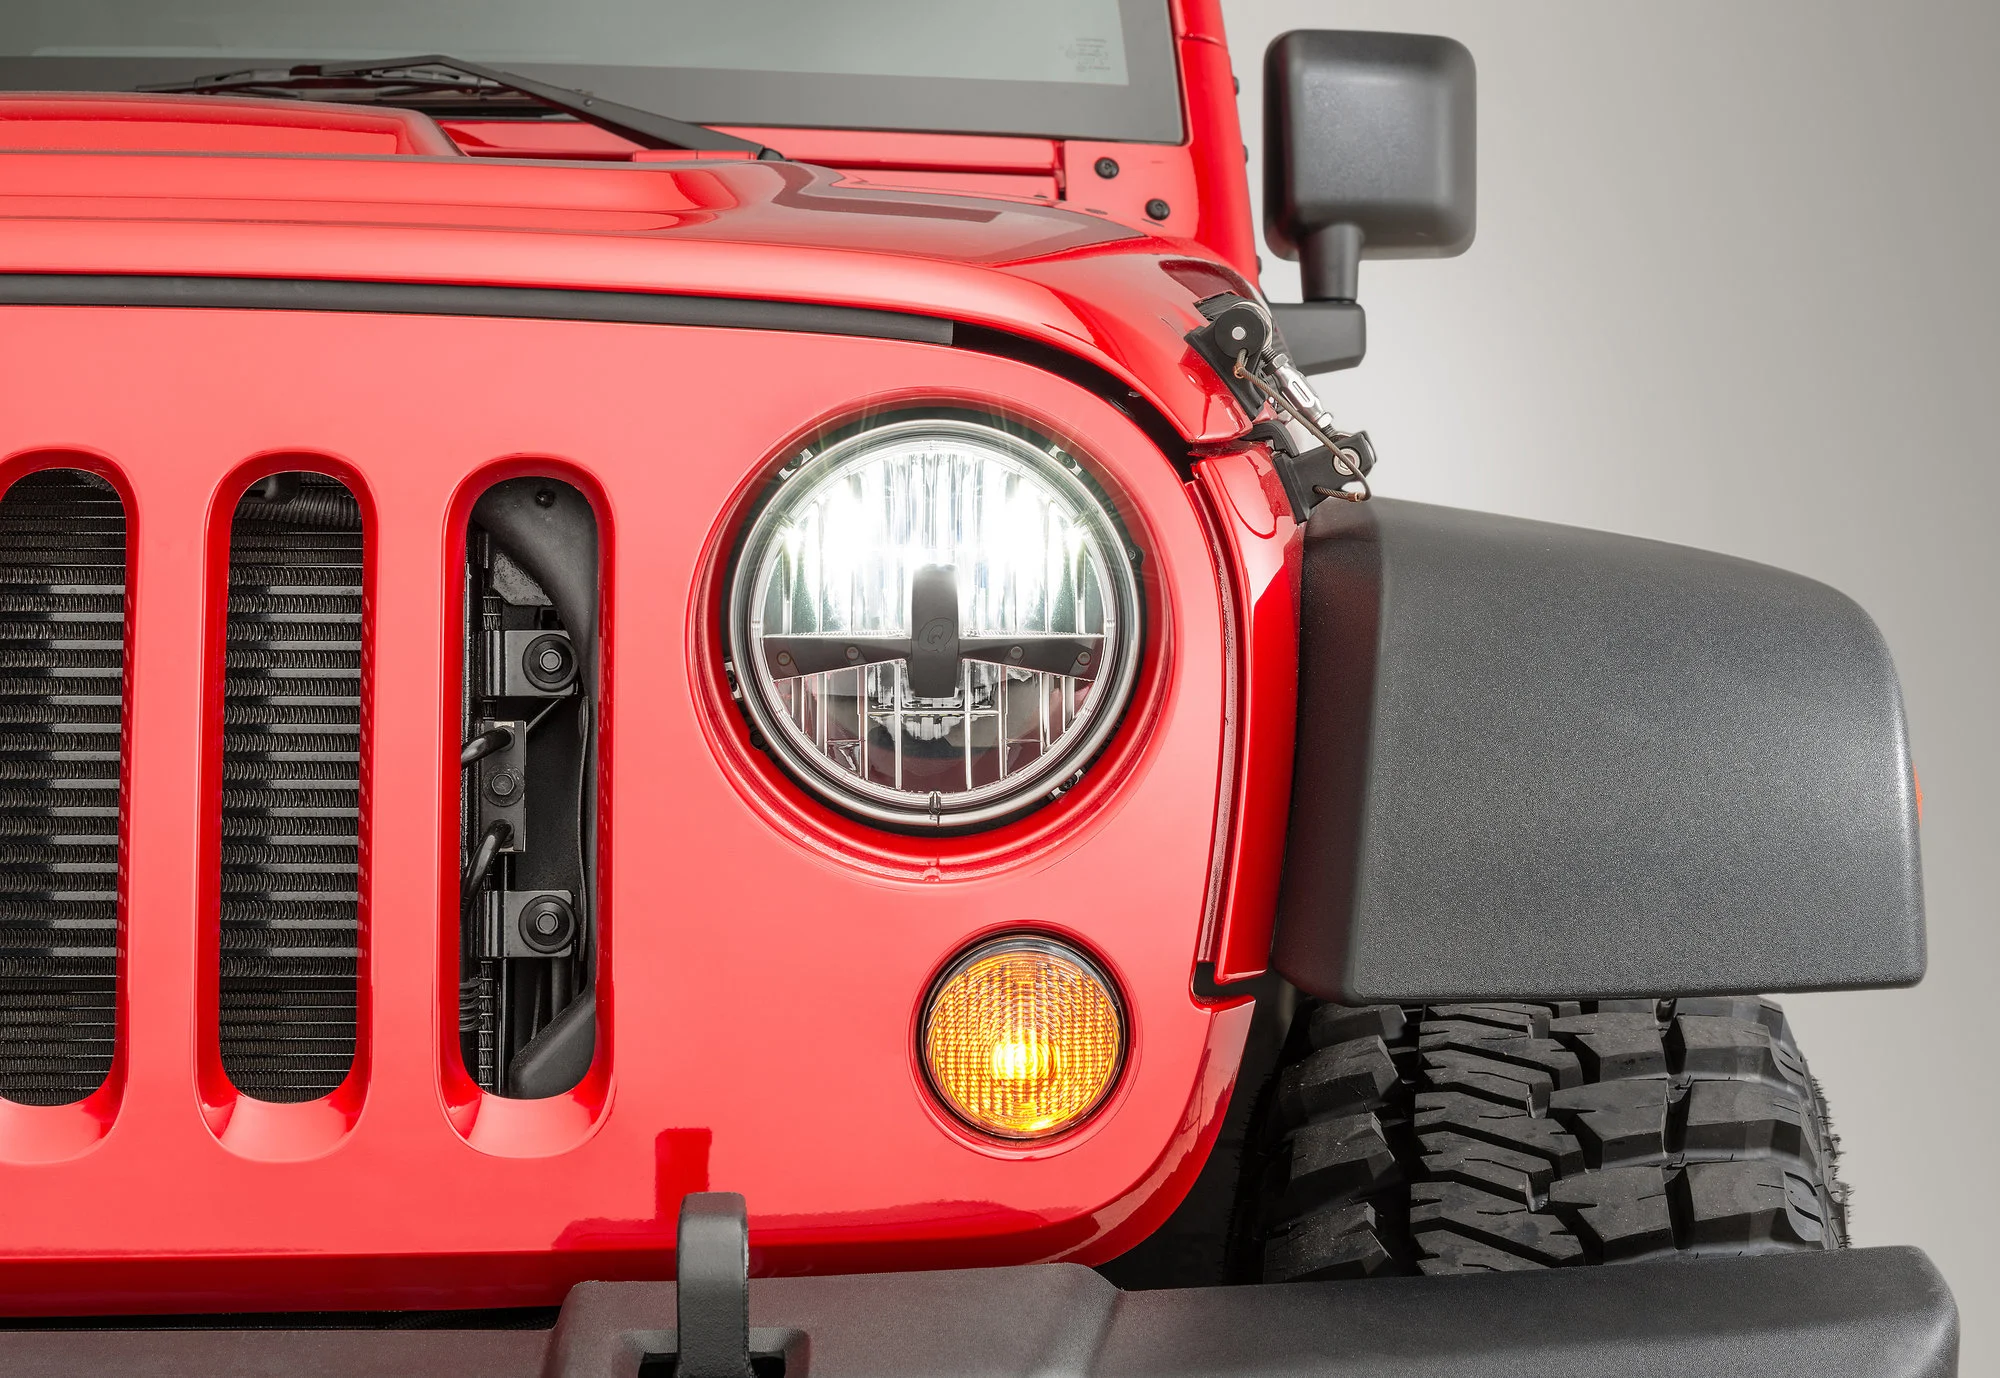
Finding the right LED headlight kit requires understanding several critical specifications that separate quality products from dangerous junk. Not all H13 LEDs perform equally, even when they fit your vehicle physically. Smart buyers prioritize these factors over flashy marketing claims.

Image source: Bing (Web (fair-use with source credit))
Lumen Output measures total light produced by each bulb. Reputable manufacturers list realistic numbers between 2000 and 6000 lumens per bulb. Beware of kits claiming 20,000 lumens or higher.
These inflated figures represent aggregate totals across both bulbs combined, not individual output. Quality LEDs deliver approximately 100 to 150 lumens per watt efficiently.
Color Temperature determines the visual appearance of your light beam. Ranges span from warm yellow at 3000K to icy blue at 8000K. The sweet spot for driving sits between 5000K and 6000K.
This range provides maximum visibility without the blue light scattering issues that reduce effectiveness in fog and rain. Lower temperatures penetrate atmospheric conditions better but feel dimmer subjectively.
Beam Pattern separates viable products from liability risks. Look for LEDs featuring precise cutoff patterns matching DOT standards. These create sharp horizontal lines on projected beams, preventing glare while illuminating road edges clearly.
Avoid "flood" or "off-road only" labeled products if you drive on public streets regularly. Proper reflector compatibility ensures your JK's existing housing shapes the light correctly.
Build Quality encompasses heatsink design, PCB materials, and driver circuitry. Premium LEDs use thick aluminum heatsinks with fins maximizing surface area for cooling. Copper core PCBs distribute heat evenly across the LED chips.
Constant-current drivers maintain stable output despite voltage fluctuations from your electrical system. Cheap alternatives skip these features entirely, sacrificing longevity for lower costs.
Waterproof Rating indicates protection against environmental exposure. IP67 ratings guarantee complete dust prevention and temporary water immersion survival. IP68 ratings offer even greater protection for extended submersion.
Your JK encounters mud, rain, and puddles constantly. Minimum IP67 certification ensures your LEDs survive regular off-road adventures without internal corrosion.
Polarity Protection simplifies installation considerably. Built-in reverse polarity safeguards prevent damage when connecting wires backward initially. Some kits include physical switches allowing easy polarity flipping without disconnecting wires.
Others rely on integrated circuits handling this automatically. Either approach prevents costly mistakes during first-time installations.
Warranty Coverage reflects manufacturer confidence in their product. Reputable brands offer two to five-year warranties covering defects and premature failures. Read warranty terms carefully for exclusions or limitations.
Some companies void coverage if installation instructions weren't followed precisely. Document your installation process with photos for potential warranty claims.
Canbus Compatibility addresses error code elimination proactively. Quality kits include built-in decoders preventing dashboard warnings. If yours doesn't, plan to purchase separate resistors or CANbus adapters.
These additional components add expense and complexity to your project.
Comparing specifications across multiple products reveals dramatic quality differences. Budget kits under $50 typically compromise on nearly every important factor listed above. Mid-range options between $100 and $200 offer reasonable quality for casual users.
Premium selections exceeding $200 deliver professional-grade performance worth the investment.
Invest time researching specific models before purchasing. Owner forums, video reviews, and independent testing reports provide valuable insights beyond manufacturer claims. Knowledgeable buyers verify specifications through multiple sources rather than trusting singular product descriptions.
Benefits and Potential Drawbacks of LED vs. Halogen Headlights
Choosing between LED and halogen headlights involves weighing tangible advantages against legitimate concerns. Neither option suits every driver perfectly. Understanding both perspectives helps you make an informed decision aligned with your specific needs and values.
LED technology delivers substantially brighter illumination than halogen equivalents. Most quality LED kits produce 300 to 500 percent more lumens using similar wattage levels. This translates directly into greater visibility distance and improved peripheral awareness during night driving.
You'll spot trail obstacles, wildlife, and road hazards earlier, giving yourself more reaction time.
Energy efficiency represents another major advantage. LEDs convert roughly 80 percent of electrical input into usable light compared to halogen's mere 10 percent. This efficiency reduces strain on your alternator and battery system significantly.
Extended idle periods while off-roading no longer drain your electrical system as rapidly.
Longevity favors LEDs dramatically as well. Quality LED kits rated for 30,000 to 50,000 hours outlast halogen bulbs averaging just 1,000 hours before failure. That means replacing your headlights once per decade instead of annually.
Fewer replacements translate to lower long-term costs despite higher upfront pricing.
Instant illumination distinguishes LEDs from alternatives requiring warm-up periods. Some HID systems take several seconds to reach full brightness after startup. LEDs achieve maximum output immediately upon activation, crucial for sudden braking situations or emergency maneuvers at night.
Durability improvement matters enormously for off-road enthusiasts. Halogen bulbs contain fragile glass envelopes vulnerable to cracking from vibration and impact. LEDs utilize solid-state semiconductor construction resisting shock and vibration completely.
Rock bouncing, bridge hopping, and extreme articulation no longer threaten your lighting system's integrity.
Lower operating temperatures benefit surrounding components despite LED bases generating concentrated heat. The actual light beam contains minimal infrared radiation, reducing heat exposure to nearby plastic housings and paint surfaces. This characteristic preserves your JK's appearance longer compared to constantly bathing surrounding areas in halogen-generated warmth.
However, legitimate drawbacks exist alongside these advantages. Higher initial cost separates budget-conscious consumers from LED adopters. Quality kits require $100 to $400 investment compared to $20 halogen replacements.
While lifecycle costs favor LEDs, the upfront barrier deters some Jeep owners from upgrading immediately.
Compatibility challenges complicate certain installations. Vehicles lacking proper voltage regulation experience flickering or reduced lifespan from LED integration. Canbus error codes frustrate owners expecting plug-and-play simplicity.
Additional components like resistors or decoders increase project complexity beyond simple bulb swaps.
Heat management demands careful engineering oversight. Concentrated thermal energy at LED bases requires sophisticated heatsinking solutions. Poorly designed units overheat rapidly, triggering thermal shutdown modes or permanent component failure.
Quality manufacturers invest heavily in thermal engineering to prevent these failures.
Legal compliance varies considerably across jurisdictions. Some regions mandate specific beam patterns requiring DOT approval. Others prohibit certain color temperatures or brightness levels entirely.
Research your local regulations thoroughly before purchasing to avoid citations or failed inspections later.
Professional installation often proves necessary for optimal results. Improper aim placement creates glare problems endangering other motorists while reducing your own visibility. Seeking qualified technicians ensures correct installation satisfying both safety and regulatory requirements consistently.
Your personal priorities should guide this comparison rather than marketing hype alone. Priority-seekers valuing maximum brightness accept higher costs and complexity willingly. Budget-focused drivers preferring simplicity stick with proven halogen technology without regrets.
Both approaches remain valid depending on individual circumstances and expectations.
Step-by-Step Installation Guide for Jeep JK LED Headlights
Installing LED headlights on your Jeep Wrangler JK requires careful attention to detail and basic mechanical aptitude. Following established procedures minimizes risks while maximizing success rates for first-time installers. This section walks you through each phase methodically.
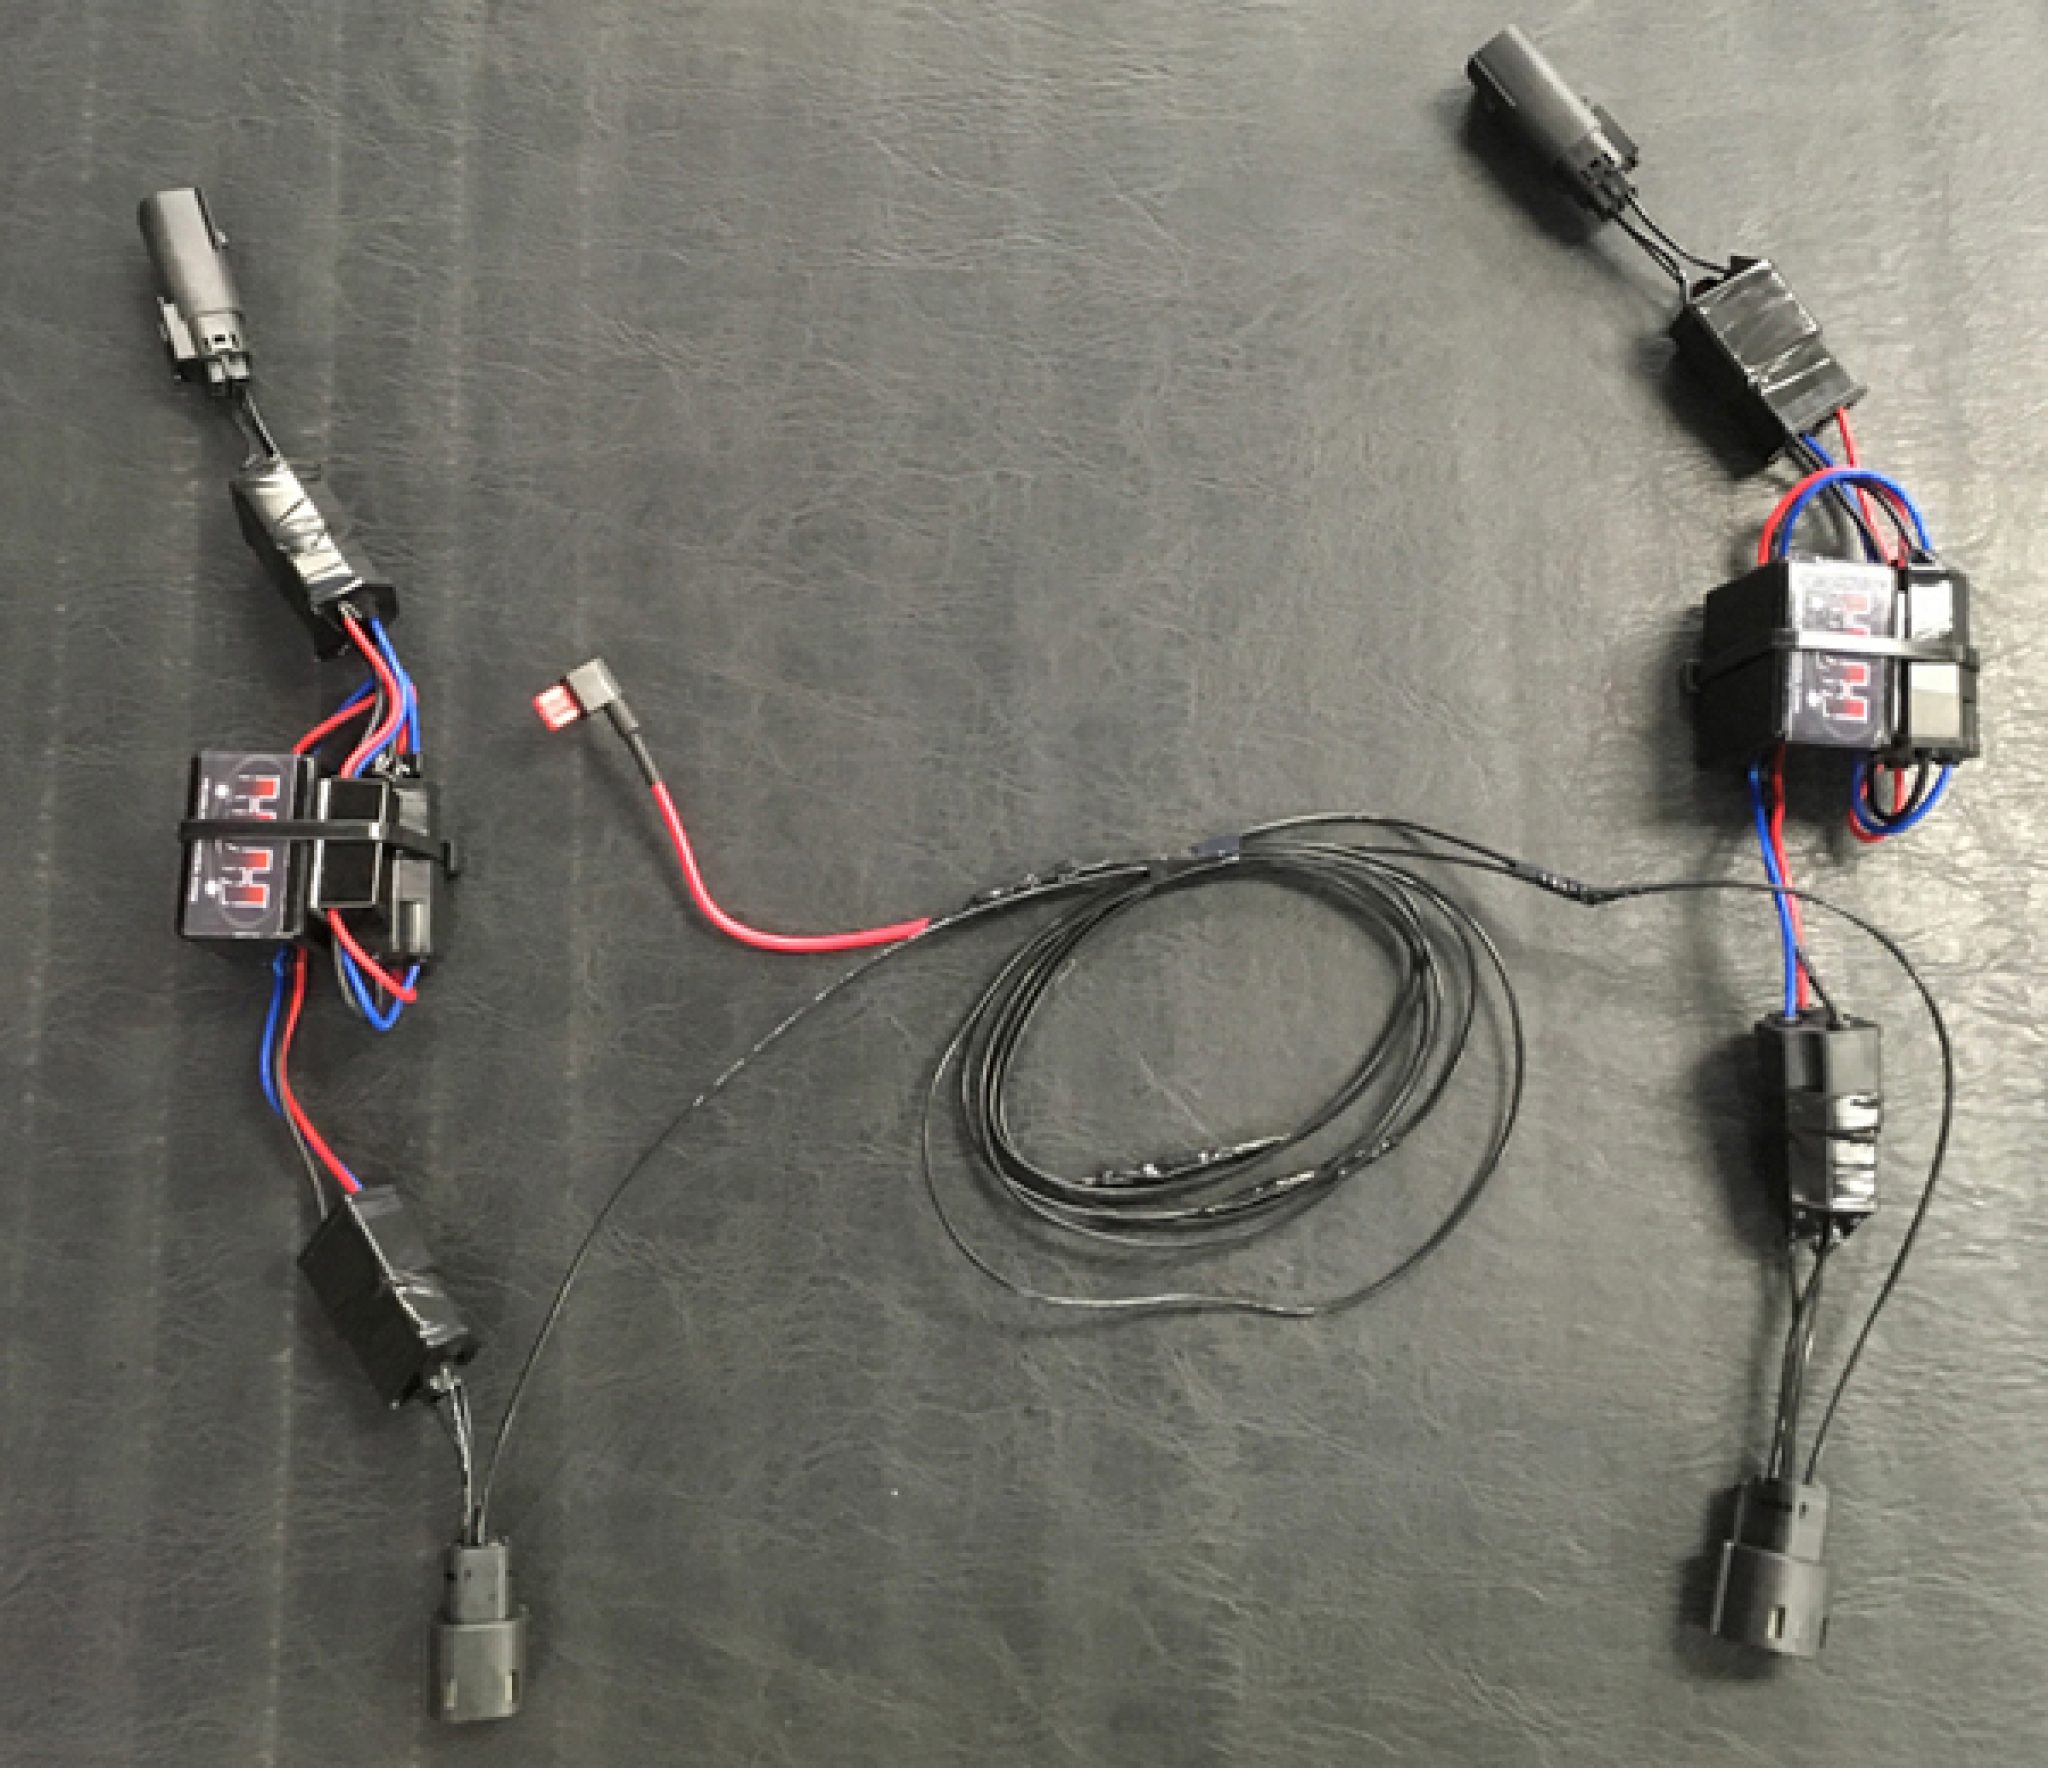
Image source: Bing (Web (fair-use with source credit))
Gather Your Tools and Materials before beginning any work. You'll need basic socket sets, screwdrivers, pliers, electrical tape, zip ties, and silicone sealant. Keep a flashlight handy for seeing inside cramped engine compartments.
Having everything organized prevents interruptions during installation.
Disconnect the Battery as your first safety step. Remove the negative terminal cable using appropriate wrenches. This eliminates electrical shock risks and prevents accidental short circuits while working near live wiring.
Wait approximately five minutes before proceeding to allow capacitors to discharge completely.
Remove the Grille Assembly for easier access to headlight mounting points. Locate and remove the plastic push clips securing the grille along its top edge. Gently pull the grille forward starting from one corner, releasing remaining clips underneath.
Set the assembly aside carefully, avoiding stress on attached wiring connectors.
Access the Headlight Housing by removing four 10mm bolts securing each headlight assembly to the frame. Some JK models require additional fastener removal depending on year and trim level variations. Support the housing weight while loosening final bolts to prevent damage to surrounding components.
Disconnect the Factory Wiring Harness by pressing the locking tab and pulling straight back on the connector. Avoid twisting or yanking motions that damage pins inside the socket. If the connector resists removal, inspect for debris or corrosion hindering separation.
Clean contacts lightly with electrical contact cleaner if necessary.
Remove the Halogen Bulb by rotating its retaining clip counterclockwise approximately one-quarter turn. Lift the bulb straight out, avoiding contact with the glass envelope using clean gloves or paper towels. Oils from bare skin degrade reflector coatings over time, reducing light output permanently.
Test-Fit Your New LED Bulb without securing it permanently yet. Verify proper orientation matches your vehicle's wiring configuration. Connect temporarily to confirm polarity functionality before final installation.
Flip the bulb or connector if the LED fails to illuminate initially.
Secure the LED Bulb using the provided retaining mechanism or original clip if compatible. Ensure seating sits flush against the housing gasket for proper sealing. Insert any included spacers or adapters between the bulb base and reflector surface as directed by manufacturer instructions.
Route Wiring Carefully away from hot exhaust components and moving suspension parts. Secure cables using zip ties to existing brackets wherever possible. Maintain minimum clearance distances from sharp edges potentially damaging insulation over time.
Apply Silicone Sealant around the headlight housing perimeter before reinstallation. This restores weatherproofing compromised during disassembly. Apply continuous beads approximately quarter-inch wide, covering all contact surfaces evenly.
Reassemble Components in reverse order of removal. Replace headlight housing bolts finger-tight initially, then torquing to manufacturer specifications. Reinstall the grille assembly, ensuring all clips engage properly.
Double-check nothing interferes with hood closure or grille alignment.
Reconnect the Battery and test all lighting functions comprehensively. Verify high beams, low beams, and turn signals operate correctly without error codes appearing on your dashboard. Allow the system to run briefly, checking for unusual sounds or smells indicating potential issues.
Adjust Beam Aim according to your local regulations and safe operating practices. Position your Jeep facing a flat wall approximately ten feet away. Mark the existing beam patterns on the wall for reference.
Adjust vertical and horizontal aim screws until achieving proper cutoff positioning preventing glare to oncoming traffic.
Document each step with photographs throughout the process. These records prove invaluable troubleshooting future issues or referencing specific configurations during subsequent maintenance sessions. Taking extra time photographing connector orientations prevents confusion when reinstalling components years later.
If you enjoy systematic installations, consider exploring related projects like How to Install an ARB Drawer System in Your Jeep JK for organized gear storage solutions. Proper documentation practices apply universally across all vehicle modification endeavors regardless of scope.
Safety and Legal Compliance: What You Must Know Before Installing
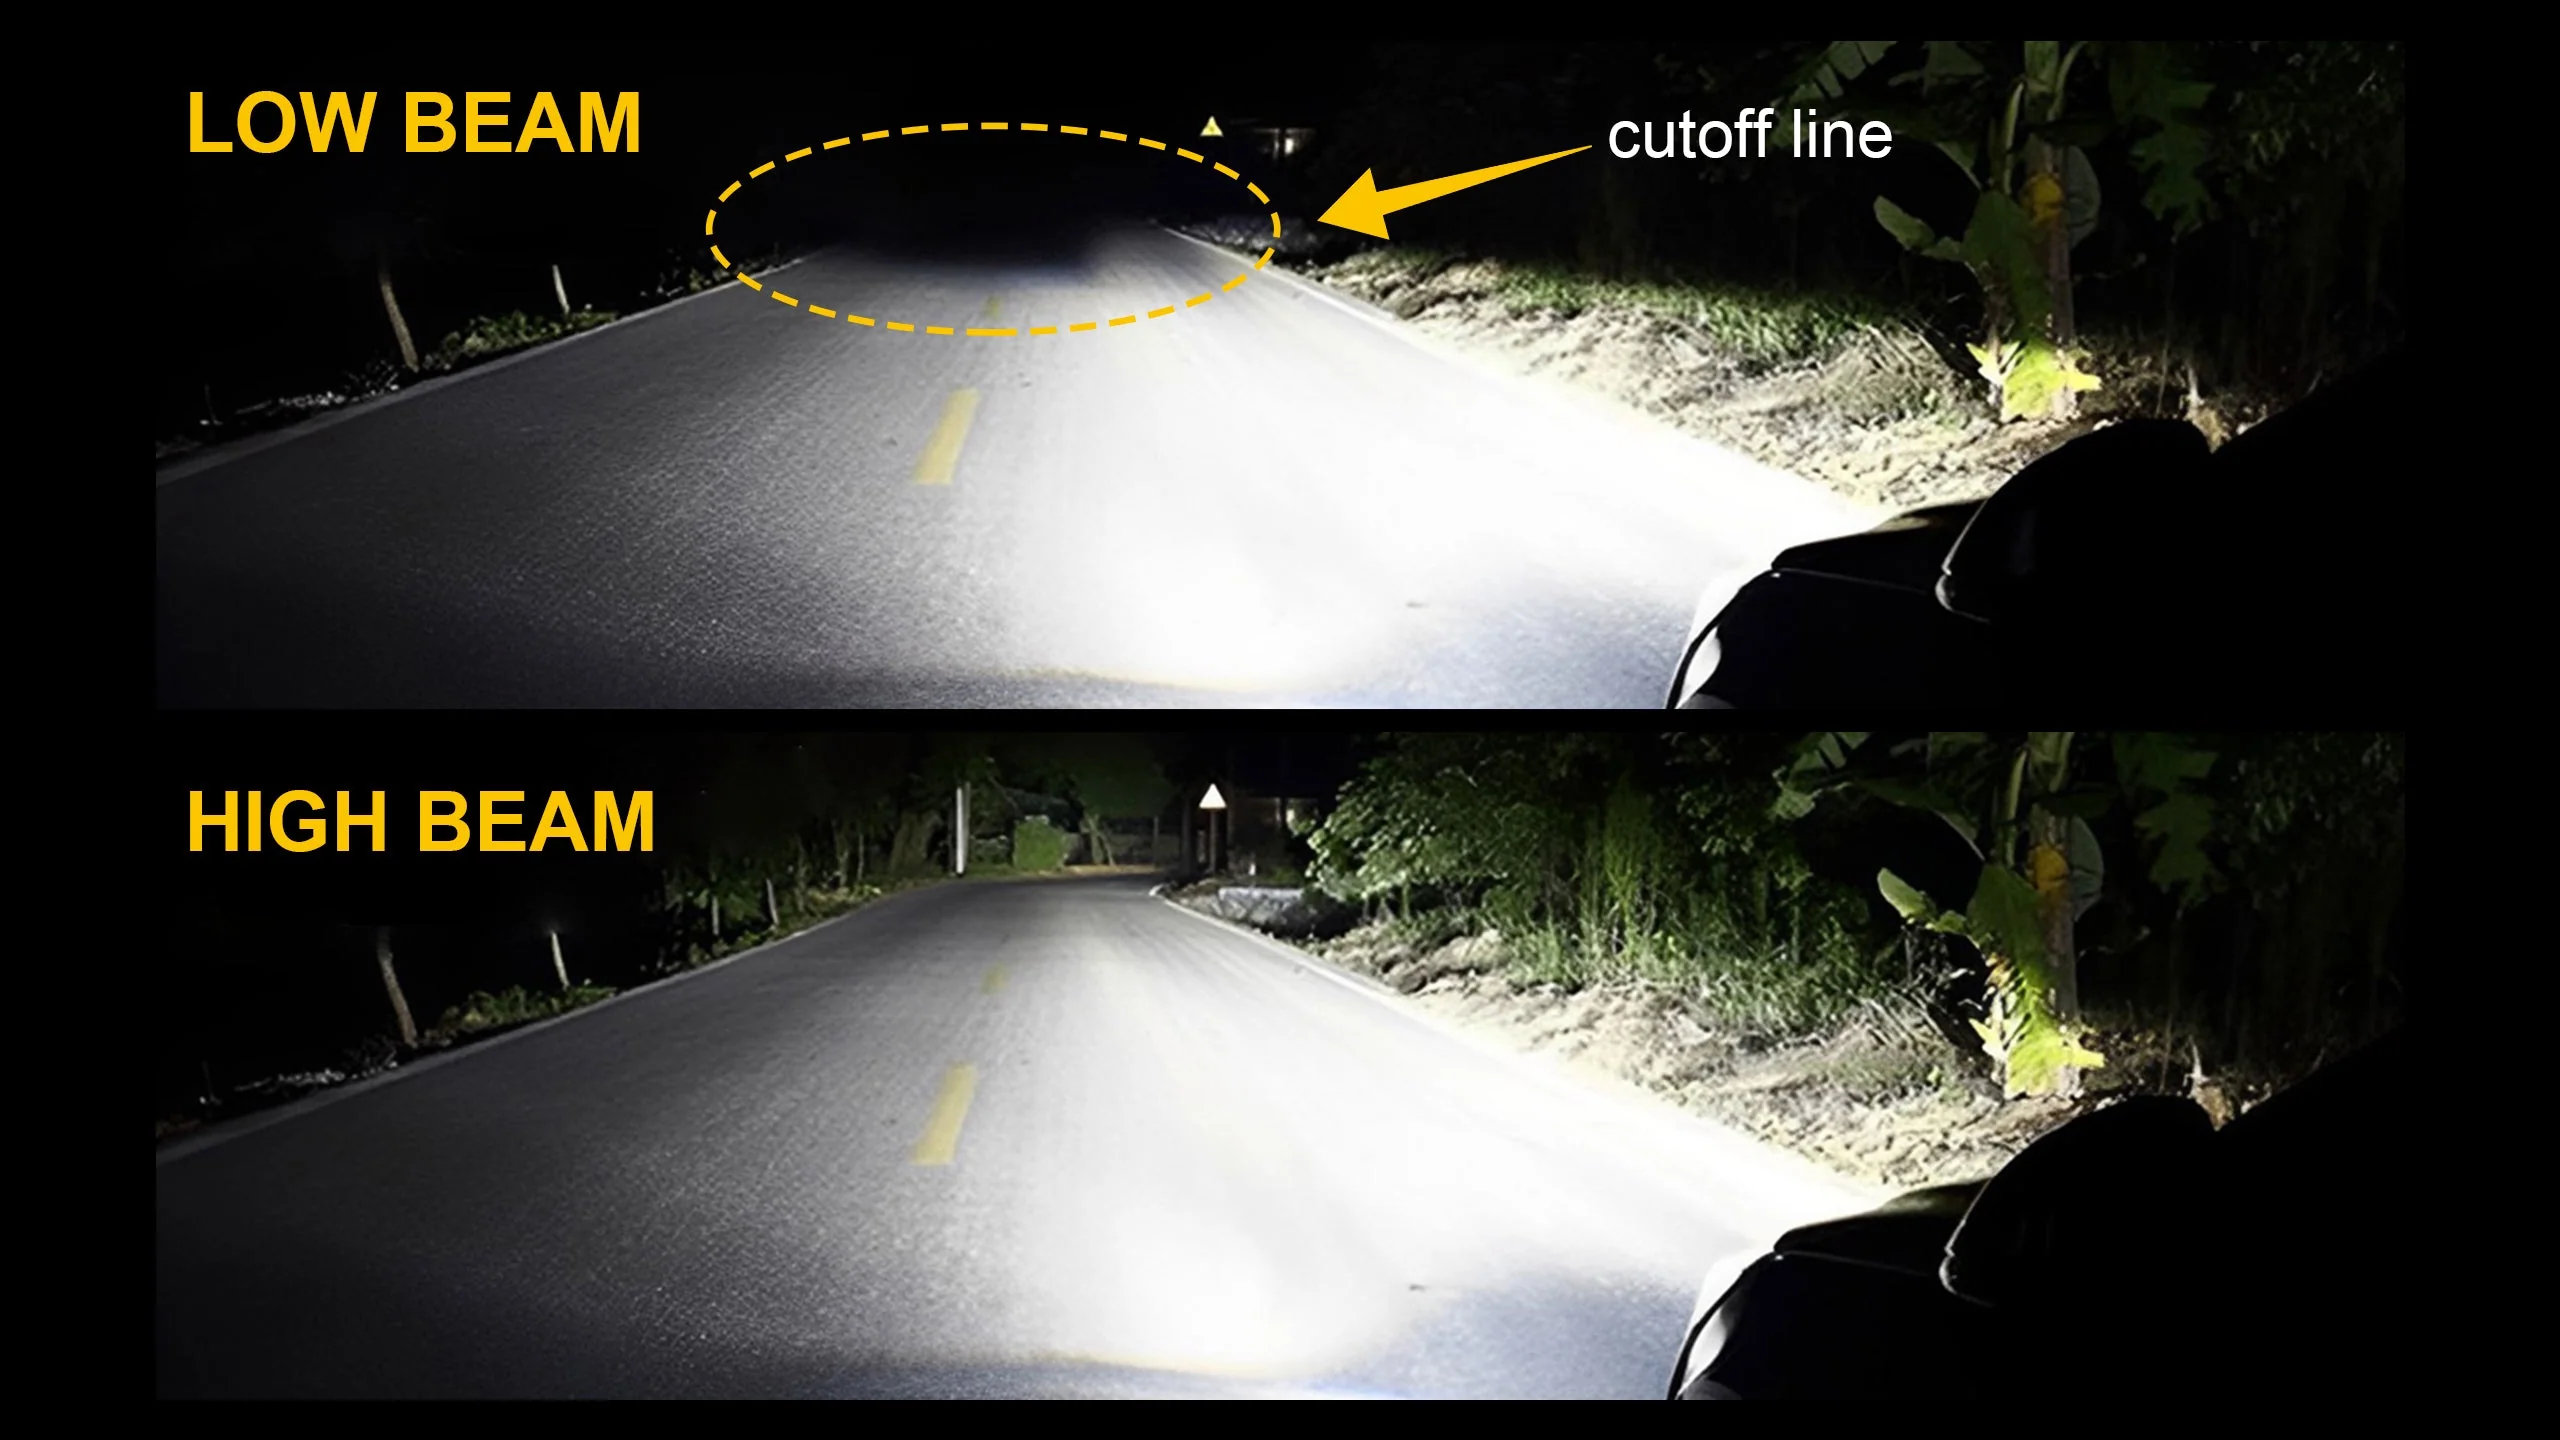
Image source: Bing (Web (fair-use with source credit))
Headlight installation carries genuine safety implications extending beyond personal convenience. Legal requirements vary considerably across jurisdictions, making thorough research essential before modifying your vehicle's lighting system.
Federal Motor Vehicle Safety Standard 108 establishes baseline requirements for automotive lighting in the United States. This regulation specifies minimum luminous intensity, beam pattern characteristics, color restrictions, and durability standards manufacturers must meet. Aftermarket replacement bulbs must satisfy equivalent criteria to remain street-legal nationally.
State-level variations complicate compliance further. California enforces stricter regulations than many other states, prohibiting certain color temperatures and requiring documented conformity certifications. New York mandates particular beam cutoff specifications differing from federal minimums.
Texas maintains relatively permissive standards but still requires functional lighting meeting basic safety thresholds.
Beam pattern legality directly impacts road safety significantly. Proper cutoff patterns prevent blinding oncoming drivers while maintaining adequate illumination for operators. Flood-type beams lacking defined boundaries violate regulations in most jurisdictions due to glare potential.
Using designated off-road-only lighting on public roads exposes you to citation and liability concerns.
Color temperature restrictions exist primarily concerning visibility enhancement versus aesthetic preference. Blue-tinted LEDs exceeding 6000K scatter excessively in atmospheric conditions, reducing effective illumination distance despite apparent brightness increases. Many states implicitly discourage colors deviating substantially from white or selective yellow spectrums through enforcement discretion.
Installation quality affects both safety outcomes and legal standing permanently. Poorly aimed headlights create dangerous glare conditions even using technically compliant components. Documenting proper adjustment procedures protects operators demonstrating due diligence during disputes or investigations involving alleged violations.
Professional installation verification provides additional legal protection occasionally. Certified technicians document compliance measurements satisfying inspection requirements automatically. Some states accept professional certifications免除 owner responsibility for technical correctness assessments during routine examinations.
Insurance implications deserve consideration alongside regulatory concerns. Modifications violating manufacturer specifications or legal standards potentially void coverage provisions related to affected systems. Claims involving improperly installed lighting receive heightened scrutiny from adjusters evaluating negligence possibilities.
Environmental factors influence practical safety considerations additionally. Reflective road signs, wet pavement, and fog conditions interact differently with various beam characteristics. Understanding these interactions helps operators select appropriate configurations maximizing personal safety while minimizing impact on fellow travelers sharing roadway space.
Research thoroughly before purchasing replacement components unfamiliar territory. Manufacturer documentation typically includes compliance statements addressing federal and state requirements generally. Verify applicability specifically to your vehicle year, model, and geographic location separately.
Official resources like NHTSA vehicle lighting standards provide authoritative guidance clarifying complex regulatory landscapes efficiently. Government agencies maintain current information reflecting legislative changes impacting automotive equipment requirements continuously.
Your responsibility extends beyond personal enjoyment toward communal safety obligations universally. Respectful consideration for other road users separates responsible modifications from reckless alterations threatening everyone's wellbeing equally. Proper research and execution demonstrate maturity valuing collective welfare alongside individual preferences consistently.
Critical Mistakes to Avoid During the Installation Process
Even experienced DIYers make preventable errors when swapping halogens for LEDs. Recognizing these pitfalls beforehand keeps your installation smooth and your lighting system reliable for years to come.
Skipping polarity checks causes immediate frustration. Many installers force connectors into place without testing whether the LED illuminates first. If the bulb stays dark after seating, simply flip the connector 180 degrees. Most modern LED kits work either direction, but forcing a non-functional connection wastes time and risks damaging connector pins.
Ignoring heatsink clearance leads to fitment failures. LED bulbs often protrude further than halogen equivalents due to integrated cooling fins. Some JK headlight assemblies lack sufficient space, causing the LED base to contact the reflector or housing interior. Measure available clearance before purchasing to avoid returns and delays.
Over-tightening mounting hardware cracks housings. Factory headlight brackets use plastic retainers prone to stripping under excessive torque. Hand-tighten bolts initially, then apply final torque only until resistance increases noticeably. Plastic components around your JK's grille area share this vulnerability.
Forgetting to reseal housings invites moisture damage. Removing headlights disrupts factory weather seals permanently unless you address them during reassembly. Apply fresh silicone bead along the entire housing perimeter before bolting everything back together. Skip this step and water intrusion becomes a certainty within months.
Aiming headlights without verification creates glare problems. Most owners skip proper beam adjustment, assuming plug-and-play installations automatically align correctly. Factory halogen positions rarely match LED optical centers exactly. Always verify cutoff patterns against a wall before driving on public roads.
Neglecting connector inspection risks electrical fires. Factory wiring harness connectors accumulate corrosion and heat degradation over twelve-plus years. Install new LEDs onto compromised sockets without cleaning or replacing damaged pins, and you invite intermittent failures or melting. Inspect every connection point carefully before proceeding.
Mounting wiring too close to hot components causes premature failure. Exhaust pipes, turbochargers, and engine blocks generate extreme temperatures that degrade wire insulation quickly. Route all LED power cables away from surfaces exceeding 250 degrees Fahrenheit. Secure connections using zip ties to fixed brackets whenever possible.
Assuming all H13LED bulbs fit identically ignores manufacturing variations. While the base shape matches across brands, internal dimensions differ significantly. Some kits include spacers or adapters; others require modification to fit properly. Read product specifications completely before beginning installation.
Rushing through the process sacrifices quality everywhere. Taking forty-five minutes instead of twenty produces dramatically better results. Double-check every connection, verify proper seating, and test functionality before declaring completion. Patience during installation prevents costly callbacks and frustrating repairs later.
How to Choose the Right LED Kit: Comparisons and Decision Factors
Selecting the appropriate LED headlight kit requires balancing multiple variables specific to your driving habits and budget constraints. No single product serves every Jeep JK owner equally.
Beam pattern quality matters more than raw brightness claims. Marketing departments push lumen counts aggressively, but useful illumination depends on precise optical engineering. Look for kits featuring patented projector lenses or engineered reflector-compatible designs. These produce sharp cutoff lines rather than scatter-gunning light everywhere.
Build quality separates permanent solutions from disposable purchases. Premium LEDs use thick aluminum heatsinks measuring one inch or greater in thickness. Copper-core circuit boards distribute thermal energy efficiently across LED chips. Constant-current drivers maintain stable output despite voltage fluctuations from aging alternators.
Budget kits skip these features entirely.
Color temperature selection should prioritize function over aesthetics. While 6000K white looks pristine in showroom lighting, real-world visibility peaks between 5000K and 5500K. Higher color temperatures increase blue light scattering in fog, rain, and dust conditions common during off-road adventures. Lower temperatures penetrate atmospheric obscurants more effectively despite appearing yellowish.
Brand reputation correlates strongly with long-term reliability. Established automotive lighting manufacturers invest heavily in research and testing before releasing products. Verify warranty terms extending two to five years minimum. Read verified buyer feedback reporting actual lifespan outcomes rather than marketing promises.
Canbus compatibility determines installation complexity significantly. Vehicles with sophisticated monitoring systems trigger error codes when LED draw differs substantially from halogen expectations. Error-free LED kits incorporate built-in decoders eliminating dashboard warnings. Budget options requiring external resistors add expense and potential failure points.
Waterproof ratings above IP67 ensure survival in harsh conditions. Mud, water crossings, and pressure washing expose your lighting system to significant moisture threats. Minimum IP67 certification guarantees dust-tight construction and temporary immersion protection. IP68 ratings offer enhanced sealing for extended submersion scenarios.
Price points reveal quality distinctions consistently. Kits under $60 per pair rarely deliver reliable performance beyond six months. Quality options cluster between $120 and $250 for pairs meeting professional standards. Premium selections exceeding $300 justify their cost through superior materials, engineering, and warranty coverage.
Consider your primary use case when making final decisions. Daily drivers prioritizing commuting safety benefit from balanced 5500K beams with conservative lumen outputs around 3000 lumens per bulb. Serious off-roaders tackling remote trails demand maximum illumination with robust construction withstand- ing constant vibration and impact exposure.
Compare at least three different products before committing funds. Owner forums dedicated to Jeep Wrangler communities provide extensive real-world testing reports supplementing manufacturer specifications. Cross-reference independent reviews with aggregate customer feedback for comprehensive understanding before purchasing.
If you plan additional lighting upgrades alongside this project, consider how they integrate with your existing system. Checking resources about Best Jeep Gladiator LED Lights: Top Picks for Visibility and Style might give you ideas for coordinating your lighting setup across multiple accessories.
Costs and Pricing: What to Budget for a Quality LED Upgrade
Understanding realistic pricing expectations prevents budget shocks and helps you allocate funds appropriately across your entire lighting upgrade project.
Entry-level LED kits range from $50 to $100 per pair. These budget options typically compromise on heatsink quality, waterproof ratings, and optical precision. Aggregate user reviews report average lifespans between six months and two years for products in this price tier. Suitable for casual drivers accepting frequent replacements, these kits struggle during demanding off-road applications.
Mid-range selections cost $100 to $200 for quality pairs. This category delivers reliable performance matching most Jeep JK owners' requirements. Expect proper beam patterns, adequate waterproofing exceeding IP67 standards, and manufacturer warranties covering two to three years. Products in this bracket represent the sweet spot balancing cost against longevity for typical usage scenarios.
Premium options exceed $200 but justify their pricing through superior engineering. High-end LEDs feature thick copper-core PCBs, oversized aluminum heatsinks, and precision optical elements producing DOT-compliant beam patterns. Manufacturer warranties extend three to five years covering defects and premature failures. Serious enthusiasts and professional operators invest in these products knowing replacement costs accumulate rapidly with cheaper alternatives.
Additional components increase total project expenses significantly. Canbus decoders, resistor kits, relay harnesses, and mounting hardware add $20 to $80 depending on vehicle requirements and installation complexity. Professional installation labor runs $75 to $150 hourly if you lack tools or confidence performing the work yourself. Budget accordingly to avoid completing installation only discovering missing necessary parts.
Long-term value calculations favor quality investments over time. A $150 premium LED kit lasting five years costs $30 annually. Budget alternatives costing $50 replacing annually total $250 over identical periods. Factoring installation time, troubleshooting headaches, and reliability concerns strengthens the economic case for premium selections considerably.
Accessory coordination affects overall lighting budget substantially. Matching auxiliary lights, fog lamp upgrades, and interior illumination components creates cohesive systems performing reliably together. Spread costs across complete projects rather than addressing individual elements piecemeal over multiple years.
Research seasonal pricing variations carefully before purchasing. Demand spikes during winter months when off-road enthusiasts prepare vehicles for snow and ice conditions. Summer promotions sometimes reduce prices significantly during slower buying periods.
Timing purchases strategically captures discounts without sacrificing availability.
Payment plan options through retailers enable spreading costs across months conveniently. Some stores offer interest-free financing for qualifying purchases exceeding minimum thresholds. Evaluate total cost including any financing charges before committing to installment arrangements.
Allocate contingency funds equaling ten to fifteen percent above anticipated expenses. Unexpected findings during installation frequently require additional purchases resolving unforeseen complications efficiently. Having spare money prevents project delays waiting for order fulfillment during critical upgrade windows.
Maintenance and Long-Term Optimization for Your LED Headlights
LED headlights demand less ongoing maintenance than traditional lighting systems, but periodic attention ensures peak performance throughout their operational lifespan. Simple preventive measures extend usefulness considerably beyond initial expectations.
Clean lens surfaces monthly using appropriate automotive glass cleaners. Road grime, bug residue, and tree sap accumulate rapidly on exposed headlight lenses, reducing light output significantly over time. Apply non-abrasive cleaners specifically formulated for automotive plastics and glass. Avoid household abrasives scratching protective coatings permanently.
Inspect mounting hardware quarterly for looseness caused by vibration. Jeep JKs experience substantial chassis flex during off-road touring generating gradual fastener loosening over months. Check all retaining clips, bolts, and bracket connections during routine maintenance intervals. Tighten anything showing play without forcing components beyond factory specifications.
Verify beam alignment annually or after any suspension modifications. Lift kits, tire size changes, and body alterations shift headlight aim dramatically affecting illumination patterns. Recheck cutoff positioning against walls or certified alignment equipment after significant geometric changes to your vehicle. Proper aiming prevents glare complaints while maximizing forward visibility.
Monitor LED brightness levels for gradual dimming indicating component aging. Quality LEDs maintain consistent output throughout rated lifespans without noticeable degradation. Premature dimming suggests thermal management failures or driver circuit issues warranting professional diagnosis. Document baseline performance immediately after installation establishing comparison standards for future evaluations.
Check wiring connections periodically for corrosion or damage accumulation. Moisture intrusion, temperature cycling, and mechanical stress degrade electrical contacts over extended periods. Disconnect and inspect terminals during seasonal maintenance, cleaning oxidation with appropriate contact cleaners. Replace severely corroded connectors rather than attempting unreliable repairs.
Test polarity protection functionality regularly to confirm proper operation. Built-in reverse polarity safeguards prevent damage during occasional connection errors. Verify LEDs illuminate correctly after each battery disconnect event indicating protection circuits remain functional. Faulty protection allows destructive current flow during accidental misconnections.
Keep spare fuses accessible near headlight circuit locations. Electrical shorts occasionally blow protective fuses interrupting illumination unexpectedly. Identify fuse panel locations within your JK and maintain spare automotive blade fuses matching circuit amperage ratings precisely. Replacement takes seconds preventing extended darkness situations unnecessarily.
Store unused LED kits properly avoiding extreme temperatures and humidity. Spare components degrade prematurely when stored incorrectly in uncontrolled environments. Keep replacement bulbs in original packaging within climate-controlled spaces whenever possible. Proper storage preserves functionality until needed during unexpected failures.
Consult maintenance guides for related systems to optimize your overall vehicle care routine. Learning about tasks like How to Install a Jeep JK Hood: Step-by-Step Guide builds mechanical confidence transferable across multiple maintenance projects successfully.
When to Seek Professional Help Instead of DIY Installation
Some installation scenarios exceed comfortable DIY boundaries requiring qualified technician intervention. Recognizing these situations early prevents costly mistakes and ensures optimal lighting performance.
Complex wiring modifications demand professional expertise consistently. Vehicles requiring custom relay installations, harness splicing, or canbus integration exceed basic plug-and-play scenarios comfortably. Qualified automotive electricians possess diagnostic equipment and experience resolving intricate electrical challenges safely. Attempting advanced modifications without proper training risks damaging expensive vehicle electronics permanently.
Persistent error codes despite correct installation indicate underlying issues. Canbus warnings appearing after verified proper LED installation suggest incompatible vehicle systems requiring specialized knowledge diagnosing. Professional technicians identify root causes efficiently using scan tools and wiring diagrams unavailable to hobbyists. Continued frustration signals it's time calling experienced help.
Suspension alterations affecting headlight geometry require professional realignment. Lift kits, leveling procedures, and body modifications change headlight aim fundamentally beyond simple adjustment screw ranges. Certified alignment specialists restore proper beam positioning using precision equipment ensuring compliance with safety standards. Incorrect geometry creates dangerous glare conditions impossible correcting through basic adjustments alone.
Severe connector damage necessitates professional repair procedures. Melted, cracked, or internally corroded factory harnesses require specialized techniques restoring functionality reliably. Wire replacement, terminal rebuilding, and heat-shrink sealing demand experience preventing future failures. Attempting rushed repairs often compounds existing problems creating additional complications.
Legal compliance concerns warrant professional verification confidently. Owners uncertain whether modifications satisfy local regulations benefit enormously from certified installer confirmation. Professional shops maintain current knowledge regarding jurisdictional requirements ensuring installations pass inspection seamlessly. This peace of mind justifies associated service charges considerably.
Multiple simultaneous lighting upgrades create integration complexity. Coordinating headlight LED installation with auxiliary light bar mounting, fog lamp additions, and interior illumination projects generates intricate wiring challenges. Experienced fabricators manage complex multi-system installations efficiently avoiding conflicts between competing power demands. DIY approaches frequently overlook interactions between separate lighting circuits.
Time constraints prevent thorough installation execution safely. Busy schedules occasionally force compromising installation quality through rushed procedures. Paying professionals ensures completed work meets appropriate standards without personal time investment. Sometimes spending money preserves quality outcomes impossible achieving under time pressure circumstances.
Lack of appropriate tools indicates professional assistance worthwhile. Quality installation requires specific equipment including torque wrenches, multimeters, wire strippers, and soldering supplies. Accumulating specialized tooling for one-time projects proves economically inefficient compared to professional service charges. Borrowing equipment introduces availability uncertainties complicating scheduling further.
Identify reputable automotive electrical specialists through verified referrals and BBB accreditation checking before committing services. Compare multiple quotes ensuring pricing transparency regarding labor rates and parts markup structures clearly. Written estimates protecting both parties prevent misunderstandings regarding scope and cost expectations comprehensively.
Your decision ultimately balances comfort, capability, and consequence evaluation honestly. Recognizing limitations demonstrates maturity preserving vehicles responsibly while maintaining safety standards consistently throughout all modifications undertaken.
Frequently Asked Questions About Jeep JK LED Headlight Installation
Can I install LED headlights myself or do I need a mechanic?
You can install LED headlights yourself if you have basic tools and patience. The process involves removing the grille, swapping bulbs, and reconnecting wiring. Most plug-and-play kits require no cutting or splicing.
Take your time and follow each step methodically for best results.
Will LED headlights fit my 2007-2018 Jeep Wrangler JK without modifications?
Most H13 LED kits fit factory JK headlight housings without alterations. However, some thicker heatsinks may clearanced against internal components. Measure your available space before purchasing.
Verify compatibility lists on product pages match your specific year and trim level exactly.
Do I need resistors or decoders to prevent error codes?
Error-free LED kits eliminate the need for additional resistors or decoders entirely. Built-in canbus technology mimics halogen load characteristics automatically. Budget kits lacking this feature trigger dashboard warnings frequently.
Always confirm canbus compatibility when shopping to avoid unexpected complications later.
How long do quality LED headlights last in a Jeep JK?
Premium LED kits rated for 30,000 to 50,000 hours typically outlast the vehicle itself under normal use. Average nightly driving of two hours extends useful life beyond ten years comfortably. Lower-quality units often fail within one to two years due to inadequate thermal management.
Invest in reputable brands ensuring long-term value.
Are LED headlights legal for street use on my Jeep Wrangler?
LED replacements meeting DOT and SAE standards remain legal for highway use nationwide. Products designed solely for off-road competition lack proper beam patterns and violate road regulations. Verify your chosen kit carries appropriate certification labels before installing.
Keep documentation proving compliance for inspection purposes routinely.
Should I replace both headlights at the same time?
Replacing both units simultaneously ensures matched brightness and color temperature consistently. Mismatched LEDs create uneven illumination patterns compromising visibility safety. Pair aging halogens degrade differently causing noticeable discrepancies over time.
Budget accordingly for complete front-end lighting upgrades rather than partial replacements.
Final Recommendation and Next Steps for a Safe, Effective Upgrade
Upgrading your Jeep JK headlights to LED delivers measurable improvements in visibility, efficiency, and durability when done correctly. The process rewards careful preparation and methodical execution with reliable performance lasting years rather than months.
Begin by evaluating your primary driving environment and selecting a kit matching those conditions specifically. Daily commuters benefit from balanced 5500K beams around 3000 lumens per bulb. Serious off-roaders tackling remote trails demand maximum output with aggressive thermal management systems.
Image source: Bing (Web (fair-use with source credit))
Prioritize beam pattern quality over raw lumen claims when comparing products. Proper cutoff geometry prevents glare while illuminating road surfaces effectively. Flood-style LEDs might appear brighter initially but create hazardous scatter patterns endangering fellow motorists regularly.
Budget realistically covering all necessary components including potential decoders, sealants, and mounting hardware extras. Plan approximately $150 to $250 for quality kits meeting professional standards reliably. Factor in additional costs for professional installation if electrical complexity exceeds your comfort level substantially.
Follow the step-by-step procedure outlined throughout this guide methodically without rushing关键环节. Document each phase photographically establishing reference points for future maintenance work conveniently. Verify polarity, aim, and sealing before considering the project complete satisfactorily.
Perform annual inspections checking for loose connections, lens contamination, and alignment shifts caused by vibration or suspension changes over time. Clean lenses regularly maintaining maximum light output throughout the product lifespan consistently. Address any dimming or flickering immediately preventing complete failures during critical situations unnecessarily.
Consider complementary upgrades coordinating lighting improvements across your entire vehicle systematically. Adding auxiliary light bars enhances trail visibility considerably beyond stock positions alone. Exploring options like Best Jeep Grand Cherokee Dome Lights: Top Picks for Brightness and Easy Installation might give you ideas for improving interior illumination alongside exterior upgrades too.
Your investment in proper LED headlights pays dividends through improved safety, reduced electrical strain, and lower replacement frequency compared to halogen alternatives. Making informed decisions based on thorough research protects both your wallet and your wellbeing on every journey ahead successfully.