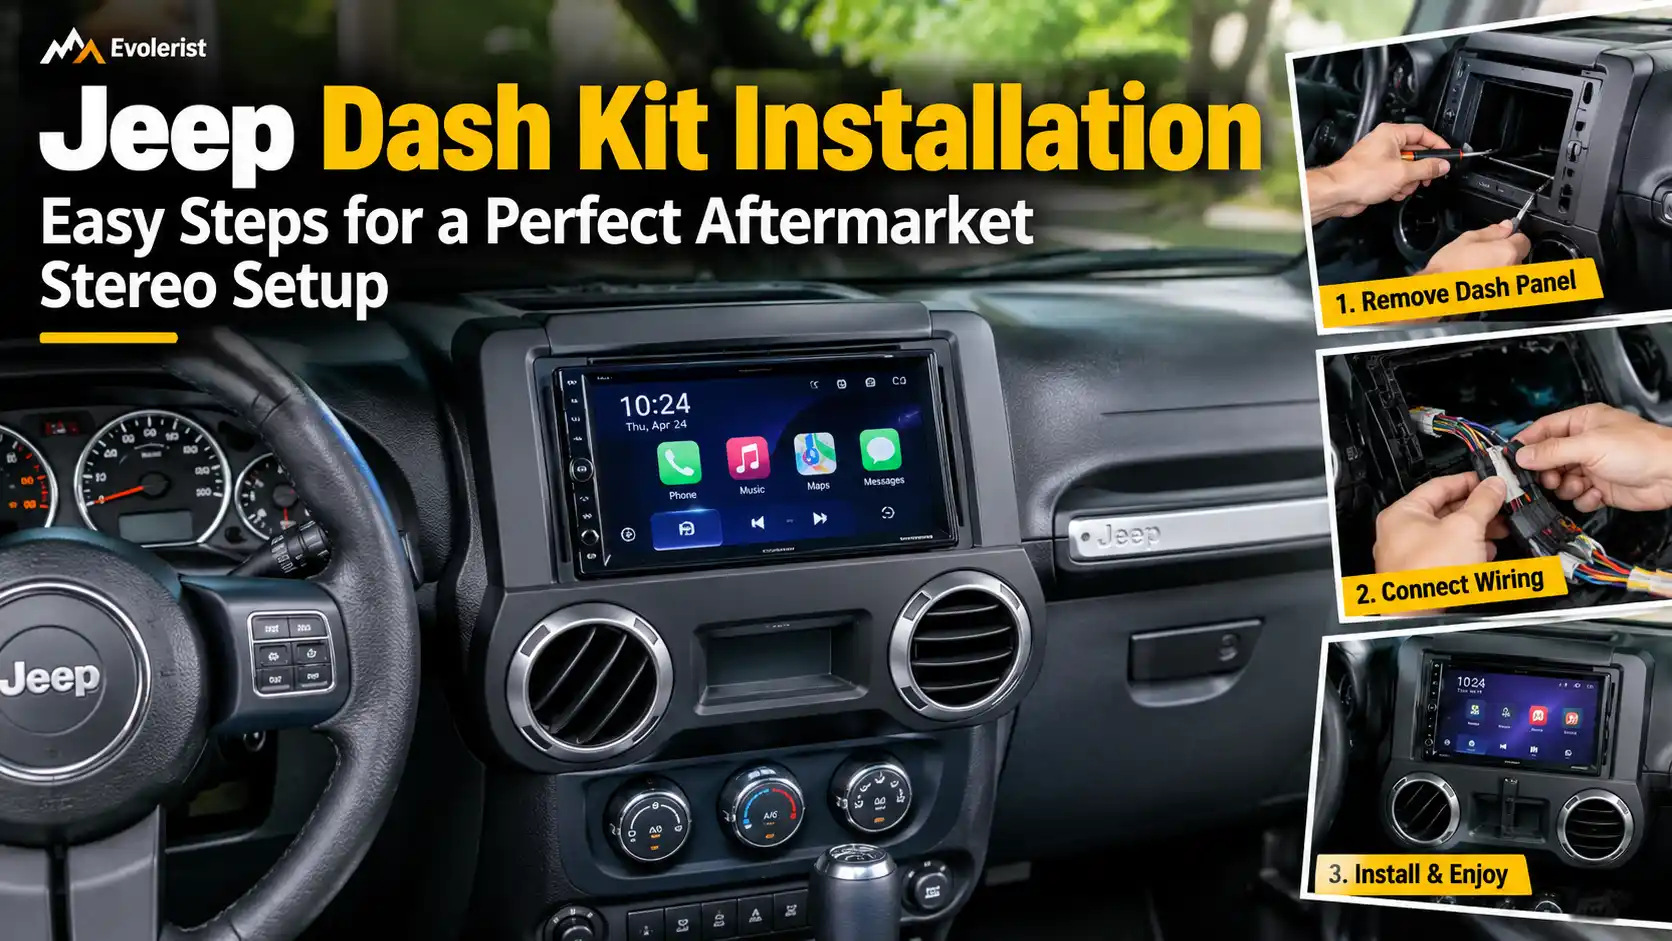
Replacing the factory radio in a Jeep can completely change the driving experience. A modern aftermarket stereo can add Apple CarPlay, Android Auto, Bluetooth, better navigation, improved audio controls, a larger touchscreen, and features that may not be available on the original head unit.
The tricky part is getting the new stereo to fit correctly without making the dashboard look unfinished or causing factory features to stop working.
That is where the right Jeep dash kit, wiring harness, antenna adapter, and radio replacement interface become important.
This Jeep dash kit installation guide covers the easy steps for a clean aftermarket stereo setup, from checking compatibility and removing the factory radio to connecting the wiring, retaining factory features, testing the new head unit, and fixing common installation problems.
One important point before starting: Jeep dashboards and electronic systems vary significantly by model, year, trim, factory radio, and audio package. Always confirm the instructions for your exact vehicle before removing or modifying anything.
What Is a Jeep Dash Kit?
A Jeep dash kit is a set of trim pieces, brackets, mounting hardware, or radio bezels designed to help an aftermarket stereo fit the opening left by the original factory radio.
The factory radio is shaped specifically for the original dashboard. An aftermarket Single DIN, Double DIN, modular, or floating-screen head unit usually has different dimensions.
The dash kit fills those differences and gives the new stereo a secure mounting point.
A good kit should do two jobs: hold the new radio firmly and make the finished installation look as close to factory-installed as possible.
A dash kit is not the same thing as a wiring harness or radio interface. The dash kit handles physical fitment. The wiring harness connects the aftermarket radio to the Jeep’s factory wiring. An antenna adapter connects the factory antenna cable to the new stereo, while an integration interface may be needed for factory electronics such as steering-wheel controls or an amplified audio system.
Check Jeep Dash Kit Compatibility Before Installation
Never order a dash kit based only on the word “Jeep.”
Even two vehicles with the same model name may require different kits because of changes between model years, trim packages, dashboards, factory screen sizes, and audio systems.
Before buying installation parts, confirm the exact Jeep model, model year, trim level, factory radio type, screen size, audio package, and whether the vehicle has factory navigation.
For example, a Wrangler JK and Wrangler JL have very different dashboards. A Grand Cherokee equipped with a larger factory touchscreen may also require a different installation solution than one with a basic radio.
The safest approach is to use the manufacturer’s vehicle fit guide and enter the exact year, model, and trim.
Check Whether Your Jeep Has a Factory Amplifier
Some Jeep models use a factory-amplified sound system. Others send speaker-level output directly from the radio.
If your Jeep has an Alpine or another premium amplified system, connecting the new stereo without the correct interface can result in a radio that powers on but produces no sound.
The factory amplifier may also depend on data signals rather than a simple 12-volt turn-on wire.
This is why amplified and non-amplified Jeeps should not automatically be treated as having the same installation requirements.
Check Your Factory Screen and Controls
Look at what the original radio controls besides music.
On some Jeeps, the factory screen is tied to climate functions, vehicle settings, heated-seat controls, parking features, cameras, or other vehicle information.
Removing that screen without the correct integration solution can mean losing functions you still need.
For example, certain 2014-2021 Jeep Grand Cherokee dash solutions are designed around the factory climate controls and require a separate interface to retain selected climate and comfort functions.
Check Regional Fitment
Jeep models sold in the USA, Canada, UK, and Australia are not always configured identically.
Right-hand-drive and left-hand-drive dashboards, radio specifications, trim packages, factory equipment, and market-specific electronics can differ.
A kit advertised for a US Jeep should therefore not automatically be assumed to fit the same model sold in the UK or Australia.
Verify the market and vehicle application before ordering.
Check the Aftermarket Stereo Size and Depth
Most buyers focus on screen size. Radio depth is just as important.
A head unit can have the correct width and height but still be too deep for the cavity behind the Jeep dashboard.
Single DIN Stereo
A traditional Single DIN stereo is approximately 2 inches tall.
When a larger factory opening is being converted to Single DIN, the installation kit may include or require a storage pocket to fill the unused space.
Double DIN Stereo
A Double DIN stereo is approximately 4 inches tall and is common for touchscreen receivers.
Many Jeep stereo upgrades use Double DIN head units, but physical clearance still needs to be checked.
Shallow-Mount Stereo
Modern shallow-mount receivers reduce the depth of the radio chassis.
They are particularly useful in dashboards where the factory cavity has limited room for the new radio, wiring, data interfaces, USB cables, antenna connectors, and other adapters.
Some Wrangler JL installation kits specifically limit the allowed receiver depth or are designed for shallow-mount and modular receivers. For example, one Metra Wrangler JL kit specifies a 3.75-inch chassis-depth allowance for compatible shallow-mount applications.
Modular and Floating-Screen Radios
A modular receiver separates parts of the display and radio chassis, which can make installation possible in tight dashboards.
Floating-screen stereos use a screen that sits in front of the dash instead of completely inside the radio opening.
These systems can provide a larger display, but check clearance around the vents, climate controls, switches, gear selector, and other dashboard components before choosing one.
Parts You May Need for a Jeep Aftermarket Stereo Installation
The dash kit is only one part of the job.
Your exact installation may use several components.
| Installation Part | What It Does |
|---|---|
| Jeep dash kit | Mounts the new stereo and fills gaps around it |
| Aftermarket head unit | Replaces the factory radio |
| Wiring harness | Connects the new stereo to factory wiring |
| Radio replacement interface | Communicates with the Jeep’s electronic system |
| CAN bus interface | Reads or provides vehicle data signals |
| Steering-wheel-control interface | Retains compatible steering-wheel buttons |
| Antenna adapter | Connects the factory AM/FM antenna |
| Factory amp interface | Helps retain an amplified factory system |
| Camera retention adapter | Helps retain a compatible factory backup camera |
| USB retention adapter | Connects a compatible factory USB port to the new radio |
| AUX adapter | Retains a compatible factory auxiliary input |
| Media hub | Replaces or adapts factory USB/AUX connections |
| Satellite antenna adapter | May allow compatible satellite-radio antenna reuse |
| Mounting brackets | Secure the stereo inside the dashboard |
| Wiring connectors | Join aftermarket and adapter harness wires securely |
You may not need every part in the table. Use only components confirmed for your Jeep and aftermarket stereo.
Which Factory Jeep Features Can You Retain?
This question should be answered before buying the radio, not after installation.
Depending on the Jeep and integration system, you may be able to retain steering-wheel audio controls, the factory amplifier, USB and AUX ports, backup camera, climate information, parking chimes, vehicle settings, warning chimes, gauges, and other OEM functions.
For example, compatible Wrangler JL integration systems can retain functions such as steering-wheel audio controls, USB/AUX connectivity, climate information, and vehicle settings when used with the required radio and interface. The exact features depend on the selected system.
That last point matters.
Do not assume that because one installation kit retains a backup camera or factory USB port, every kit for the same Jeep will do the same.
Check the feature-retention list for the exact combination of vehicle, dash kit, interface, and head unit you plan to install.
Factory Features You May Lose After Replacing the Jeep Radio
Certain factory functions may not transfer to an aftermarket stereo.
Possible examples include parts of the Uconnect system, the original microphone, satellite-radio functionality, factory navigation information, factory USB ports, camera functions, or settings previously accessed through the original touchscreen.
Feature loss depends heavily on the interface being used.
Sometimes there is an adapter or alternative solution. In other cases, a feature simply cannot be retained with that particular stereo.
Write down the factory functions you use regularly before ordering the new system. This simple step can prevent the frustrating discovery that your new touchscreen works perfectly but a feature you use every day has disappeared.
Tools Needed for Jeep Dash Kit Installation
The required tools change by model, but most installations use a similar basic set.
| Tool | Typical Use |
|---|---|
| Plastic trim removal tool | Releases dash panels and clips |
| Phillips screwdriver | Removes radio and trim screws |
| Torx drivers | Removes Torx fasteners where fitted |
| Socket and ratchet set | Removes bolts on certain models |
| Wire stripper | Prepares aftermarket harness wires |
| Crimping tool | Secures crimp connectors |
| Multimeter | Helps verify power, ground, and signals |
| Small flashlight | Makes the radio cavity easier to inspect |
| Electrical tape or heat-shrink | Protects electrical connections |
| Zip ties | Organizes wiring behind the radio |
| Soft cloth or towel | Protects dashboard surfaces |
Vehicle-specific instructions should always take priority over a generic tool list.
Safety Checks Before Removing the Factory Stereo
Park the Jeep on a level surface and turn the ignition completely off.
Save any settings, radio presets, or security information you may need later.
Follow the vehicle manufacturer’s recommended battery-disconnection procedure before working on exposed electrical connections. This is especially important around dashboards containing airbags, start/stop controls, vehicle-data wiring, and other electronic modules.
Do not probe unknown wires randomly with a test light.
Do not cut factory wiring simply because an aftermarket wire appears to have the same color.
Also pay attention to hybrid and 4xe applications. Some accessories or installation systems specifically exclude certain electrified models, so compatibility needs to be verified rather than assumed.
How to Install a Jeep Dash Kit and Aftermarket Stereo Step by Step
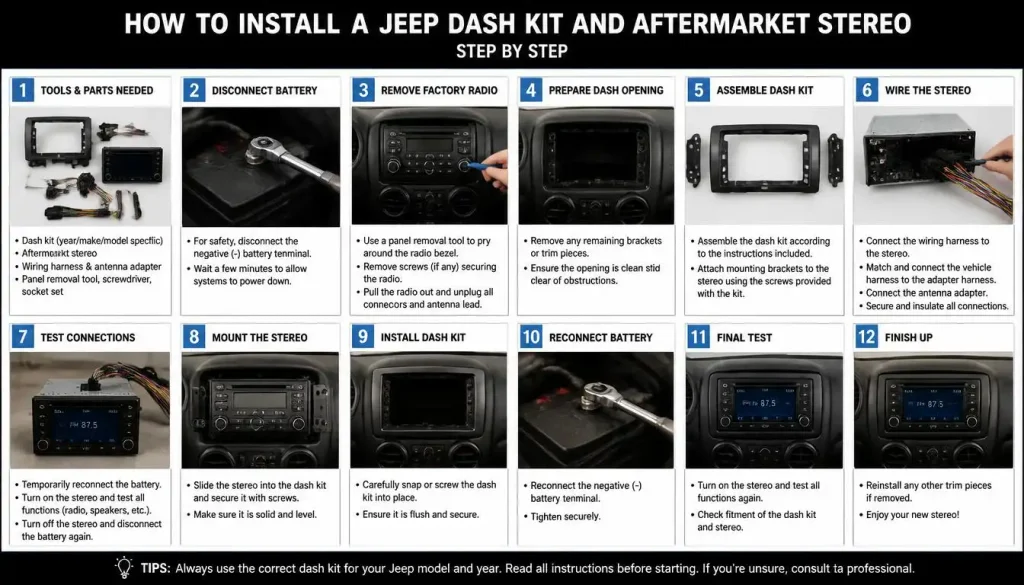
The following workflow explains the general process. Your exact screw locations, trim removal sequence, wiring, programming, and mounting method may be different.
Step 1: Confirm Every Part Before Taking the Dash Apart
Lay the components out before beginning.
Compare the dash kit with the factory dashboard. Confirm that the wiring harness plugs into the Jeep connector and that the antenna adapter matches the factory antenna plug.
If you are using a data interface, check that it supports your exact Jeep and aftermarket radio.
It is much easier to discover a missing adapter while the factory radio is still installed.
Step 2: Disconnect Power Safely
Follow the correct procedure for your Jeep before disconnecting electrical components.
If the installation instructions call for disconnecting the negative battery terminal, do that before connecting or modifying the radio wiring.
Keep the terminal isolated so it cannot accidentally touch the battery post while you work.
Step 3: Remove the Factory Dash Trim
Use a plastic panel tool instead of a metal screwdriver whenever possible.
Start at the points identified in the vehicle-specific instructions and release the retaining clips gradually.
Do not pull a panel away quickly. Climate controls, start/stop buttons, lighting switches, USB connections, or other components may still have wiring attached behind the panel.
Disconnect those plugs by their locking tabs instead of pulling on the wires.
On some newer Wrangler installations, the climate-control panel is removed before the radio trim, followed by screws securing the radio assembly.
Step 4: Remove the Factory Jeep Radio
Once the surrounding trim is removed, locate the screws or bolts holding the factory radio in place.
Support the radio as you remove the final fastener so it does not fall forward and scratch the dashboard.
Pull it toward you slowly.
Several connectors may be attached to the rear, including the main wiring plug, antenna cable, USB or media connections, satellite antenna, camera-related connections, and other vehicle-specific plugs.
Release each connector carefully.
Take a clear photo before disconnecting everything. It gives you a useful reference if you later forget where a plug originally went.
Step 5: Compare the Factory Opening With the New Stereo
Do not immediately start cutting plastic.
Place the dash-kit components near the opening and inspect the available depth.
Look for metal braces, plastic supports, factory electronic modules, vents, and wiring bundles that could interfere with the new receiver.
Some Jeep installations accept an aftermarket radio without modification. Others require specific trimming, bracket removal, or relocation procedures.
Follow the dash-kit instructions exactly.
Step 6: Assemble the Jeep Dash Kit
Identify the left and right mounting brackets.
Attach them to the radio or radio housing according to the manufacturer’s instructions.
Do not fully tighten everything immediately.
Leave enough movement to adjust the screen position and trim alignment during test fitting.
For a Single DIN installation, install the required mounting pocket or sleeve.
For a Double DIN, shallow-mount, or modular head unit, use only the bracket configuration designed for that radio format.
Step 7: Prepare the Wiring Harness
This is where careful preparation saves time.
The aftermarket stereo will normally have its own harness. Your Jeep adapter harness or integration interface will have another set of wires.
Match each connection by function according to the manuals.
Common circuits can include constant battery power, switched accessory power, ground, illumination, speaker outputs, amplifier turn-on, reverse signal, parking-brake input, and vehicle-speed information.
Do not rely only on wire color.
A color that means one thing on an aftermarket radio may mean something different elsewhere in the vehicle.
Use the labels and wiring diagrams supplied with the stereo and interface.
Make secure connections using a suitable method such as quality crimp connectors or properly insulated soldered connections where appropriate. No bare copper should remain exposed.
Step 8: Install the Radio Replacement or CAN Bus Interface
Modern Jeep electrical systems often communicate over a vehicle data network.
This is why a simple red accessory wire may not be available in the factory radio plug.
A compatible interface can interpret vehicle data and provide the signals required by the aftermarket stereo.
Depending on the system, it may also retain the factory amplifier, steering-wheel controls, reverse trigger, illumination, parking-brake signal, or retained accessory power. Some Chrysler/Dodge/Jeep radio interfaces provide several of these functions from vehicle data.
Follow the interface connection diagram carefully.
Step 9: Program or Flash the Interface if Required
Do this before final assembly.
Some advanced integration modules must be programmed with the correct vehicle and radio firmware.
For example, certain Maestro-based Jeep kits require the interface module to be flashed with the correct firmware before installation.
Programming can identify the exact Jeep, aftermarket stereo brand, steering-wheel-control configuration, and supported factory features.
If your interface requires software, an app, or computer programming, complete that process according to the manufacturer’s latest instructions.
Step 10: Connect the Antenna and Media Adapters
Connect the AM/FM antenna through the correct adapter.
If you plan to retain USB, AUX, HDMI, or another media connection, install the required adapter or replacement media hub.
Do not assume the original Jeep USB connector can plug directly into the aftermarket stereo.
Factory USB systems may use a vehicle-specific connector or hub.
Step 11: Connect Factory Feature Retention Components
Now connect any required factory amplifier interface, steering-wheel-control connection, camera retention adapter, chime module, USB adapter, or other vehicle-specific component.
If an interface requires an OBD-II connection or data connection, route it according to the installation manual without interfering with pedals, steering components, or diagnostic access.
Step 12: Organize the Wiring Before Installing the Radio
A common mistake is pushing every connector directly behind the stereo.
This creates a thick bundle that prevents the head unit from sliding fully into the dash.
Instead, look for safe open spaces beside, below, or above the radio cavity where permitted by the vehicle and kit instructions.
Secure loose wiring with zip ties.
Keep wires away from sharp edges, HVAC mechanisms, moving controls, and hot components.
Never force the stereo into place.
If it does not slide in naturally, pull it back out and find the obstruction.
Step 13: Test the Stereo Before Reassembling the Dashboard
This step can save an hour of unnecessary work.
Restore power according to the installation procedure and turn the new radio on.
Check every speaker.
Test left-right balance and front-rear fader where supported.
Check AM/FM reception, Bluetooth, Apple CarPlay or Android Auto, USB charging and data, steering-wheel controls, factory amplifier operation, backup camera, microphone, illumination, and any retained vehicle settings.
Turn the ignition off and confirm that the stereo shuts down or remains active for the correct retained-accessory-power period.
Start the Jeep again and make sure the radio boots normally.
If something does not work, fix it now while every connector is still accessible.
Step 14: Test-Fit the Dash Kit
Place the radio and dash-kit trim into the opening without forcing the clips.
Look at the gaps around all sides.
The screen should be level and centered.
Check whether a floating display interferes with vents or controls.
If the radio sits too far forward or backward, loosen the mounting brackets and adjust their position if the kit allows it.
Step 15: Secure the Stereo
Once the test fit is correct, tighten the mounting screws evenly.
Do not overtighten screws into plastic brackets.
Overtightening can crack the mounting tabs or pull the stereo out of alignment.
Confirm that no wires are trapped between the radio chassis and dashboard.
Step 16: Reinstall the Jeep Dash Trim
Reconnect every plug removed during disassembly.
Align the trim panel clips before pressing them into place.
Work around the panel gradually rather than hitting one side hard.
Reinstall the original screws and bolts in their correct positions.
Finally, inspect the entire dashboard for uneven gaps or loose panels.
Jeep Wrangler Dash Kit Installation Notes
Wrangler installations deserve extra attention because the dashboard changed significantly between generations.
Older Wrangler TJ and JK models are generally different installation environments from the Wrangler JL.
The JL can involve deeper integration with factory vehicle controls, depending on the radio and trim level. Some JL dash solutions also require shallow-depth or modular receivers because of limited space behind the screen.
Do not use instructions written for a Wrangler JK on a Wrangler JL just because both vehicles carry the Wrangler name.
Jeep Grand Cherokee Dash Kit Installation Notes
Grand Cherokee radio replacement can become more complex when factory climate and comfort functions are integrated into the original touchscreen.
That means replacing the radio may require much more than plastic mounting brackets.
For 2014-2021 Grand Cherokee applications, aftermarket dash solutions exist that accommodate the original climate controls, while separate electronic interfaces may be required to retain selected factory climate and comfort features.
Before buying a head unit, make a list of every function currently controlled from the factory screen.
Jeep Cherokee Dash Kit Installation Notes
Cherokee installations can also involve the factory amplifier, camera, USB ports, parking-assist chimes, climate information, and steering-wheel controls.
Compatible integration packages are available for certain applications that can retain several of these systems, but retention depends on the particular kit and head unit.
Again, fitment should be checked by exact model year and equipment level.
Do You Need to Cut or Modify the Jeep Dashboard?
Sometimes.
Certain aftermarket radio installations require modification behind the visible dashboard.
That may involve trimming plastic supports or another specifically identified component to create enough space for the radio.
Never assume cutting is required.
And never start removing plastic simply because the new stereo will not slide in.
First check whether wiring is blocking the chassis, the brackets are incorrectly positioned, the radio is too deep, or the wrong dash kit has been purchased.
If the kit instructions specify dashboard modification, mark the area carefully and follow the supplied template.
Some Jeep Double DIN kits explicitly require dashboard modification and include a cutting template for that reason.
If you are uncomfortable making irreversible changes, this is a good point to use a professional installer.
How to Get a Factory-Like Fit
A professional-looking Jeep aftermarket stereo installation is usually the result of patience rather than force.
Dry-fit the brackets before tightening them.
Look at the radio from the driver’s seat as well as directly in front of the dashboard.
Check the horizontal alignment.
Run your fingers around the trim ring and look for areas where one edge sticks out farther than another.
Make sure wires behind the receiver are not pushing it outward.
If the kit provides different mounting positions, choose the one that places the radio face at the correct depth relative to the surrounding trim.
The best installation should look intentional, not like a screen was pushed into an opening that was never designed for it.
Configure the New Stereo After Installation
Physical installation is only half the job.
Open the stereo settings and configure the system correctly.
Set the speaker layout and crossover options if applicable. Pair your phone and test Bluetooth calls. Configure Apple CarPlay or Android Auto. Set the backup-camera trigger and camera image options.
If steering-wheel buttons are programmable, confirm each one performs the expected function.
Check the time, illumination, microphone level, radio region, and audio balance.
For systems connected to an advanced vehicle interface, review any available vehicle settings and make sure the options you previously controlled through the factory radio are accessible.
Common Jeep Dash Kit Installation Problems and Fixes
New Stereo Does Not Turn On
First check the radio fuse and vehicle fuse.
Then verify constant power, accessory power, and ground.
If your Jeep uses a data-controlled accessory circuit, make sure the radio replacement interface is connected and programmed correctly.
A stereo can be wired correctly internally but still fail to power on if the interface is not generating the required accessory output.
Stereo Turns On but There Is No Sound
A factory amplifier is one of the first things to check.
The amplifier may need an interface, data command, remote turn-on output, or a specific wiring configuration.
Also check the speaker connections and the new stereo’s amplifier settings.
Steering-Wheel Controls Do Not Work
Confirm that the steering-wheel-control interface supports both the Jeep and the aftermarket head unit.
Some systems require programming or a radio-specific connection.
Check the interface instructions before trying to remap buttons manually.
Factory USB Port Does Not Work
The factory USB port may require an adapter or replacement media hub.
It may also support charging but not data with a particular aftermarket head unit.
Confirm that the USB retention solution supports CarPlay or Android Auto if that is your goal.
Backup Camera Has No Image
Check whether the factory camera is actually retained by your selected interface.
Some kits retain the original camera. Others require a separate camera adapter, and certain integration solutions may replace the factory camera instead.
Also verify camera power, video format, reverse trigger, and the radio’s camera-input settings.
Factory Amplifier or Subwoofer Is Not Working
Check the amplifier-retention interface and remote turn-on circuit.
If the vehicle uses a digitally controlled factory amplifier, a simple wire connection may not be enough.
Make sure the selected interface specifically supports the factory audio package.
Stereo Does Not Sit Flush
Do not push harder.
Pull the radio back out and inspect the cavity.
A connector may be trapped behind the chassis.
The wiring bundle may need to be repositioned.
The brackets may be attached in the wrong holes.
Or the receiver may simply be too deep for that dash kit.
Dash Kit Has Visible Gaps
Loosen the mounting brackets slightly and realign the radio.
Also check whether the dash-kit clips are fully seated.
An uneven radio chassis can pull an otherwise correct trim panel out of position.
Radio Stays On After the Jeep Is Turned Off
Some Jeeps use retained accessory power, which means the radio may remain active until a door is opened or a timed period expires.
If it stays on indefinitely, check the interface programming and accessory wiring.
Do not immediately move the accessory wire to another circuit without confirming the correct wiring method.
Radio Loses Settings Every Time the Jeep Is Turned Off
The stereo may not be receiving constant battery power.
Check the constant 12-volt connection, radio harness, and fuse.
Constant power normally maintains presets, clock information, and saved settings while the ignition is off.
Chimes Are Missing or Too Loud
Some factory chimes depend on the original radio or integration interface.
Advanced interfaces may provide a replacement chime or allow adjustment.
Check the interface configuration before changing unrelated audio settings.
Climate or Vehicle Settings Are Missing
This usually indicates that the factory radio controlled functions the aftermarket stereo cannot reproduce by itself.
Check whether your vehicle requires a compatible integration interface and whether the interface has been programmed correctly.
Screen Hits a Vent or Dashboard Control
Floating screens and larger displays need physical clearance beyond the radio opening.
Adjust the screen mounting position if the manufacturer allows it.
If there is still interference, the head unit may not be suitable for that Jeep configuration.
Common Jeep Stereo Installation Mistakes to Avoid
The most expensive mistakes often happen before the installation begins.
Buying by vehicle model without checking year and trim can leave you with the wrong dash kit. Buying an aftermarket radio without checking chassis depth can leave you with a receiver that physically cannot fit.
Cutting the factory radio harness creates unnecessary work when a plug-in adapter is available.
Skipping the factory amplifier check can produce a perfectly powered stereo with no sound.
Another common mistake is completing the entire dashboard assembly before testing the stereo.
Take a few extra minutes to test every important feature while the radio is still accessible.
Can You Install a Jeep Dash Kit Yourself?
Yes, many Jeep owners can install a stereo at home.
A basic radio replacement in an older Jeep with straightforward wiring can be a reasonable DIY project for someone comfortable removing trim panels and making electrical connections.
A modern Jeep with CAN bus electronics, a factory amplified system, camera integration, climate controls, multiple factory USB connections, or vehicle settings is more complicated.
Being able to remove the dashboard is not the same as being able to integrate the electronics correctly.
If the installation requires irreversible dash cutting, module programming, extensive troubleshooting, or work around systems you do not understand, professional installation may save both time and money.
How Long Does Jeep Dash Kit Installation Take?
There is no reliable universal installation time.
A simple stereo swap can be relatively quick when the correct harness is already prepared.
A more complex installation may take considerably longer when the job includes interface programming, camera retention, factory amplifier integration, microphone routing, GPS antenna installation, USB replacement, dash modification, or troubleshooting.
Your first DIY installation will also usually take longer than the same job performed by an experienced installer.
Plan enough time that you do not need to rush the dashboard back together.
Jeep Dash Kit Installation Cost: DIY vs Professional
The final cost depends more on the Jeep’s electronics than on the plastic dash kit itself.
A basic installation may require only a dash kit, wiring harness, and antenna adapter.
A modern integrated Jeep may also require a vehicle-data interface, steering-wheel-control module, amplifier interface, camera adapter, USB adapter, replacement media hub, or a more advanced all-in-one installation kit.
Professional labor also varies by vehicle, location, complexity, and the amount of custom work required.
For that reason, compare the complete installed-system cost rather than choosing a stereo based only on the price of the head unit.
Final Jeep Aftermarket Stereo Installation Checklist
Before considering the job complete, verify the following:
- The stereo is securely mounted and sits evenly in the dash.
- Every dash panel and retaining clip is secure.
- All speakers produce sound.
- Balance and fader work as expected.
- The factory amplifier works if retained.
- AM/FM reception works.
- Bluetooth calling and audio work.
- Apple CarPlay or Android Auto works if equipped.
- USB and AUX connections work if retained.
- Steering-wheel controls work if retained.
- The backup camera works if retained.
- Factory chimes and parking alerts work where applicable.
- Climate and vehicle settings remain accessible where supported.
- The radio turns on and off correctly with the vehicle.
- Saved settings remain after the Jeep is switched off.
- No wires are pinched behind the stereo.
- No warning lights appeared after installation.
- The dashboard does not rattle during a short test drive.
Frequently Asked Questions About Jeep Dash Kit Installation
Do I Need a Dash Kit to Install an Aftermarket Radio in a Jeep?
In many Jeep applications, yes.
The aftermarket stereo normally does not match the shape and mounting points of the factory radio opening. A vehicle-specific dash kit provides the brackets and trim needed for secure mounting and a cleaner finished appearance.
How Do I Know Which Dash Kit Fits My Jeep?
Use the exact model, model year, trim, factory radio, screen size, and audio system when checking compatibility.
Do not rely only on a product title saying “fits Jeep.”
The manufacturer’s vehicle fit guide should be the final reference.
Can I Install a Double DIN Stereo in My Jeep?
Many Jeeps can accept a Double DIN receiver with the correct dash kit.
However, dashboard depth and internal supports can limit which receivers fit.
Some applications require a shallow-depth Double DIN radio or specific dashboard modification.
What Is the Difference Between a Dash Kit and a Wiring Harness?
A dash kit handles physical mounting and appearance.
A wiring harness handles electrical connections between the Jeep and aftermarket radio.
Many installations need both.
Do I Need an Antenna Adapter?
Often, yes.
Factory Jeep antenna connectors do not always match the standard antenna input used on aftermarket receivers.
A vehicle-specific antenna adapter solves that connection without modifying the factory cable.
Why Do I Need a CAN Bus Interface?
The factory radio in many modern Jeeps exchanges information with other vehicle modules over a data network.
A compatible interface can translate that information and provide functions required by the aftermarket stereo.
Depending on the Jeep, this may include accessory power, illumination, steering-wheel controls, factory amplifier operation, reverse signal, climate information, or other features.
Will My Steering-Wheel Controls Still Work?
They often can, but usually only when a compatible steering-wheel-control or radio replacement interface is installed and configured correctly.
Check support for your exact radio brand and Jeep before ordering.
Can I Keep the Factory Jeep Amplifier?
Often, yes, if the correct integration interface supports it.
Do not assume that connecting the speaker wires directly will automatically activate a factory amplified system.
Can I Keep the Factory Backup Camera?
Possibly.
Camera retention varies considerably by Jeep and interface.
Some installation packages retain the original camera, some require another adapter, and some aftermarket integration systems use a replacement camera.
Check this feature specifically before purchasing the kit.
Can I Keep the Factory USB Port?
In many applications, a compatible USB retention adapter or replacement media hub can maintain USB functionality.
However, charging, audio playback, CarPlay, and Android Auto compatibility are separate issues.
Make sure the adapter supports the type of USB connection you actually want to use.
Will Uconnect Still Work After Replacing the Factory Radio?
Some Uconnect-related features may be lost when the factory radio is removed.
A vehicle integration system may restore or replicate certain functions, but complete retention should never be assumed.
Check the interface manufacturer’s feature list for your exact Jeep.
Can I Use the Factory Jeep Microphone With an Aftermarket Stereo?
Not always.
Many aftermarket radios are designed to use their own external microphone.
Even when a factory microphone is physically present, its wiring or electronics may not be directly compatible with the new receiver.
Does My Jeep Need a Shallow-Mount Radio?
Some models do.
Wrangler JL installations are a good example of why depth must be checked before buying a receiver.
A shallow or modular radio may provide the clearance needed for the chassis, adapters, interface modules, and wiring behind the dashboard.
Why Does My New Jeep Stereo Have Power but No Sound?
A factory amplifier is a common cause.
Other possibilities include incorrect speaker wiring, amplifier settings, a missing remote turn-on signal, or an incorrectly configured integration interface.
Identify whether your Jeep has a factory amplified system before troubleshooting individual speakers.
Why Does My Aftermarket Stereo Not Turn Off With the Jeep?
The vehicle may use retained accessory power, so a short delay can be normal.
If the stereo remains on continuously, inspect the accessory circuit and vehicle interface configuration.
Does Installing an Aftermarket Stereo Require Cutting the Jeep Dashboard?
Not always.
Some dash kits fit without permanent modification, while certain Jeep applications require specifically documented trimming behind the dashboard.
Never cut anything until the exact dash-kit instructions confirm it is required.
Is a Jeep Radio Fascia the Same as a Dash Kit?
The terms are often used for similar products.
Dash kit” and “stereo installation kit” are common terms in North America, while “radio fascia” or “fascia fitting kit” may be used in other markets.
The important part is not the product name. It is whether the kit matches your exact Jeep and aftermarket radio.
Can a Beginner Install a Jeep Dash Kit at Home?
A beginner can handle some simple Jeep stereo installations by following accurate vehicle-specific instructions.
A modern integrated system can be much more demanding.
If you need to retain factory climate controls, a digital amplifier, cameras, safety chimes, or vehicle settings, take time to understand the interface system before starting.
Final Thoughts
A successful Jeep dash kit installation is not about getting the new stereo into the dashboard as quickly as possible.
The real goal is to make the aftermarket stereo work like it belongs there.
Start by confirming the Jeep’s exact model, year, trim, factory radio, audio system, and region. Then choose the correct dash kit, wiring harness, antenna adapter, integration interface, and head unit.
Check stereo depth before opening the dashboard. Prepare the wiring carefully. Program any required interface before final installation. Test every factory and aftermarket feature before reinstalling the trim.
Most importantly, never force a radio into the dash or cut factory components because something does not seem to fit.
When the parts are compatible and the installation is planned properly, an aftermarket Jeep stereo can deliver modern features while keeping the dashboard clean, secure, and close to a factory-style finish.