A lifted Jeep Cherokee XJ can feel great on the trail and frustrating on the road at the same time. One of the most common complaints after adding suspension lift is a new vibration from the rear driveline, especially during acceleration or at higher road speeds.
That is where a Slip Yoke Eliminator, usually shortened to SYE, becomes useful.
A properly installed SYE converts the transfer case from the factory slip-yoke arrangement to a fixed-yoke output. That change allows the use of a longer double-cardan rear driveshaft and can improve the driveline geometry on a lifted XJ. SYE manufacturers specifically design these systems to reduce the steep driveshaft angles that contribute to vibration and increased drivetrain wear.
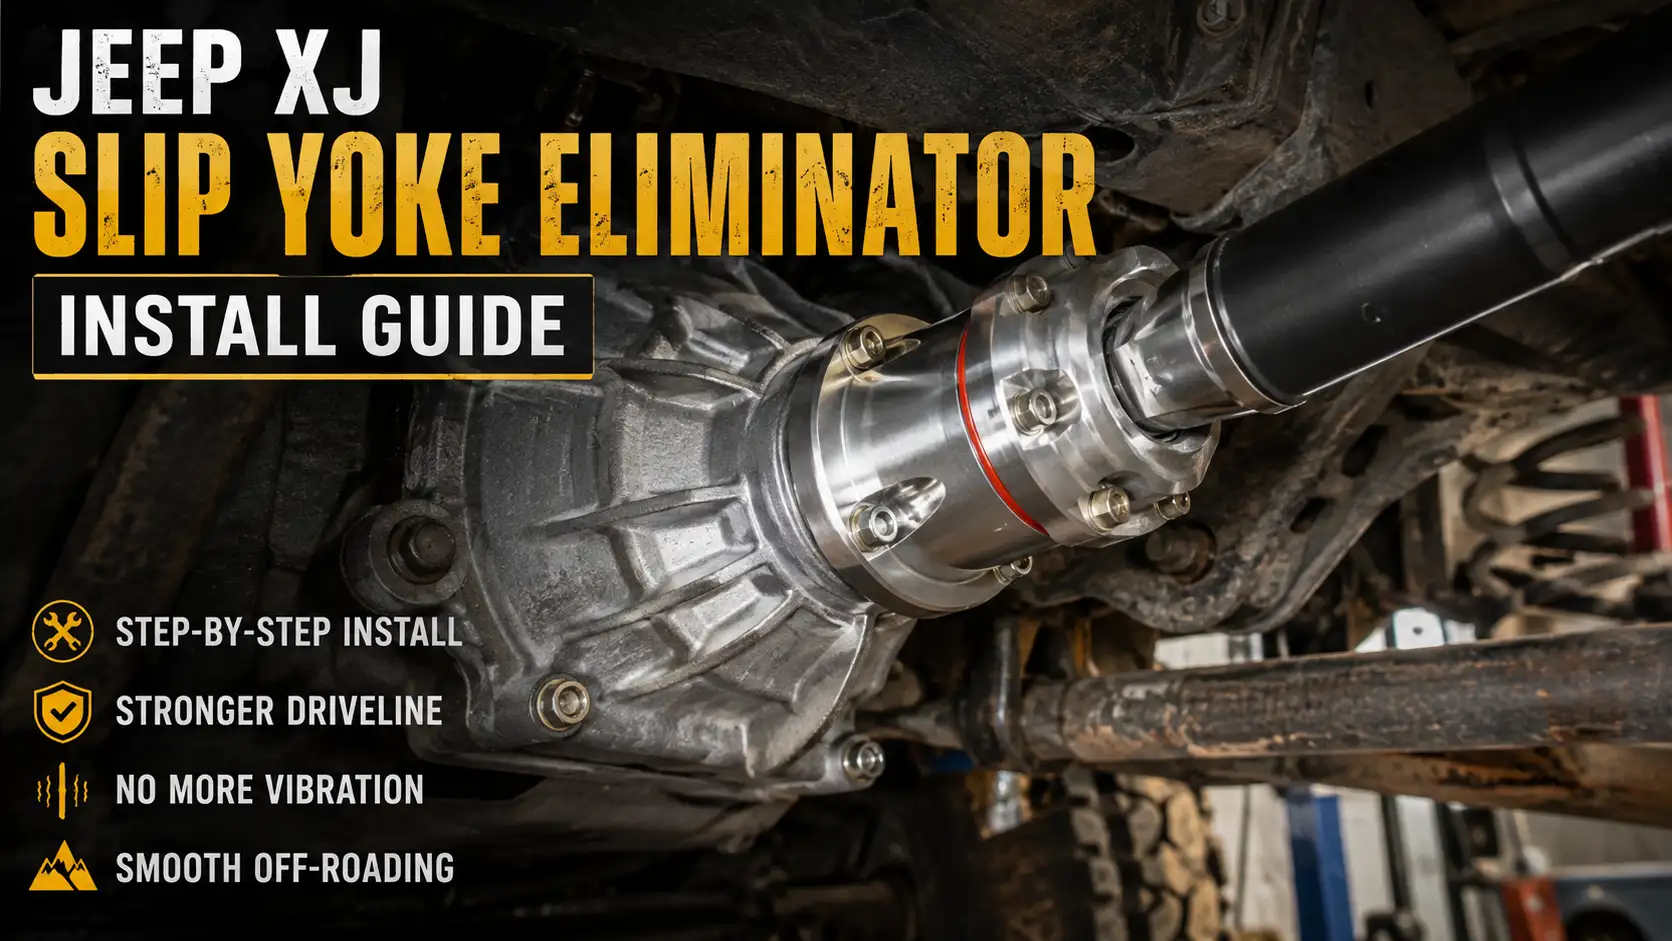
This Jeep XJ Slip Yoke Eliminator install guide walks through the complete process—from deciding whether you actually need an SYE to identifying your transfer case, installing the kit, setting the pinion angle, measuring the new driveshaft, troubleshooting vibrations, and checking everything before your next off-road trip.
Important: SYE kits are not all installed exactly the same way. Treat this guide as a practical overview and always follow the instructions and torque specifications supplied with your specific SYE kit.
What Is a Slip Yoke Eliminator on a Jeep XJ?
The factory rear output on many Jeep XJ transfer cases uses a slip-yoke design. As the rear suspension moves, the driveshaft needs to change its effective length, and the slip-yoke arrangement allows that movement at the transfer-case output.
That system works well at factory ride height.
Problems can begin when the Jeep is lifted. Raising the body and transfer case relative to the rear axle increases the operating angle of the rear driveshaft. Steeper driveline angles can contribute to vibration, U-joint wear, and other driveline problems.
An SYE replaces the factory slip-yoke output with a fixed output yoke. The sliding movement then takes place in the driveshaft itself.
The big advantage is packaging. A shorter fixed-yoke transfer-case output allows a longer rear driveshaft, helping reduce its operating angle. Some XJ-compatible short-shaft systems are specifically designed around this principle.
For a lifted Jeep XJ, the usual complete setup is:
SYE + correctly sized double-cardan driveshaft + properly adjusted rear pinion angle.
Installing only one part of that combination does not guarantee a vibration-free Jeep.
Does Your Jeep XJ Really Need an SYE?
Not every Cherokee XJ needs a Slip Yoke Eliminator.
A stock-height Jeep that drives smoothly has little reason to receive an SYE simply because it is a popular modification. The upgrade becomes more relevant when suspension changes create unfavorable driveline geometry.
Signs Your XJ May Need an SYE
Pay attention to symptoms such as:
- Vibration that appeared after installing a suspension lift
- Vibration during acceleration
- A noticeable buzz or shake at highway speed
- Steep rear driveshaft angles
- Accelerated rear U-joint wear
- Binding at the driveshaft or U-joints
- Insufficient slip-yoke engagement or travel
- A temporary transfer-case drop being used to control vibration
Driveline vibration is not automatically proof that an SYE is required. Tires, wheels, damaged driveshafts, worn U-joints, poor driveline angles, bearings, and incorrect driveshaft installation can produce similar symptoms. A proper diagnosis should come before buying parts.
What About Lift Height?
You will often hear rules such as:
“Every XJ over 3 inches needs an SYE.”
Real-world Jeeps are not that simple.
Two XJs with the same lift height can have different transfer cases, rear axles, spring condition, pinion angles, driveshaft lengths, and vibration characteristics.
Lift height is therefore a warning sign, not a complete diagnosis.
As suspension height increases, however, driveline angles generally become more difficult to manage. Double-cardan shafts are commonly used to achieve smoother operation at higher operating angles.
If your lifted XJ already has noticeable rear driveline vibration, inspect and measure the system instead of choosing parts based only on the advertised lift height.
Identify Your Jeep XJ Transfer Case Before Buying an SYE
This is one of the easiest places to make an expensive mistake.
Do not assume that every Jeep Cherokee XJ uses the same transfer case.
Common XJ configurations include the NP231/NV231 and NP242/NV242, and the SYE solution for one is not automatically correct for the other. XJ driveshaft specialists recommend checking the identification tag on the transfer case itself before purchasing an SYE.
How to Check the Transfer Case
Look at the transfer-case identification tag.
The model designation may appear as something similar to:
- NP231
- 231J
- NV231
- NP242
- NV242J
Use the actual transfer-case model and configuration when choosing your kit rather than relying only on the Jeep’s model year.
NP231 Jeep XJ
The Jeep NP231 is one of the most common candidates for an SYE conversion. Heavy-duty kits are available that replace the original output components with a fixed-yoke output shaft and new tailhousing.
NP242 Jeep XJ
NP242-equipped Cherokees require a solution designed for the 242. SYE options exist for this transfer case as well, but it should not be treated as though it were an NP231.
Bottom line: Crawl underneath, clean the tag if necessary, and verify what is actually installed before ordering anything.
What You Need for a Jeep XJ SYE Installation
The exact parts list changes with the kit and transfer case, but planning everything before opening the transfer case makes the job much easier.
Main Parts
A typical build may require:
- Correct SYE kit for your transfer case
- Compatible fixed output yoke or flange
- Double-cardan/CV rear driveshaft
- Transfer-case fluid specified for your vehicle and transfer case
- Appropriate sealant specified by the kit manufacturer
- Replacement seals if they are not included
- Rear axle shims if pinion-angle correction is required
- New U-joints if the existing joints are worn
A complete heavy-duty NP231 SYE kit typically replaces major rear output components rather than simply modifying the original slip yoke.
Useful Tools
Depending on the kit, expect to use items such as:
- Floor jack
- Properly rated jack stands
- Wheel chocks
- Socket set
- Combination wrenches
- Torque wrench
- Snap-ring pliers
- Screwdrivers
- Pliers
- Drain pan
- Soft-face or rubber mallet
- Scraper or gasket-removal tool
- Brake cleaner or suitable parts cleaner
- Shop towels
- Angle finder or digital inclinometer
Good snap-ring pliers are particularly valuable. Fighting transfer-case retaining rings with the wrong tool can turn a straightforward job into an unnecessarily frustrating afternoon.
Inspect the Driveline Before Taking Anything Apart
An SYE will not repair unrelated worn components.
Before installation, inspect:
- Rear U-joints
- Existing driveshaft
- Rear pinion yoke
- Transfer-case output area
- Transfer-case seals
- Transmission and transfer-case mounts
- Rear axle condition
- Leaf-spring and spring-perch condition
If you already have a vibration, note exactly when it happens.
For example:
Vibration under acceleration: often points you toward a loaded driveline-angle or joint issue.
Speed-dependent vibration: may lead you toward driveshaft balance, a bent shaft, wheels, tires, or other rotating components.
A driveshaft specialist recommends separating angle-related vibration from dynamic vibration rather than automatically blaming one component.
Before You Start: Safety and Preparation
Park the XJ on a stable, level surface.
Apply the parking brake, chock the wheels, and support the Jeep correctly if it must be raised. Never work underneath a vehicle that is supported only by a hydraulic jack.
Give yourself enough working room around the transfer case and driveshaft.
It is also smart to clean mud, oil, and dirt from the transfer-case housing before opening it. The cleaner the outside is, the less likely you are to introduce contamination during assembly.
Read the complete instruction sheet supplied with your SYE before removing the first bolt. TeraFlex and other manufacturers specifically instruct installers to read the installation procedure completely before beginning and recommend professional installation when the installer is not comfortable with the work.
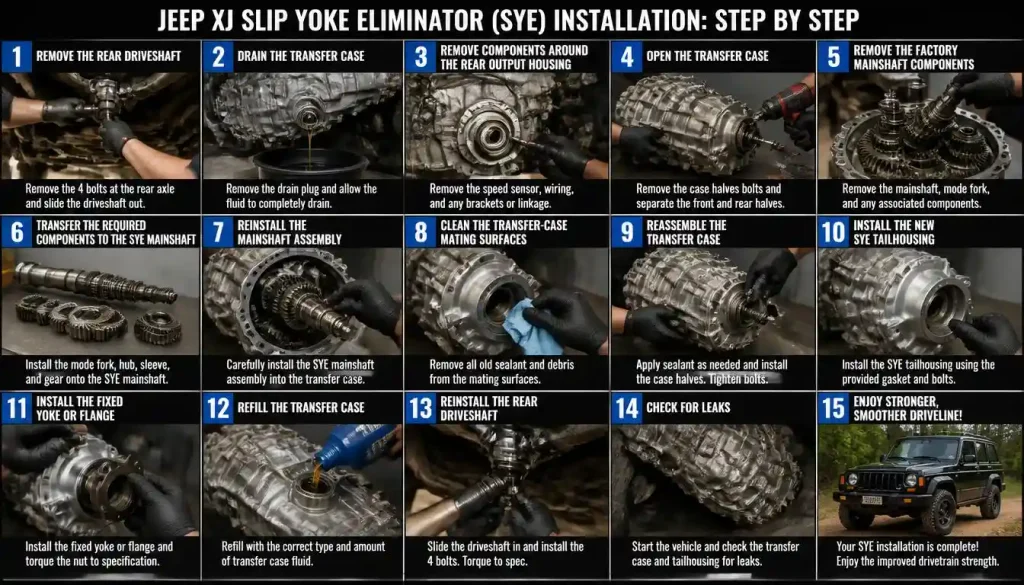
Jeep XJ Slip Yoke Eliminator Installation: Step by Step
The following process describes the general workflow of an NP231-style full SYE installation. Exact hardware, snap-ring locations, seals, speed-sensor components, torque specifications, and assembly details vary by manufacturer.
Step 1: Remove the Rear Driveshaft
Mark the relationship between the driveshaft and axle yoke before removal if you intend to reuse any components.
Remove the rear driveshaft and set it aside.
This is also a good opportunity to inspect the U-joints for stiffness, rust, looseness, or binding.
If the original shaft has been running at a severe angle for a long time, do not automatically assume it is still healthy.
Step 2: Drain the Transfer Case
Position a drain pan underneath the transfer case and remove the appropriate drain plug.
Allow the fluid to drain completely.
Inspect the old fluid for obvious contamination or unusual metallic debris. A small amount of normal wear material is different from finding obvious metal fragments.
If you discover signs of significant internal damage, reconsider whether simply installing an SYE is the right next step.
Step 3: Remove Components Around the Rear Output Housing
Depending on the transfer case and SYE kit, you may need to remove components associated with:
- Rear output housing
- Speed sensor
- Output seal
- Retaining hardware
- Shift-related components
- Factory tailhousing
Keep hardware organized as it comes apart.
Taking a few reference photos with your phone before removing internal pieces is a simple habit that can save time during reassembly.
Step 4: Open the Transfer Case
Remove the required case bolts and carefully separate the housing according to the SYE manufacturer’s procedure.
Do not drive a screwdriver aggressively between sealing surfaces. Gouging the aluminum mating surfaces creates another problem you will need to fix later.
Work slowly around the housing and separate it without damaging the case.
Step 5: Remove the Factory Mainshaft Components
With the case open, remove the retaining rings and components necessary to free the original output shaft.
Pay close attention to the order and orientation of:
- Gears
- Sprockets
- Spacers
- Bearings
- Snap rings
- Oil-pump components
- Washers
Lay them out in installation order.
A clean workbench is much better than dropping transfer-case parts into one pile and trying to remember their orientation later.
Step 6: Transfer the Required Components to the SYE Mainshaft
A full heavy-duty SYE uses a replacement output shaft rather than the original long slip-yoke output arrangement. For example, heavy-duty NP231 kits from major drivetrain manufacturers use a replacement output shaft and dedicated tailhousing.
Transfer each reusable component according to the kit instructions.
Check every retaining ring to make sure it is fully seated in its groove.
Do not force components together when something clearly does not fit. Stop and verify orientation first.
Step 7: Reinstall the Mainshaft Assembly
Position the new output assembly in the transfer case.
Make sure gears, bearings, chain, oil-pump components, and retaining hardware are correctly located.
Before closing the case, rotate the assembly by hand where appropriate and check that nothing feels obviously jammed or incorrectly seated.
Step 8: Clean the Transfer-Case Mating Surfaces
Remove the old sealing material carefully.
Both surfaces should be clean, dry, and free of chunks of old RTV or gasket material.
Avoid dropping debris into the open transfer case.
Apply only the sealant type and amount recommended by the manufacturer. More sealant is not automatically better.
Step 9: Reassemble the Transfer Case
Rejoin the case halves without forcing them together.
If the housing refuses to seat properly, something may be misaligned inside. Pulling the case together with bolts can damage components.
Install the case bolts following the sequence and torque values specified by your kit or transfer-case service information.
Step 10: Install the New SYE Tailhousing
Install the replacement tailhousing, bearing arrangement, seal, and fixed output components supplied with the kit.
A conventional full SYE fundamentally changes the rear output arrangement by replacing the original slip-yoke configuration with a fixed-yoke design.
Again, use the manufacturer’s torque values instead of a random number found in a forum post.
Step 11: Install the Fixed Yoke or Flange
Install the correct rear output yoke or flange for your driveshaft.
Make sure the output hardware is correctly seated and tightened according to the SYE manufacturer’s specifications.
Verify that the output rotates correctly before moving on.
Step 12: Refill the Transfer Case
Reinstall the drain plug and fill the transfer case with the correct fluid and quantity specified for your particular transfer case and vehicle.
Do not guess based on another Jeep owner’s setup.
After filling, inspect the case for immediate leakage around:
- Case halves
- Tailhousing
- Drain and fill plugs
- Output seal
- Sensor areas
How to Measure the Rear Driveshaft After an SYE Install
This is where many otherwise good builds go wrong.
Do not order a rear driveshaft simply because someone on a forum has “the same lift.”
Measure your Jeep.
Measure at Normal Ride Height
Place the Jeep at normal ride height on a reasonably level surface.
Measure between the exact points specified by the driveshaft manufacturer.
Different yokes and flange systems can require different measurement points, so follow the shaft builder’s diagram rather than inventing your own method.
Why Driveshaft Length Matters
A shaft that is too short may have insufficient spline engagement.
A shaft that is too long may bottom out as the suspension moves.
Either condition can create problems.
Remember that the rear axle moves through an arc as the suspension compresses and droops. Your driveshaft needs enough working travel to handle that movement without pulling apart or bottoming out.
If you are ordering a custom shaft, giving the builder accurate measurements is far better than asking for “a rear shaft for a 4-inch lifted XJ.”
Why a Double-Cardan Driveshaft Is Commonly Used With an SYE
A double-cardan shaft—often casually called a CV shaft—places two universal joints together at one end of the driveshaft, normally near the transfer case in this application.
The arrangement allows smoother operation at greater driveline angles than a conventional two-joint shaft.
That makes it well suited to lifted short-wheelbase and compact 4WD drivetrains where driveshaft angle becomes a problem.
But installing a double-cardan shaft changes what you want from the rear pinion angle.
And that brings us to one of the most important parts of the entire job.
Set the Correct Rear Pinion Angle After Installing the SYE
You can install an excellent SYE and a perfectly balanced new driveshaft and still have vibration if the rear axle is pointed incorrectly.
On a conventional two-single-cardan-joint driveline, the transfer-case output and pinion geometry are arranged differently than they are with a double-cardan shaft.
With a double-cardan rear shaft, the rear pinion should generally point toward the transfer-case output so the operating angle at the axle-end U-joint remains small. Tom Wood’s driveline guidance specifically describes rotating the differential upward to minimize the joint angle at the differential end.
How to Measure the Angle
Use an angle finder or digital inclinometer.
You will typically want measurements for:
- Driveshaft slope
- Rear pinion slope
- Transfer-case/output orientation where applicable
Measure with the Jeep sitting at normal ride height.
Driveline specialists calculate operating angle from the difference between component slopes rather than simply looking at the shaft and guessing whether it “looks straight.”
Correcting Pinion Angle on an XJ
Because the Cherokee XJ uses rear leaf springs, pinion correction is commonly achieved with properly selected axle shims between the spring and spring perch. Driveshaft specialists specifically recommend shims as the usual adjustment method on leaf-spring applications.
Use quality components and make sure the axle remains securely located.
If the required correction is significant or you are unsure about spring-perch and axle geometry, have an experienced 4×4 or driveline shop inspect the setup.
Common Jeep XJ SYE Installation Mistakes
Most SYE problems are not caused by the basic idea of the modification. They come from poor parts selection, measurement, assembly, or driveline setup.
Buying the Wrong SYE
An NP231 kit is not automatically correct for an NP242.
Read the transfer-case tag first.
Ordering the Driveshaft Before Measuring
“Four-inch lift” is not a driveshaft measurement.
Measure after the SYE configuration is established unless your shaft manufacturer specifically gives you a different procedure.
Ignoring Pinion Angle
This may be the most common conceptual mistake.
The SYE gives you the hardware needed for improved geometry. It does not automatically rotate the rear axle into the correct position.
Assuming an SYE Fixes Every Vibration
It does not.
A bent driveshaft, damaged U-joint, poor balance, bad bearing, tire problem, worn mount, or incorrect installation can still cause vibration.
Using Excessive Sealant
Too much RTV can squeeze both outside and inside the housing.
Use the amount and product specified in the instructions.
Forgetting the Oil-Pump Arrangement
When working inside a transfer case, pay attention to every component associated with lubrication.
Never rush reassembly simply because the new output shaft is already installed.
Guessing Torque Specifications
Use the instructions for your exact kit.
SYE kits vary in hardware and design, so a torque number from an unrelated product is not automatically safe for yours.
How to Test Your Jeep XJ After Installing the SYE
Do not finish the installation and immediately head for a rocky trail.
The first test should be boring—and that is a good thing.
Check for Leaks
With the Jeep stationary, inspect the transfer case carefully.
Look around the:
- Case seam
- Tailhousing
- Output seal
- Fill plug
- Drain plug
Correct any leak before a long road or trail test.
Start With a Low-Speed Road Test
Drive gently.
Listen for:
- Clicking
- Grinding
- Clunking
- Scraping
- New vibration
If something feels seriously wrong, stop and inspect rather than “driving through it.”
Increase Speed Gradually
If the Jeep is smooth at low speed, gradually test at normal road speeds.
Pay attention to whether vibration changes with:
- Vehicle speed
- Acceleration
- Deceleration
- Throttle load
Those details can help identify the source if a vibration remains.
Recheck Fasteners
After the initial test, inspect the driveshaft and related hardware again.
Check your specific shaft manufacturer’s instructions for any required post-install torque inspection or lubrication.
SYE Installed but the Jeep XJ Still Vibrates?
Do not assume the new SYE is defective.
Work through the system logically.
Check the Pinion Angle First
If your vibration changed after installing the double-cardan shaft, measure the pinion and driveshaft angles.
Do not rely on appearance.
Proper driveline geometry is essential because excessive U-joint operating angles contribute to vibration and reduced joint life.
Inspect the Driveshaft
Check for:
- Missing balance weights
- Dents
- Bent tubing
- Damaged U-joints
- Excessive spline play
- Binding joints
- Loose yoke hardware
Dynamic driveshaft problems can create vibration even when the operating angles are acceptable.
Confirm the Double-Cardan End Is Correctly Positioned
On the typical SYE/double-cardan rear arrangement, the double-cardan assembly belongs at the transfer-case end.
Incorrect shaft installation should always be ruled out during vibration diagnosis.
Check Driveshaft Length
Make sure the shaft has adequate slip travel in both compression and extension.
Suspension movement should not cause the shaft to bottom out or separate.
Inspect U-Joints
A joint can be new and still have a problem.
Look for:
- Binding
- Incorrect installation
- Damaged needle bearings
- Loose caps
- Insufficient lubrication where applicable
Separate Tire Vibration From Driveline Vibration
A Jeep with large off-road tires can have wheel or tire vibration at the same time as a driveline problem.
If vibration is tied closely to road speed rather than throttle load, do not overlook:
- Tire balance
- Mud inside wheels
- Bent wheels
- Tire damage
- Uneven tire wear
Diagnose instead of repeatedly replacing drivetrain parts.
SYE vs Transfer-Case Drop on a Jeep XJ
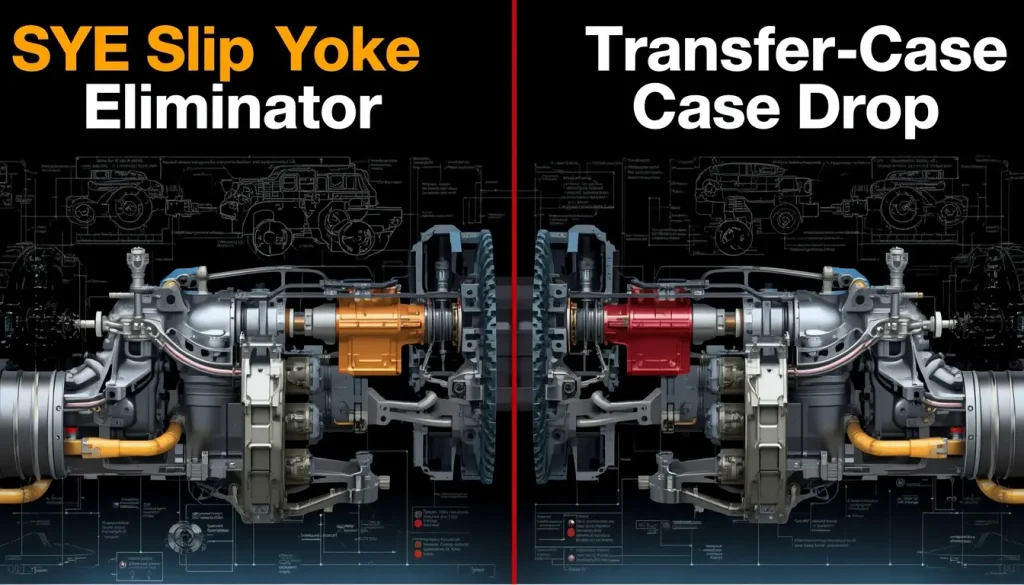
A transfer-case drop and an SYE approach the problem differently.
A transfer-case drop lowers the transfer-case position to reduce the rear driveshaft angle.
It can sometimes reduce vibration, but it also gives up some of the clearance gained by lifting the vehicle.
An SYE takes a more complete approach by shortening the transfer-case output arrangement and allowing a longer driveshaft. Some XJ-compatible short-shaft systems are specifically designed to increase available rear driveshaft length and eliminate the need for a transfer-case lowering kit in many installations.
For an XJ built primarily for serious trail use, maintaining clearance while creating better driveline geometry is usually more attractive than permanently lowering drivetrain components.
For a mild daily-driver build with no vibration, however, there is little reason to install parts simply because another Jeep has them.
Fix the problem your Jeep actually has.
Full SYE vs Hack-and-Tap on a Jeep XJ
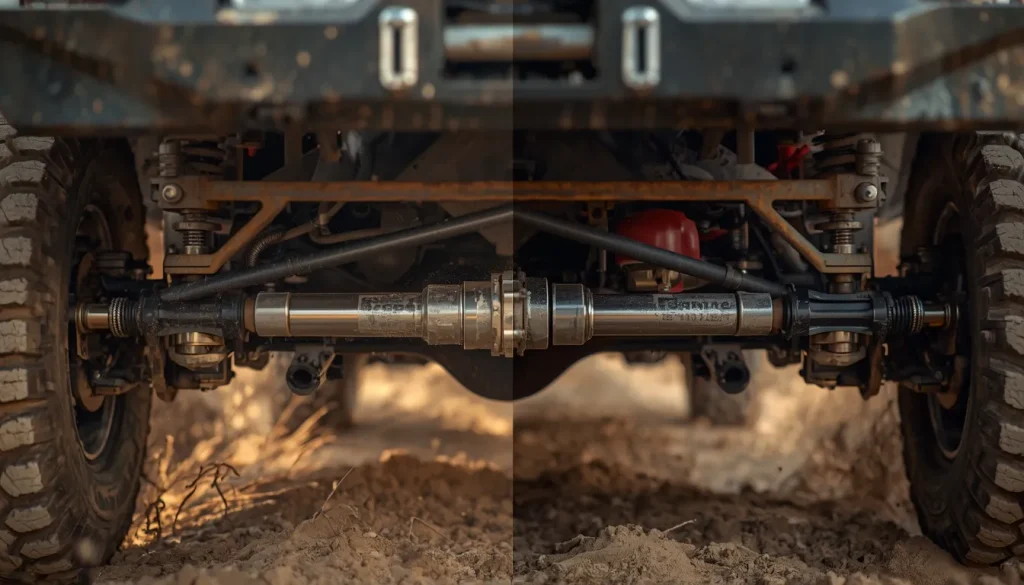
XJ owners generally encounter two broad approaches when researching this modification.
Full SYE
A full SYE replaces the factory output arrangement with dedicated components such as a replacement output shaft, tailhousing, bearing, and fixed yoke.
Heavy-duty NP231 SYE kits are built around this type of conversion.
Advantages can include:
- Purpose-built output components
- Strong fixed-yoke design
- Professional-style installation
- Good foundation for a dedicated double-cardan shaft
The tradeoff is that installation requires opening the transfer case and costs more than the simplest conversion methods.
Hack-and-Tap
A hack-and-tap conversion modifies the existing output shaft to accept a fixed flange or yoke arrangement.
It can appeal to budget-focused XJ owners, but execution matters greatly. Cutting, drilling, alignment, output-shaft condition, and the rest of the driveline setup all affect the result.
For a trail rig that you expect to keep and use hard, a full replacement-shaft SYE is generally the cleaner solution when an appropriate kit is available.
Can You Use a Front XJ Driveshaft in the Rear?
This is a popular budget question.
In some XJ builds, owners use a suitable double-cardan front-style shaft in the rear after converting to a fixed output.
But do not assume every front XJ shaft will automatically fit every rear SYE setup.
Compatibility depends on:
- Compressed and extended length
- Transfer-case connection
- Rear axle yoke
- U-joint size
- Lift height
- Axle position
- Suspension travel
Measure your Jeep first.
A used driveshaft that is the wrong length is not a bargain.
How an SYE Helps a Jeep XJ Off Road
An SYE does not create more suspension travel, horsepower, or axle strength.
Its value comes from helping the driveline work properly after suspension changes.
Better Rear Driveshaft Geometry
The fixed-yoke conversion allows a longer rear shaft, which can reduce the operating angle created by a lifted suspension.
Better Match for a Double-Cardan Shaft
Double-cardan shafts are particularly useful where higher driveshaft angles make conventional two-joint operation difficult.
Less Dependence on a Transfer-Case Drop
Many off-road owners would rather correct the driveline than lower the transfer case and lose some underbody clearance.
Improved Confidence on Longer Trips
A Jeep that runs smoothly on the highway and articulates without driveshaft binding is far more enjoyable to drive to the trail, wheel all day, and drive home again.
That matters more than simply being able to say your XJ “has an SYE.”
Jeep XJ Slip Yoke Eliminator Installation Cost
There is no useful universal price for an XJ SYE installation because the total depends on much more than the SYE kit itself.
Your budget should account for:
- SYE kit
- Rear double-cardan driveshaft
- Shipping
- Transfer-case fluid
- Sealant and small supplies
- Replacement U-joints if needed
- Axle shims or pinion correction
- Transfer-case repair parts discovered during installation
- Professional labor if you are not doing the work yourself
Labor can also vary considerably with the kit and shop. As one reference point, TeraFlex lists an estimated five hours of labor for its TJ/YJ/XJ NP231 short-shaft kit, but that should not be treated as a universal time for every SYE or every Jeep.
When comparing quotes, compare the complete driveline solution, not only the price of the SYE box.
Jeep XJ SYE Maintenance After Installation
An SYE is not something you need to obsess over after every trip, but a modified off-road driveline deserves regular inspection.
Check periodically for:
- Transfer-case leaks
- Loose driveshaft bolts
- U-joint play
- CV-center wear
- Damaged driveshaft tubing
- Unusual noises
- New vibration
- Changes in pinion or suspension hardware
After hard rock crawling, deep mud, or an impact to the driveshaft, inspect it before returning to high-speed road driving.
A small dent that seems unimportant on the trail can become very noticeable when the shaft is spinning quickly on the highway.
Is a Slip Yoke Eliminator Worth It for a Jeep XJ?
For the right Jeep, absolutely.
An SYE makes the most sense when a lifted XJ has rear driveline geometry that can no longer be managed properly with the factory slip-yoke arrangement.
It is particularly valuable when you want to run a correctly sized double-cardan shaft while maintaining good ground clearance.
But the SYE should be viewed as part of a system.
The best result comes from:
Correct transfer-case identification → correct SYE → properly measured driveshaft → correct rear pinion angle → careful installation → road testing.
Skip one of those steps and an expensive driveline can still vibrate.
Do all of them correctly and the XJ should feel far more refined both on the highway and when the suspension starts working off road.
Frequently Asked Questions About Jeep XJ Slip Yoke Eliminator Install Guide
Do I need an SYE for a 3-inch lift on a Jeep XJ?
Not automatically.
Lift height is only one factor. Transfer-case configuration, rear driveshaft length, axle position, pinion angle, suspension condition, and actual vibration symptoms all matter.
If your 3-inch-lift XJ runs smoothly and the driveshaft operates correctly throughout suspension travel, do not assume an SYE is mandatory just because of a number.
If you have vibration or poor driveline geometry, measure and diagnose the system.
Does an SYE eliminate all Jeep XJ driveline vibration?
No.
An SYE helps create better driveline geometry, but vibration can still be caused by an incorrect pinion angle, damaged driveshaft, poor shaft balance, worn U-joints, bearings, mounts, wheels, or tires.
Do I need a new driveshaft after installing an SYE?
A full SYE conversion normally changes the transfer-case connection and is commonly paired with a properly sized double-cardan rear driveshaft.
Measure the Jeep in the final configuration using your driveshaft manufacturer’s instructions before ordering the shaft.
What is the difference between an SYE and a CV driveshaft?
They are different components that work together.
The SYE converts the transfer case to a fixed rear output.
The double-cardan/CV-style shaft uses a joint arrangement designed to operate smoothly at greater driveline angles.
Can an NP242 Jeep XJ use an SYE?
Yes, SYE solutions exist for the NP242, but you need a system specifically compatible with that transfer case. Do not order an NP231 kit and assume it will work.
Can I install an XJ SYE without removing the transfer case?
Some SYE installations can be performed with the transfer case still in the vehicle, while other installers prefer removing it for easier access and inspection.
Follow the procedure provided with your particular kit.
How long does an SYE installation take?
It depends heavily on experience, tools, transfer-case condition, and kit design.
An experienced mechanic familiar with NP231 transfer cases will work much faster than someone opening a transfer case for the first time. One XJ-compatible NP231 short-shaft kit currently carries a manufacturer-estimated labor time of about five hours, but individual installations can differ.
Should the rear pinion point toward the transfer case with a double-cardan shaft?
Generally, yes.
With the typical double-cardan rear setup, the pinion is rotated toward the transfer-case output so the operating angle at the differential-end U-joint remains minimal. The exact target should be established using actual measurements and your driveshaft manufacturer’s guidance.
Can I install an SYE as a beginner?
A mechanically confident DIY owner with good tools can complete some SYE installations, but remember that you are opening and reassembling the transfer case.
If you are uncomfortable identifying internal components, working with bearings and retaining rings, sealing drivetrain housings, or verifying driveline geometry, paying an experienced 4×4 or driveline technician is a sensible choice.
Final Checklist Before Taking Your XJ Off Road
Before pointing the Jeep at the first trail, verify the whole system.
- Transfer-case model was correctly identified
- SYE matches the transfer case
- All transfer-case components were correctly reassembled
- Manufacturer torque specifications were followed
- Transfer case contains the correct fluid
- No leaks are visible
- Rear driveshaft was properly measured
- Driveshaft has adequate slip travel
- Double-cardan end is positioned correctly
- Rear pinion angle has been measured and corrected if necessary
- U-joints move normally
- Driveshaft fasteners are secure
- Driveshaft clears surrounding components
- Jeep has been tested at low speed
- Jeep has been tested at normal road speed
- No new vibration, clunking, grinding, or leakage is present
- Suspension travel does not cause driveshaft binding or bottoming
A successful Jeep XJ SYE installation is not simply about replacing the slip yoke. It is about creating a rear driveline that works as one system.
Identify the correct transfer case, use the right SYE, measure the driveshaft instead of guessing, set the rear pinion angle correctly, and test the Jeep before pushing it hard.
Get those details right and your lifted Cherokee will be much better prepared for the combination that matters most: smooth road manners on the way to the trail and dependable driveline performance once the pavement ends.