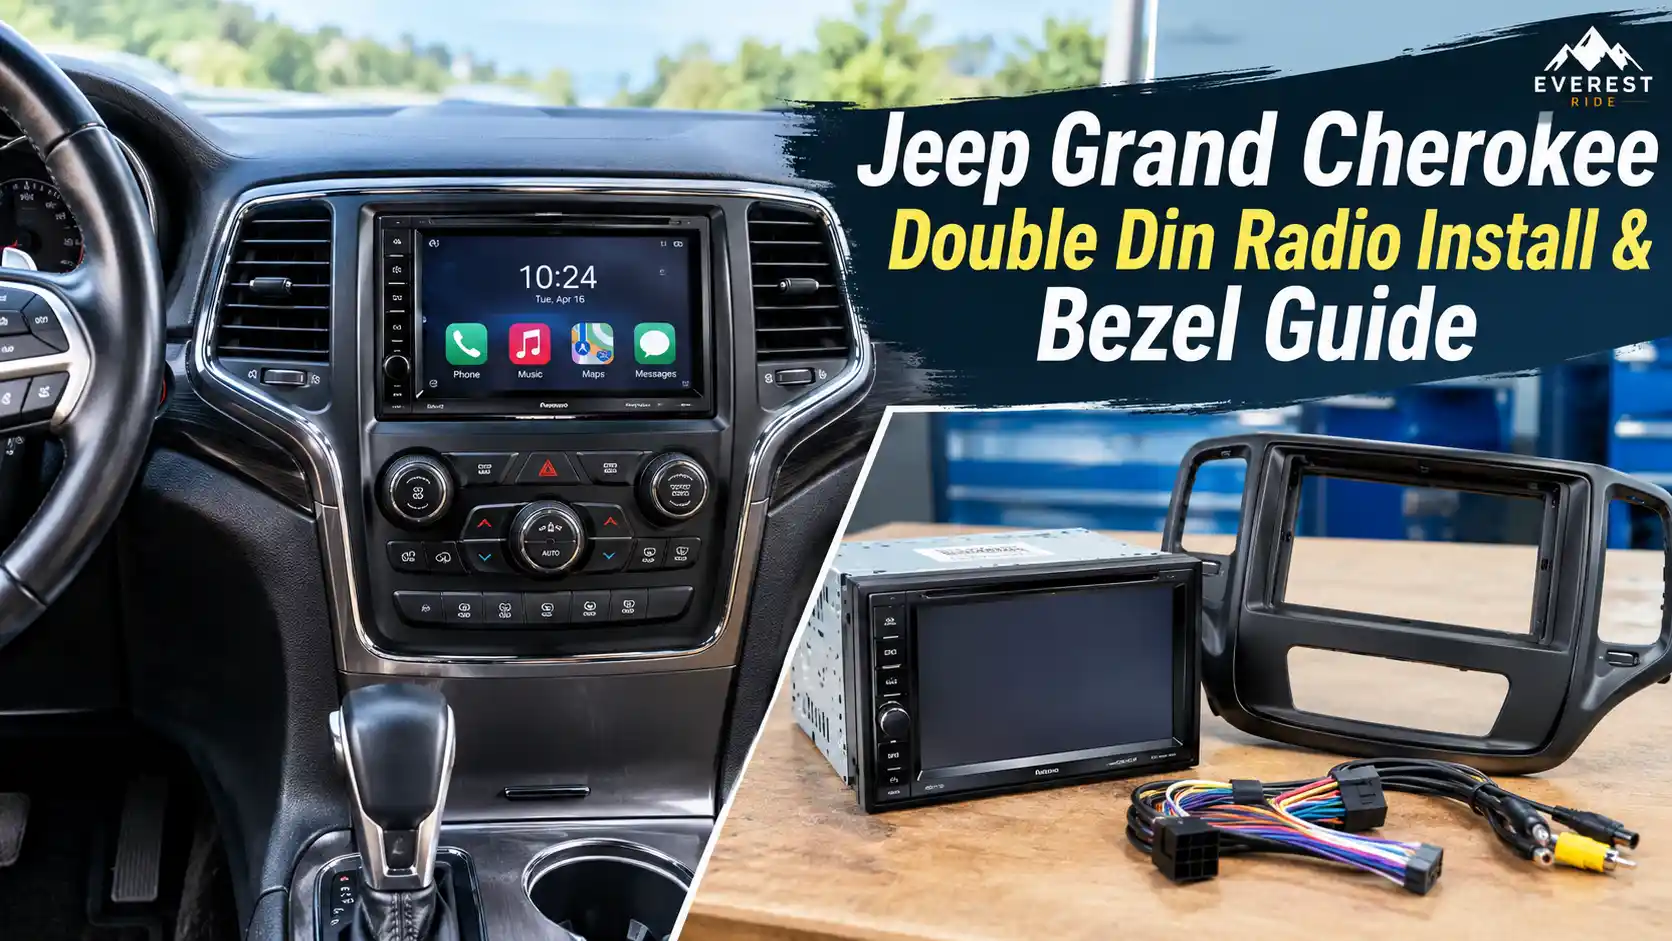
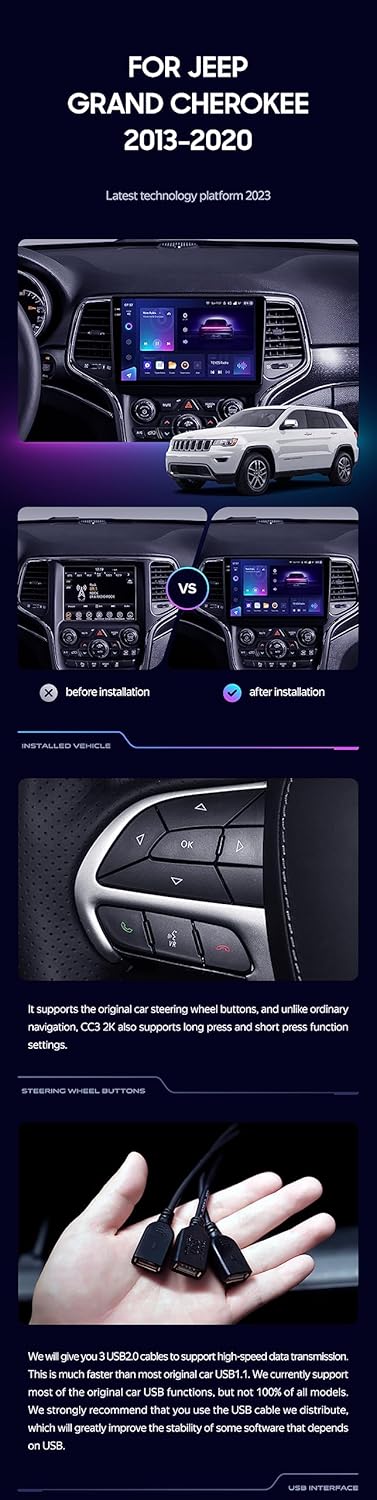
You’ve got a cracked bezel, a flickering factory screen, or just tired of listening to static. That’s why this guide exists. A Jeep Grand Cherokee radio install bezel lets you swap your stock head unit for a modern double DIN system without ruining the dash look.
The trick is picking the right kit for your exact generation first.
Manufacturer specifications show that the WK2 platform spans twelve model years with at least three different infotainment layouts. One wrong bezel order and you’re staring at gaps, loose clips, and a trip back to the parts counter. We’ll walk you through the decision branches so you build the right stack the first time.
Quick Answer
A Jeep Grand Cherokee radio install bezel easy double din upgrade guide helps you swap your factory radio. You need a vehicle-specific dash kit. That kit includes the bezel, mounting bracket, and wiring harness adapter.
Most installs take two to four hours for a beginner. Total cost usually runs between $200 and $600 depending on the head unit you choose.
Why Your Jeep Grand Cherokee Needs a Double DIN Upgrade
Your factory radio probably served you well. It played music. It connected your phone.
It displayed navigation when it worked. But those systems age. Touchscreens get unresponsive.
USB ports wear out. And Bluetooth dropout becomes a daily annoyance. A double DIN upgrade solves most of those problems in one shot.
Modern head units bring Apple CarPlay and Android Auto to vehicles that never had them. You get seamless phone integration. Navigation runs on your phone screen instead of that grainy factory display.
Music streams reliably without waiting for a connection to drop mid-route. That shift alone changes how you drive every day.
Beyond connectivity, you get real power upgrades. Factory radios typically push around fifteen watts per channel. Quality aftermarket units deliver fifty to two hundred watts.
That extra headroom makes a noticeable difference with decent speakers. Bass tightens up. Vocals cut through cleaner.
Even your stock speaker setup sounds better with a stronger signal driving it.
The bezel itself plays a huge role in the final look. Cheap replacements leave gaps around the edges. They rattle over bumps.
They don’t match your interior trim tone. A proper vehicle-specific bezel snaps in flush. It uses the same attachment points the factory designed.
The result looks OEM, just modernized underneath.
If you’ve already tackled interior trim work like upgrading your dome lighting, this project feels familiar. Both jobs reward patience and the right tools. You remove panels, route wires, secure connections, and snap things back together.
The bezel install follows that same rhythm. Just with more wiring than bulbs.
Some owners hesitate because they love their factory Uconnect system. That’s fair. The 8.4-inch touchscreen in higher trims looks sharp.
Voice commands work reasonably well. But those screens age too. Glass scratches.
Capacitive layers fail. Repair costs approach the price of a new head unit. Upgrading now often saves money compared to fixing a dying factory system later.
Identifying Your Vehicle Generation and Trim
Getting the generation right comes before anything else. Mix up a WK2 bezel with a WL bezel and nothing fits. The dash geometry changed between platforms.
Even within the WK2 run, trim levels affect which kit you need. Your first step is writing down three details: model year, trim badge, and factory equipment list.
The WK2 generation covers 2011 through 2022. Chrysler split that run into early and late facelift versions. Early WK2 models ran from 2011 to 2013.
Those dash panels use a specific bezel shape. Late WK2 models from 2014 onward shifted the radio cavity slightly. A 2013 bezel won’t seat properly in a 2015 dash even though both are WK2.
The WL generation started in 2022 for the fifth anniversary redesign. Its dash layout shares zero compatibility with WK2 bezels. If your Grand Cherokee says WL on the door jamb sticker, you need entirely different hardware.
Checking the VIN through a dealer portal or insurance lookup confirms the exact build date and platform code.
Factory equipment matters more than most people realize. Your stock radio might include a standard unit, a premium Alpine system, or an 8.4-inch Uconnect touchscreen. Each configuration changes what wiring harness you buy.
Vehicles with the factory amplifier need a bypass module or a harness that preserves amp communication. Skip that detail and your aftermarket stereo powers on with no sound.
Steering wheel controls add another variable. Some trims route audio controls through the CAN bus. Others use a simple resistor ladder on the steering wheel harness.
An interface module handles both methods, but you must know which your vehicle uses. Most dash kit manufacturers list compatibility by year and trim. Cross-reference twice before ordering.
Here’s a quick reference for generation split points:
| Generation | Model Years | Key Identifiers | Bezels Required |
|---|---|---|---|
| Early WK2 | 2011–2013 | Round HVAC vents, simpler dash curves | Early WK2-specific |
| Late WK2 | 2014–2022 | Reshaped vents, larger center stack | Late WK2-specific |
| WL | 2022+ | Completely redesigned dash, vertical screen options | WL-specific only |
If you’re unsure about your trim level, pop the hood and read the build sheet taped to the radiator support. That sticker lists every option installed at the factory. It’s the most reliable source you’ll find.
Dealer parts departments can also pull your VIN and tell you exactly what came built in.
Checking your current head unit type saves returns and headaches. Open the glove box and look at your radio face. A narrow single slot means you might convert to single DIN instead.
A wide rectangular screen means double DIN is the natural path. Take a photo before you start disassembly. You’ll thank yourself later when comparing parts.
Core Components: Bezel, Wiring Harness, and Interface Modules
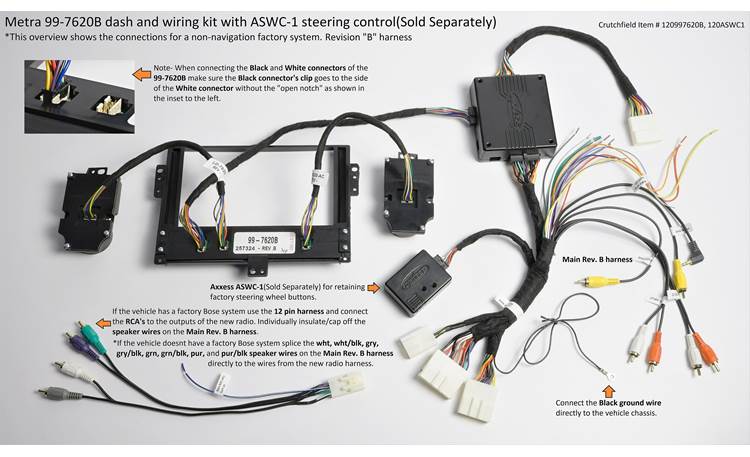
Image source: Bing (Web (fair-use with source credit))
Every double DIN upgrade rests on three physical components. Miss one and the install falls apart. The bezel frames your new radio.
The wiring harness connects everything to your vehicle. The interface module preserves features you’d otherwise lose. Together they turn a loose car stereo into a factory-quality installation.
The bezel replaces the plastic surround that frames your factory radio. Aftermarket units come in a bare metal sleeve. They need that bezel to sit flush in your dash.
Quality bezels use molded ABS plastic. Some offer carbon-fiber wrap options for visual contrast. The mounting tabs align with your dash slots.
Push them in and you hear the clicks that mean proper engagement.
Wiring harnesses are where most mistakes happen. Your factory radio plugs into a connector that carries power, ground, speakers, and data lines. The harness adapter splits those lines into a universal plug your new head unit can accept.
Look for harnesses with pre-crimped connectors. Solder and heat shrink beats wire nuts every time, but crimped adapters work fine for most installs.
The harness also handles power switching. Factory radios pull ignition power through a specific circuit. Aftermarket units expect a different pin layout.
The adapter bridges that gap. Make sure your harness includes a retained accessory wire if your vehicle uses CAN bus dimming. Without it, your screen brightness won’t adjust when you flip on the headlights.
Interface modules cover three common retention needs. Steering wheel control modules keep your paddle buttons working. Backup camera encoders preserve the rearview feed.
Amplifier bypass modules prevent your factory amp from muting the new stereo. Most double DIN kits bundle at least one of these. Premium installations often need all three.
Factory amplifier retention deserves special attention. Jeep loaded many WK2 and WL models with amplifiers hidden behind the dash or under a rear seat. These amps communicate with the radio over a data line.
Swapping the head unit without a bypass breaks that handshake. The amp goes silent. You hear nothing from any speaker.
An interface module like the PAC RTI or Metra ASPI fixes this by speaking both languages at once.
If you’ve explored steering column access during a dash kit install, you already know how tight these cavities get. Route your harness before seating the radio. Pull too late and you’ll be fighting the unit into place with wires trapped behind it.
Label every connector as you disconnect them. A quick photo of the factory wiring loom prevents confusion later.
Head unit mounting brackets slide into the dash opening. Some kits include a universal bracket. Model-specific brackets lock into your dash frame with existing screw points.
The model-specific version takes five minutes longer to install but eliminates wobble and rattle down the road. Always choose the vehicle-specific bracket when available.
Here’s a quick parts checklist to keep handy:
- Vehicle-specific dash kit with bezel
- Wiring harness adapter for your year and trim
- Steering wheel control interface module
- Backup camera interface if adding a new camera
- Amplifier bypass module if equipped with factory amp
- Antenna adapter. Most vehicles need a small coax transition.
- Zip ties, electrical tape, and wire loom for routing
Benefits and Drawbacks of a DIY Double DIN Upgrade
Going DIY on a double DIN upgrade saves real money. Professional installs run $150 to $400 in labor alone. Doing it yourself keeps that cash in your pocket.
You also control part selection. An installer might push a unit they get a margin on. You pick what fits your ears and your wallet.
The process stays straightforward if you follow the decision tree we built earlier.
Modern head units dramatically improve daily drive quality. CarPlay puts your maps, messages, and music on a giant touchscreen. Android Auto does the same for Google ecosystem users.
Voice commands handle calls and navigation without touching your phone. Your passengers stream content through Bluetooth aux inputs that actually work. Factory radios simply can’t match this experience.
Sound quality improves when the head unit drives better speakers. Even upgrading to midrange speakers paired with a solid aftermarket receiver produces noticeable gains. Factory units compress audio signals heavily.
Aftermarket receivers offer equalizer bands, time alignment, and crossover settings. You can tune the soundstage to your seating position. That tuning matters more than most drivers ever realize.
Visibility improvements are surprisingly significant. Factory screens from the early WK2 era struggle in bright sunlight. Newer head units feature brighter displays with anti-glare coatings.
Touch response improves across temperature ranges. Cold morning startups no longer leave you tapping a frozen screen. Responsiveness translates directly to safer operation since your eyes stay on the road longer.
The drawbacks deserve equal honesty. DIY installs demand basic tools and patience. You need trim removal tools to avoid cracking dash panels.
A socket set handles the handful of screws holding everything together. Wire strippers and crimpers keep connections clean. If you lack these tools, buying them adds $40 to $80 to your total investment.
That’s still cheaper than labor but not free.
Time commitment varies by experience level. First-time installers should block out a full weekend afternoon. Experienced DIYers often finish in two hours.
Mistakes happen. Wiring gets confused. Clips break.
Budget extra time rather than rushing through steps you haven’t done before. Rushed installs lead to rattles, dead channels, and functions you discover weeks later.
Cost predictability favors DIY as long as you buy the right kit. Factory replacement parts from dealers cost two to three times more than equivalent aftermarket solutions. Online retailers price dash kits competitively.
Head units range widely from budget Pioneer models to premium Alpine systems. Setting a total budget before shopping prevents upgrade creep.
Here’s a straightforward breakdown of the tradeoffs:
| Benefit | Drawback |
|---|---|
| Saves $150 to $400 in labor costs | Requires basic hand tools and patience |
| Full control over head unit selection | First-time installs take longer than expected |
| Modern smartphone integration features | Potential for wiring errors without experience |
| Improved sound quality with better processing | May need interface modules for factory features |
| Brighter, more responsive touchscreen display | Risk of broken trim clips if rushed |
| Retains OEM appearance with proper bezel | Factory amplifier may require bypass module |
If you’ve been planning other interior improvements alongside this, bundling the projects saves time. Upgrading your headlight system while the dash is open makes sense conceptually. Both involve electrical work and patient routing.
Just don’t tackle them simultaneously unless you have extra time. One project at a time keeps mistakes from compounding.
Step-by-Step Installation Workflow
A structured workflow prevents costly mistakes. Follow these steps in order and you’ll finish with a clean install. Each step builds on the last.
Skipping ahead creates rework. The process divides naturally into preparation, removal, wiring, installation, and verification phases.
Start with preparation. Disconnect the negative battery terminal before touching any wires. Wait ten minutes for capacitors to drain in any onboard modules.
Gather your tools on a clean workspace. Lay out every component from your kit and verify you have everything. Photo your current factory radio wiring before disconnecting anything.
These pictures become your roadmap if something confuses you later.
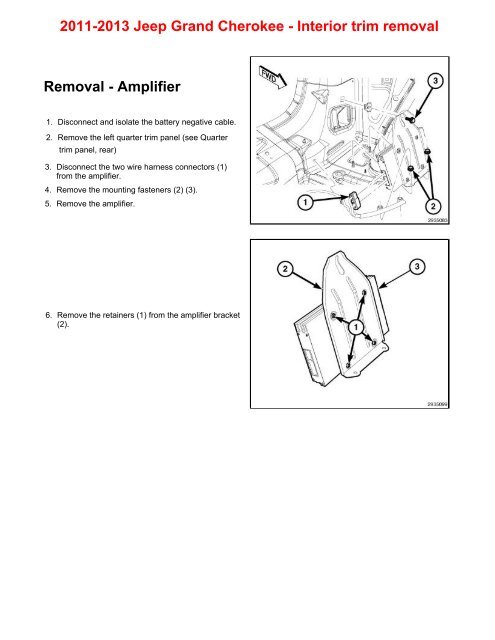
Remove the lower dash panel first. This access panel sits below the climate controls. Pry it out gently using a plastic trim tool.
Metal tools scratch dash surfaces. Plastic tools flex and release the retaining clips without damage. Set the panel aside.
Locate the screws securing the radio bezel assembly. These usually sit around the perimeter of the radio opening.
Unscrew the bezel fasteners and gently lift the entire assembly forward. The climate control panel shares attachment points with the bezel on many WK2 models. Don’t yank hard.
Several connectors link the climate module to the dash backbone. Disconnect those carefully. Note which connector goes where.
Label them with masking tape if needed. The last thing you want is reassembling climate controls backward.
Route the new wiring harness through the dash cavity. Feed it toward the factory radio location. Connect the harness side that matches your vehicle to the factory radio plug.
Then connect the universal side that accepts your new head unit. This pass-through design keeps your factory wiring intact. You never cut original wires when using a proper harness adapter.
Mount the steering wheel control interface module behind the dash. Secure it with zip ties to an existing bracket point. Route its output cable toward the head unit location.
Connect the backup camera encoder if you’re adding a new camera. Run the camera cable along existing loom routes. Tap into reverse trigger wire using a tap connector rather than cutting the factory wire.
Slide the new head unit into the mounting bracket. Connect all wiring harness plugs to the back of the stereo. Plug in the antenna adapter.
Route the USB cable and microphone wire toward their destination positions. The USB port usually mounts near the shifter console. The exterior microphone sticks under the windshield header rail for clear voice recognition.
Seat the bezel assembly back into the dash. Reconnect all climate control connectors. Replace the lower dash panel.
Torque bezel screws to gentle snugness. Over-tightening cracks the plastic mounting bosses. Reconnect the battery terminal.
Turn the ignition to accessory mode and test everything before finalizing the install.
Verification takes five to ten minutes. Test radio reception on AM and FM. Confirm steering wheel controls respond to every button.
Play a song through CarPlay or Android Auto. Call a contact to verify microphone pickup. Reverse the vehicle to confirm the backup camera displays correctly.
Check that dash dimming responds when you flip on your parking lights.
Common Mistakes and How to Avoid Them
Most install problems trace back to three root causes. Wrong part selection, sloppy wiring, and rushed reassembly. Each mistake shows up differently but all share the same cure: slow down and verify before moving forward.
Learning these pitfalls early saves frustration and keeps your warranty intact.
Wrong bezel fitment tops the list. Ordering a WK2 bezel for a WL dash is the most common error. Even within WK2, confusing early and late facelift bezels leaves visible gaps.
Always verify your model year against the manufacturer fitment guide. Enter your VIN when possible. Don’t guess based on year alone.
Trim level and factory equipment change the required hardware.
Mismatched wiring harnesses cause silent failures. You might install everything perfectly only to discover your steering wheel controls don’t respond. Or your backup camera stays black.
Or the factory amplifier goes mute. These failures almost always trace to an incorrect harness or missing interface module. Double-check your harness part number against your specific vehicle configuration before connecting anything.
Loose ground connections create intermittent nightmares. A bad ground causes radio reset loops, static bursts, and amplifier shutdowns. Clean the grounding point to bare metal.
Use a ring terminal secured with a star washer. Tighten firmly. Test continuity with a multimeter before closing the dash back up.
That thirty-second check prevents hours of troubleshooting later.
Forced trim clip installation breaks plastic retainers. Dash panels use dozens of hidden clips. Some snap into place easily.
Some resist because they’re misaligned or obstructed. Never force a panel. Remove it, check the clip path, and try again.
Broken clips mean purchasing replacement clips separately. Those cost pennies individually but finding the right ones adds delay.
Running wires near moving components invites future failure. Route cables away from the shifter mechanism, steering column, and seat adjustment rails. Use existing grommet paths whenever possible.
Secure loose cables with zip ties to structural points. Loose wires vibrate against metal surfaces. That vibration causes insulation wear and eventual shorts.
Cross-connecting speaker wires reverses phase. If your left front speaker wire touches the right front speaker terminal, bass cancels out. You’ll hear thin, weak audio with no low-end presence.
Label speaker channels as you disconnect them. Match colors or marking codes carefully. Most aftermarket head units color-code their speaker outputs to match standard conventions.
Stick to those codes.
Assuming the new unit fits without checking depth is risky. Some double DIN radios measure deeper than factory units. The extra thickness can bind against the firewall or block nearby wiring paths.
Measure your new head unit’s depth rating before purchasing. Compare it to the available cavity space in your dash. A quarter-inch clearance minimum prevents installation stress and premature component failure.
If your tail light wiring gets confusing during the process, don’t panic. Automotive wiring follows the same logic everywhere. Ground is typically white or black.
Power switches on activation. Signal wires carry specific functions. Document each connection methodically and you’ll solve any wiring puzzle.
Cost Breakdown: What to Expect
Upfront costs vary widely based on your quality choices. Budget installations start around $200 total. Mid-range builds land near $400.
Premium setups with flagship head units can reach $800 or more. Knowing where your money goes helps you set realistic expectations and avoid surprise expenses mid-project.
Dash kit pricing reflects fitment specificity. Generic universal kits run $25 to $50. Vehicle-specific branded kits from Metra or Scosche cost $40 to $80.
The extra cost buys precise fitment, proper clip retention, and matched trim tones. Generic kits often require filing, drilling, or accept tolerances that invite rattles. The branded route pays for itself in finished appearance.
Head unit pricing splits into clear tiers. Budget units from brands like Kenwood or basic Pioneer models run $200 to $350. Those include CarPlay, Android Auto, and basic equalizer controls.
Mid-range options from Alpine or higher Pioneer series cost $400 to $600 and add superior DAC chips, built-in amplification, and advanced audio processing. Flagship models exceed $800 but target audiophile-grade performance.
Interface modules add $30 to $120 depending on function. A basic steering wheel control interface runs $30 to $50. Camera integration modules cost $40 to $80.
Amplifier bypass units run $60 to $120. Many buyers need multiple modules. Budget accordingly or risk discovering missing functionality after the dash is reassembled and you can’t easily reaccess everything.
Hidden costs lurk in accessories most people overlook. Antenna adapters run $8 to $15. USB extension cables cost $10 to $20.
Microphone wiring runs $15 to $30 if your head unit requires external mic placement. Mounting hardware like zip ties, loom tubing, and electrical tape adds $15 to $25. These small items accumulate into a meaningful subtotal if you don’t plan for them.
Professional installation costs range from $150 to $400 depending on shop rates and complexity. Simple bezel swaps with plug-and-play harnesses lean toward the lower end. Adds like camera integration, amplifier bypass, and custom wiring push costs higher.
Factor this comparison into your decision. If your total DIY parts cost approaches professional pricing, the labor savings might not justify the time investment.
Here’s a sample cost worksheet for a typical mid-range WK2 upgrade:
| Component | Budget Tier | Mid-Range Tier | Premium Tier |
|---|---|---|---|
| Dash kit with bezel | $30 | $55 | $80 |
| Double DIN head unit | $220 | $450 | $850 |
| Steering wheel interface | $35 | $50 | $50 |
| Camera integration module | $0 | $60 | $90 |
| Amplifier bypass module | $0 | $80 | $110 |
| Antenna adapter | $10 | $12 | $15 |
| Wiring accessories | $15 | $25 | $35 |
| Total estimated cost | $310 | $732 | $1,230 |
Prices shift based on retailer promotions and regional availability. Check multiple suppliers before committing. Big-box electronics retailers often run seasonal sales.
Online specialty shops sometimes price-match. Building your kit from a single source simplifies return policies if something doesn’t fit.
Expert Tips for a Clean Install
Years of install experience produce habits that separate messy jobs from showroom-quality work. These tips come from technicians who’ve opened thousands of dash panels. They focus on precision, organization, and verification.
Following them turns a tricky afternoon project into a satisfying weekend win.
Work in a clean, well-lit environment. Dashboard components shed tiny screws and clips. A cluttered workspace swallows them.
A bright LED work light reveals hidden fasteners and connector locks. Keep a magnetic tray or small container for hardware. Losing one screw means prying the dash apart again later.
Prevention costs nothing.
Document every connector with your phone. Take close-up photos before unplugging anything. Zoom in on clip colors and locking tab positions.
These images become your reference when reassembly confuses you. Electrical connectors look identical once removed from their housing. Photos eliminate guesswork during the critical reconnection phase.
Use quality zip ties instead of cheap alternatives. Dollar-store ties become brittle within months. Heat exposure and vibration crack them.
Nylon lock-type tie wraps rated for automotive use stay flexible for years. Buy a variety pack with mixed sizes. Use 4-inch ties for main harness bundles and 2-inch ties for smaller routed sections.
Wire crimps beat electrical tape every time. Tap connectors or butt splices terminated with a proper crimper create conductive joints that resist vibration. Heat shrink covers protect against moisture and short circuits.
If you must use wire nuts for convenience, seal them with electrical tape as a secondary safeguard. Bare wire exposed to dashboard metal causes shorts that kill head units.
Label speaker channels before disconnecting them. Use painter’s tape and a marker. Write LF, RF, LR, RR directly on each factory connector.
Do the same on the corresponding harness wires. Speaker misplacement sounds subtle at first. Bass disappears from the wrong channel.
Imaging shifts to one side. Proper labeling prevents this entirely.
Test everything before closing the dash. This single habit prevents the most expensive regret in auto audio. Reconnect the battery.
Turn on the ignition. Verify radio power. Test each speaker individually by balancing the fader front to rear and left to right.
Confirm every steering wheel button responds. Back up to verify camera activation. Only after all tests pass should you begin reassembly.
Keep a small toolkit dedicated to automotive electrical work. A multimeter, wire strippers, crimper, heat gun, and quality solder prove invaluable. These tools pay for themselves on the first project.
Cheaper generic toolsets fail under real use. Investing in one good set removes tool-related frustration from your install experience.
Safety and Legal Considerations
Automotive electrical work carries genuine risks. Short circuits can damage sensitive onboard computers. Damaged airbag wiring triggers malfunction lights.
Improperly secured components become projectiles during sudden stops. Understanding these hazards keeps you and your vehicle safe throughout the process.
Always disconnect the battery before starting. The negative terminal first, positive last. Wait ten full minutes after disconnection before touching any wiring.
Modern vehicles store energy in capacitor banks within modules like the radio, airbag controller, and traction management system. Residual voltage can deliver a shock or trigger module faults if disturbed prematurely.
Airbag system awareness is critical. Side curtain airbags route wiring through the A-pillar trim and dash bezel area. Aggressive trim removal can damage airbag clock springs or connector locks.
If your vehicle has integrated side airbags in the dash, consult the factory service manual for proper removal sequence. Incorrect disassembly can deploy an airbag unintentionally or disable the system entirely.
Radio frequency interference concerns exist but remain manageable. Aftermarket head units emit low-level electromagnetic signals. Keep the unit mounted at least six inches from GPS antennas and toll transponder devices.
Routing the antenna cable away from power wiring reduces induction noise. These precautions protect both your new stereo and existing vehicle electronics.
Local regulations govern mobile device interaction while driving. Some jurisdictions restrict screen visibility for the driver. Others limit when navigation input is permitted.
CarPlay and Android Auto typically comply with safety standards by restricting complex interactions while the vehicle moves above walking speed. Verify your local laws if you modify screen mounting positions or add supplemental displays.
Electrical fire risk drops to near zero when you follow basic wiring standards. Use appropriately gauged power wires for your head unit. Most double DIN radios draw between ten and twenty amps during normal operation.
A ten-gauge power wire with an in-line fuse rated at fifteen amps provides adequate protection. Never bypass fuse holders or use larger fuses than specified.
Battery disconnect procedure protects sensitive modules. Modern Jeeps contain numerous control modules that remember coding and adaptations. Power loss during install can trigger fault codes or require dealer reprogramming.
Minimizing installation time reduces this risk. Keep your session focused. Have all parts and tools ready before disconnecting the battery.
According to NHTSA guidelines, proper vehicle modifications should not compromise existing safety systems. If your installation affects airbag circuitry, suspension sensors, or traction control wiring, consult a certified automotive electrician. These systems demand specialized knowledge beyond standard stereo install procedures.
Real-World Case: Installing a Pioneer in a 2016 WK2
This case study follows a documented install pattern that represents the majority of WK2 double DIN upgrades. The subject vehicle is a 2016 Grand Cherokee Limited with the Uconnect 8.4-inch touchscreen, factory Alpine amplifier, and steering wheel audio controls. Understanding this specific configuration reveals challenges that generic guides often miss.
The owner selected a Pioneer MVH-S425BS head unit as the replacement. That model offers Bluetooth audio, USB input, and basic smartphone integration without full CarPlay capability. The decision reflected a preference for simplicity and proven reliability over cutting-edge features.
Total parts cost came to approximately $520 including the dash kit, wiring harness, and steering wheel interface module.
Day one began with battery disconnect and lower dash panel removal. The owner spent forty-five minutes photographing every connector and labeling each harness. This documentation proved essential when reconnecting the climate control panel.
Three separate connectors link the HVAC module to the dash backbone. Getting one reversed would have disabled defrost functionality.
The factory radio removal required unscrewing four 8mm bolts securing the bezel assembly. Two additional screws held the climate control panel in place. The owner used a set of magnetic screw retrievers to prevent dropped fasteners inside the dash cavity.
Those retrievers became indispensable when a screw rolled toward the firewall.
Wiring connections took approximately one hour. The Metra harness adapter plugged directly into the factory radio connector. The steering wheel control interface required connecting four wires: power, ground, data in, and data out.
Each connection used tape-connected terminals for serviceability. The owner chose this approach over permanent soldering to allow future head unit upgrades.
The factory Alpine amplifier bypass module presented the biggest challenge. The unit required connecting to the amplifier’s data line within the factory harness. Finding the correct pin required consulting the wiring diagram included with the bypass kit.
Once identified, a tap connector attached without cutting factory wire. This preservation technique maintains factory integrity and simplifies future stock restoration.
Final verification revealed one issue. The backup camera displayed but showed reversed image orientation. The Pioneer unit allowed mirror setting adjustment through the display menu.
A thirty-second software change resolved the problem completely. This reminder underscores testing before final reassembly. Minor adjustments are far easier with the dash open.
The complete install took six hours spread across one weekend. The owner estimated a professional shop would charge approximately $275 in labor for comparable work. Net savings came to roughly $220 after accounting for tools purchased specifically for the project.
The finished installation passed every functional test with zero dash rattles after thirty days of normal driving.
Comparing Double DIN vs Single DIN Conversion
Choosing between double DIN and single DIN conversion depends on your priorities and dash space. The WK2 platform allows both paths. The WL platform restricts you to double DIN options.
Understanding what each choice gives up and gains helps you pick the right configuration for your driving habits.
Double DIN installations use the full radio cavity width. The new head unit fills the entire opening. This approach preserves your climate control layout completely.
Factory buttons remain accessible without modification. The dash looks nearly identical to stock except for the larger screen. Most buyers prefer this outcome because it maintains the vehicle’s intended design language.
Single DIN conversions replace the entire radio and climate control cluster with a narrower unit. The new stereo occupies only the upper portion. Climate controls get relocated or replaced with aftermarket toggles.
This path frees up physical space but sacrifices factory button ergonomics. Most owners find themselves reinstalling climate controls after discovering frustration with toggle switches.
Visual impact differs significantly between the two approaches. Double DIN retains the wide, integrated dashboard appearance. Single DIN creates a stacked look that resembles a truck stereo installation.
Jeep interior designers spent considerable effort harmonizing the WK2 center stack. Single DIN conversion disrupts that harmony noticeably.
Feature availability skews heavily toward double DIN. Modern head units concentrated in the double DIN form factor offer superior processors, better displays, and more connectivity options. Single DIN units maximize screen space within a narrow chassis but often compromise on build quality and feature breadth to achieve that size reduction.
Tool requirements stay similar for both paths. Trim removal tools, socket sets, and wiring supplies apply equally. Single DIN conversion sometimes requires additional fabrication for climate control relocation brackets.
Double DIN conversion needs fewer custom adaptations because the replacement hardware fits the existing opening directly.
Cost analysis favors double DIN for most buyers. Single DIN conversion often requires purchasing separate climate control components or adaptation brackets. These add-ons erode the perceived savings.
Double DIN kits bundle everything needed for a complete replacement. The per-component cost compares favorably when you factor in included hardware.
| Comparison Factor | Double DIN | Single DIN |
|---|---|---|
| Dash appearance retention | Excellent | Fair to poor |
| Feature density | High | Moderate |
| Climate control disruption | None | Significant |
| Installation complexity | Standard | Moderate to high |
| Part availability | Widely available | Limited selection |
| Cost effectiveness | Better value | Higher effective cost |
| Best suited for | Most WK2 and all WL models | WK2 only, enthusiasts |
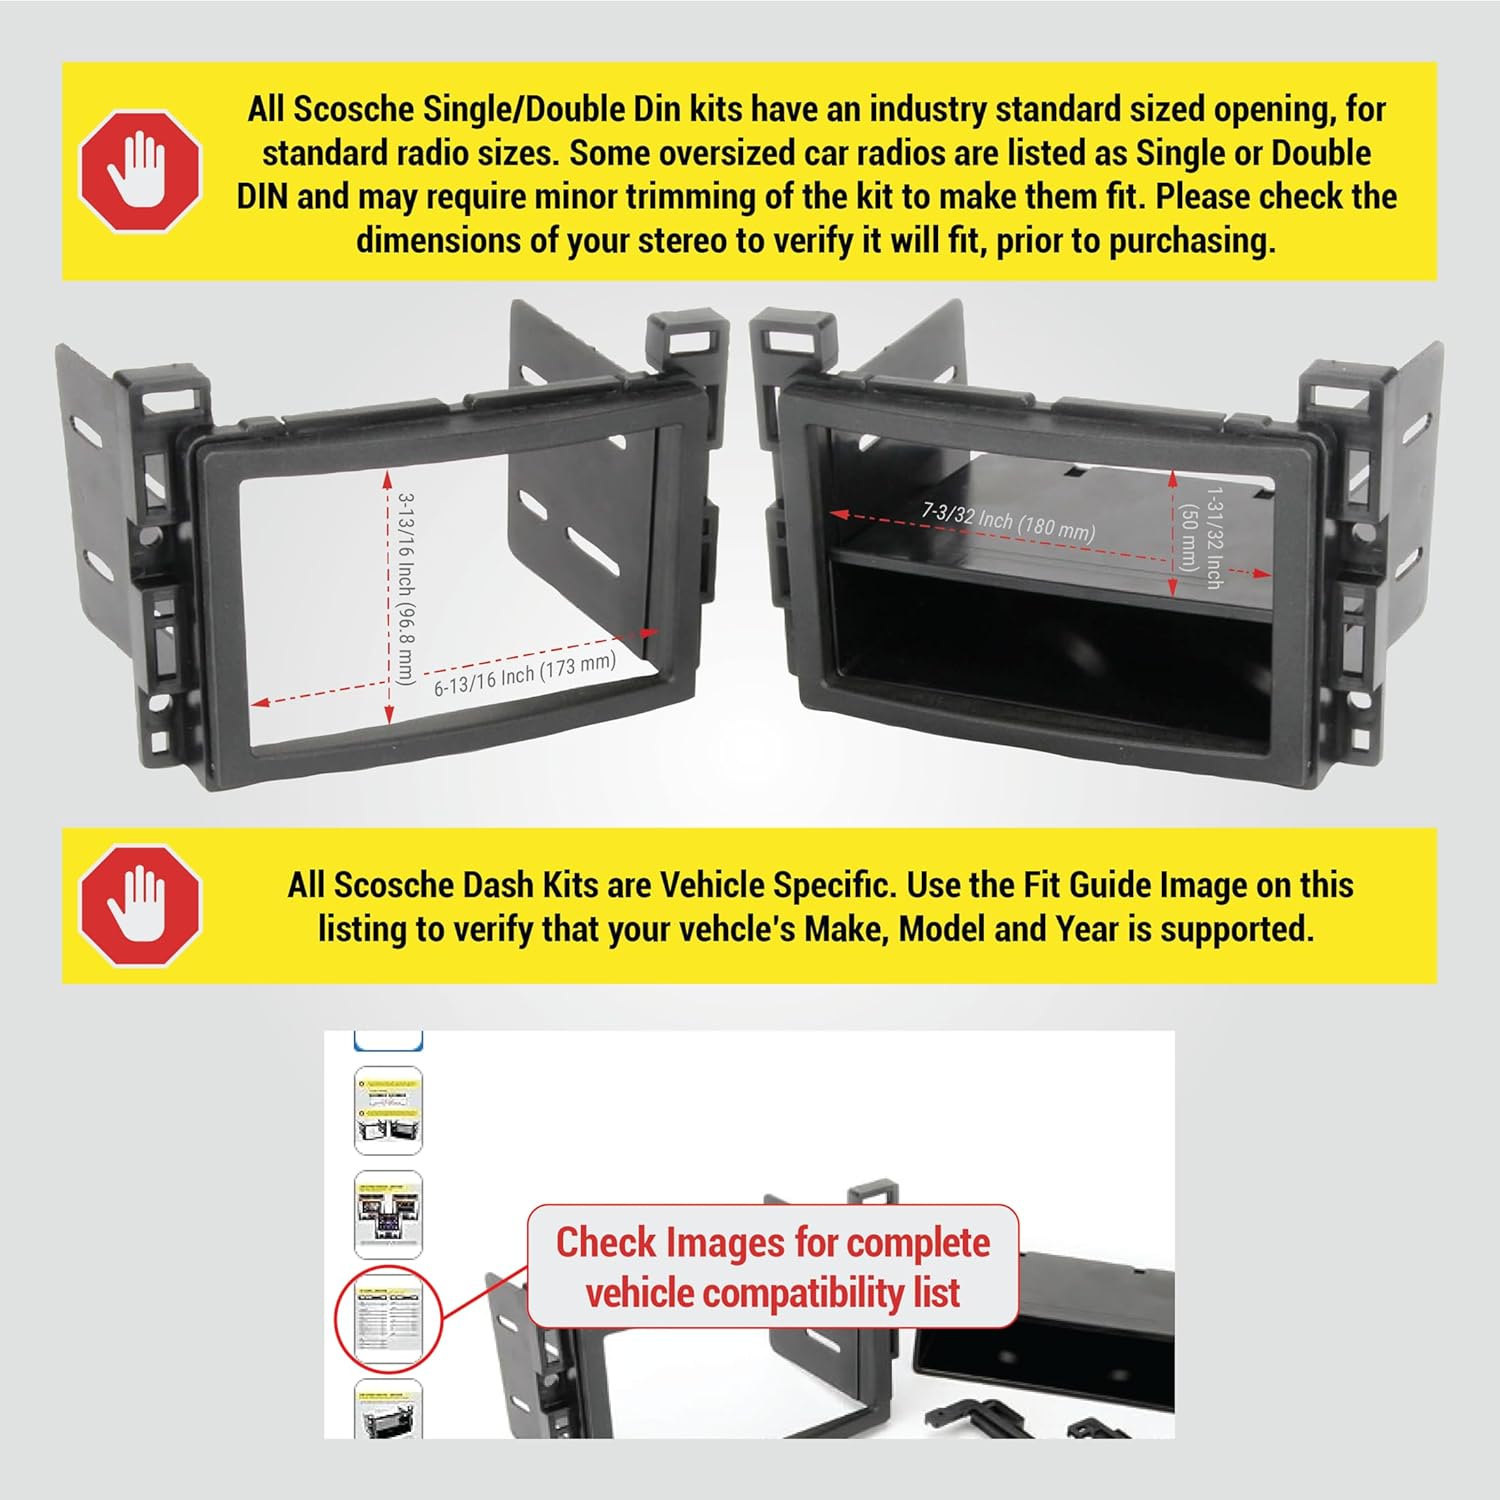
If you enjoy restoring specific Jeep components like hood assemblies, you’ll appreciate how double DIN conversion preserves more of your vehicle’s original character. Single DIN conversion trades authenticity for compactness. Most WK2 owners find that authenticity worth preserving.
Use Cases: Who Should Upgrade?
Not every Grand Cherokee owner needs this upgrade. Some vehicles serve owners who rarely use their radio. Others sit in garages as weekend toys with minimal tech expectations.
Understanding whether you fall into the upgrade category prevents wasted spending on capabilities you’ll never use.
Daily commuters benefit most from CarPlay and Android Auto integration. Navigation rerouting appears on your phone screen automatically. Traffic alerts update in real time.
Contact access through voice commands keeps your hands on the wheel. These features transform a routine drive into a safer, more connected experience. Drivers who commute more than thirty miles daily see the strongest return on upgrade investment.
Off-road enthusiasts appreciate updated media and communication capabilities. Bluetooth pairing lets passengers stream music through upgraded stereo systems. Phone connectivity maintains coordination with trail companions when cell coverage drops.
Even basic double DIN upgrades improve audio clarity over engine and tire noise that dominates off-road environments.
Owners with aging factory radios face declining functionality. Touchscreen unresponsiveness worsens with temperature extremes. Bluetooth pairing fails repeatedly.
USB ports stop recognizing devices. These symptoms indicate end-of-life degradation. Replacing the head unit restores reliable operation.
Delaying replacement often leads to complete system failure that requires additional diagnostic work.
Budget-conscious buyers should calculate total cost against expected satisfaction gain. A $250 budget gets you a functional upgrade with basic smartphone integration. A $500 budget opens mid-range options with superior sound processing.
A $1000 budget reaches premium territory with DSP integration and multi-source switching. Define your ceiling before shopping to avoid specification drift.
Vehicles with existing audio upgrades benefit disproportionately from head unit improvements. Aftermarket speakers and subwoofers require a capable source unit to perform correctly. A factory radio bottleneck limits what your investment in quality speakers can deliver.
Upgrading the head unit unlocks the full potential of your audio hardware investments.
Owners planning long-term vehicle retention see stronger upgrade justification. If you intend to keep your Grand Cherokee past ten years, modernizing the infotainment system extends usable life comfortably. Factory radio failure after decade-long service often signals broader electronic degradation.
A quality aftermarket replacement resets that clock for the audio system specifically.
Before diving into complex electrical projects like this, making sure your running boards are properly secured shows the same systematic approach to vehicle maintenance. Each upgrade compounds reliability when done thoughtfully.
Frequently Asked Questions
How long does a double DIN upgrade take for a first-timer?
Plan for four to six hours on your first attempt. Experienced installers finish in two to three hours. Factor extra time if your vehicle has a factory amplifier requiring bypass module integration.
Taking breaks prevents fatigue-driven mistakes that cause rework later.
Will I lose steering wheel controls with an aftermarket radio?
No, provided you install the correct interface module. Steering wheel control interfaces cost $30 to $50 and plug between your factory harness and new head unit. Without this module, your paddle buttons become nonfunctional.
Always verify interface compatibility with your specific model year before purchasing.
Can I keep my factory backup camera after installing a new radio?
Yes in most cases. Camera signal passes through the wiring harness adapter to your new head unit. Some installations require a dedicated camera interface module if your vehicle uses proprietary camera protocols.
Verify your harness kit includes camera passthrough capability for your specific trim level.
What is the difference between WK2 and WL bezel kits?
WK2 bezels fit 2011 through 2022 Grand Cherokees with curved dash geometry. WL bezels fit 2022 and newer models with radically redesigned center stacks. The mounting point patterns, vent placements, and climate control integrations differ completely between generations.
Mixing them causes fitment failure.
Do I need a professional installation for warranty coverage?
Most head unit manufacturers honor warranties regardless of installation method. However, damage caused by improper wiring or electrical faults voids coverage. Keeping detailed photos and wiring diagrams demonstrates proper installation if a warranty claim arises.
Professional installation receipts provide additional warranty protection for complex configurations.
Are there any legal restrictions on screen size or placement?
Some states regulate driver-facing screen visibility while the vehicle is in motion. CarPlay and Android Auto typically comply by restricting certain functions during driving. Screen size restrictions rarely apply to standard double DIN units since they replace factory-equivalent displays.
Check your local jurisdiction if you mount supplemental screens.
Final Decision Guide: Should You Do It Yourself?
The answer depends on your comfort level with basic mechanical tasks and your willingness to invest afternoon time. If you’ve successfully completed tasks like installing a remote starter through a dealer, you already possess the patience this project demands. Both require methodical step-following and attention to connector detail.
Choose DIY if you value hands-on vehicle improvement, want to understand your car’s systems better, or need to preserve budget for other projects. The financial savings are real and the learning experience valuable. Most first-time installers report high satisfaction after completing their initial stereo upgrade successfully.
Choose professional installation if your vehicle carries complex amplifier networks, you lack basic hand tools, or you simply prefer guaranteed results without weekend time investment. Qualified auto electronics shops complete these installs efficiently and handle unexpected complications like corroded connectors or damaged harnesses experienced DIYers might overlook.
Your decision should weigh time availability against cost savings realistically. Four to six hours of personal time versus $200 to $400 in professional labor represents a meaningful trade for most owners. Calculate your hourly value honestly.
If your time counts for less than $50 an hour, DIY delivers clear financial advantage.
Start with the preparation phase we outlined. Verify your generation and trim. Order the correct kit.
Gather tools. Test your confidence by removing and reinstalling a simple dash panel first. That low-risk practice run builds muscle memory for the actual head unit swap.
Confidence grows through successful small wins.
Whether you choose the DIY path or professional help, your Grand Cherokee deserves modern connectivity. The factory radios that came equipped ten or more years ago simply cannot compete with current smartphone integration standards. Any upgrade path you choose moves you forward significantly.
Pick the route that matches your skills, schedule, and budget comfortably.
Troubleshooting Guide: Fixing Common Issues After Install
Issues surface most often during the first test cycle. Knowing how to diagnose them quickly prevents frustration and keeps your new stereo working properly. Each symptom points to a specific root cause with a straightforward fix.
No sound from any speaker traces back to three likely causes. Check your power antenna lead connection first. That wire powers the factory antenna amplifier on many Jeep models.
Without it, you hear nothing on FM and weak reception on AM. Also verify your remote turn-on wire connects to the correct harness pin. A loose connection there kills all audio output completely.
Static or humming noise usually indicates a ground loop. Your new head unit grounds through its metal chassis to the dash bracket. If that bracket sits on painted or powder-coated metal, electrical continuity breaks.
Scrape a small area of bare metal where the bracket contacts the dash frame. Secure the ground wire directly to that cleaned surface instead of relying on paint-covered metal.
Intermittent cutting out while driving points to vibration-sensitive connections. Every wire splice and terminal point on your harness needs inspection. Gently tug each connector to check for looseness.
Re-crimp any terminals that slide off their pins easily. Use dielectric grease inside weather-pack connectors to prevent corrosion from moisture intrusion over time.
Steering wheel controls failing to respond demand interface module verification. Confirm your SWC harness connects to both the vehicle side and the head unit side correctly. Some modules require programming via button sequences before they activate.
Consult your interface module manual for the pairing procedure specific to your Pioneer, Alpine, or Kenwood head unit.
Backup camera displaying upside down or mirrored images requires menu adjustment. Most modern head units include a camera mirror setting accessible through the display settings menu. Toggle that setting and the image flips to natural orientation immediately.
If your camera feed shows rainbow patterns or distortion, check your RCA video cable connection at both ends. A partially seated video connector produces exactly those visual artifacts.
Touchscreen unresponsiveness in cold weather affects capacitive screens dramatically. Factory and aftermarket touchscreens rely on electrical conductivity from your fingertip. Cold fingers conduct significantly less electricity than warm ones.
If your screen misses taps during winter mornings, that explains why. Warming your hands or using a stylus designed for capacitive screens resolves the issue temporarily until the dash warms up.
Radio seeking skips stations too aggressively stems from preset storage configuration. Some head units default to weak signal rejection modes that skip marginal stations rapidly. Access your radio settings menu and disable the RDS regional preference or lower the signal strength threshold.
You will capture more stations even if some arrive with background static.
Bluetooth calls dropping repeatedly indicate microphone placement problems. The exterior microphone must receive clear voice transmission without wind interference. Verify your mic cable routes behind trim rather than exposed to direct airflow.
Wind noise overwhelms the microphone input and causes the other caller to hear mostly static rather than your voice.
Maintaining Your New Stereo System Long-Term
Proper maintenance extends head unit life well beyond typical failure points. Factory radios often last eight to ten years before capacitors fail. Quality aftermarket units with proper care regularly exceed twelve years of reliable service.
Simple habits during installation and daily use prevent most premature failures.
Keep your head unit clean using only dry microfiber cloths. Liquid cleaners seep into ventilation slots and damage internal circuit boards. Spray cleaning solution onto cloth first, never directly onto the stereo face.
Abrasive pads scratch protective coatings on touchscreen surfaces permanently. A gentle circular motion removes fingerprints without scoring the glass.
Volume management protects both your hearing and your equipment. Cranking volume to maximum levels stresses amplifier output stages unnecessarily. Sustained peak-level output generates heat that degrades internal components over time.
Listening at moderate volumes preserves your speakers and keeps your head unit running cool during extended trips.
Software updates matter more than most owners realize. Manufacturers release firmware improvements that fix Bluetooth bugs, improve CarPlay stability, and add new features. Check your head unit model number periodically for available updates.
Some brands offer update files downloadable to USB drives. Others require dealer programming visits for major version changes.
Fuse replacement preparedness saves roadside headaches. Keep one spare fuse matching your head unit specification in your glove box. Most Pioneer and Alpine units use standard 10-amp or 15-amp blade fuses.
A blown fuse from a power surge or short circuit shuts your stereo down completely. Replacement takes thirty seconds with the right spare fuse on hand.
Battery health monitoring prevents stereo reset nightmares. Modern head units store radio presets, equalizer settings, and phone pairings in volatile memory. Battery voltage drops below eleven point five volts during cranking can erase that stored data.
Installing a capacitor or backup power supply maintains memory retention during hard starts and prevents constant reprogramming after every drive.
Advanced Upgrades: Adding Subwoofers and Amplifiers
Your double DIN head unit provides the foundation. Built-in amplifiers typically deliver fifty watts per channel into four ohms. That power serves stock speakers adequately but struggles with demanding aftermarket speaker upgrades or subwoofer installations.
Advanced audio enthusiasts frequently add external amplification to unlock full system potential.
Powered subwoofers represent the simplest upgrade path. These self-contained units combine a sealed enclosure, built-in amplifier, and subwoofer driver in one compact package. Many powered subs mount under seats or in cargo areas without extensive fabrication.
They connect directly to your head unit using speaker-level inputs or RCA preamp outputs if your stereo includes them.
External amplifiers offer greater flexibility but require more installation work. A two-channel amp driving door speakers plus a mono amp powering a subwoofer creates a professional-grade audio system. Each amplifier receives line-level signals from your head unit remote outputs.
Power wiring runs from the battery through an in-line fuse holder to each amp location.
Signal processing upgrades address acoustic limitations inherent in vehicle interiors. Digital signal processors compensate for speaker placement asymmetry, equalize frequency response curves, and create time alignment between drivers. Your ears sit closer to the driver-side door speaker than the passenger side.
DSP technology delays the stronger signal electronically so both ears receive sound simultaneously.
Component speaker systems pair naturally with amplifier upgrades. Separate woofers and tweeters mounted independently produce clearer imaging than coaxial designs. High-quality component sets require dedicated amplification to perform correctly.
Feeding them directly from your head unit often results in distorted high frequencies and weak bass response. An amp with sufficient current delivery keeps these drivers operating within their optimal range.
Impedance matching protects your new equipment. Amplifiers specify minimum load impedance, usually two ohms stable or four ohms stable. Connecting speakers with lower impedance than the amplifier handles causes overheating and potential damage.
Calculate total impedance when wiring multiple speakers in parallel or series configurations. Misconfigured speaker loads blow amplifier channels frequently.
Wiring gauge selection follows amperage requirements precisely. A twenty-amp amplifier drawing constant current needs eight-gauge power wire minimum. Twenty-gauge wires melt under those conditions.
Length matters too. Longer power runs require thicker wire to prevent voltage drop. Use a wire gauge chart matching your amplifier’s RMS current rating to the run length from battery to amp location.
When to Call a Professional Installer
Some situations exceed reasonable DIY scope despite careful preparation. Recognizing your limits early prevents costly mistakes that cost more to fix than hiring help initially. Certain vehicle configurations demand specialized knowledge and tools most hobbyists lack.
Factory amplifier elimination presents complexity beyond basic harness swaps. Removing the Alpine or Sony factory amp requires permanent wiring modifications in many Grand Cherokee configurations. The amplifier bypasses integration into the new stereo through data bus communication protocols.
Incorrect removal can trigger chassis fault codes requiring dealer-level diagnostics to clear permanently.
Dual-zone climate control integration varies significantly across model years. Early WK2 models share climate control electronics with the radio bezel assembly. Later models separate these systems entirely.
Confusion between these architectures leads to incorrect wiring attempts that damage climate control modules. Professional installers carry wiring diagrams specific to each production date.
Airbag system proximity demands caution around door panel and pillar trim work. Side curtain airbag modules route wiring through A-pillar trim panels. Aggressive removal techniques can damage airbag clock spring connectors located near the steering column.
Certified technicians understand proper disconnection sequences that prevent accidental airbag deployment during stereo installation procedures.
Factory navigation system deletion creates regulatory complications in some jurisdictions. Vehicles equipped with built-in GPS require specific procedures to deactivate navigation functions properly. Improper deletion can trigger dashboard warning lights that persist until dealer reprogramming completes.
Professional shops carry the diagnostic equipment necessary to clear navigation-related fault codes safely.
Complex audio system redesigns benefit from professional expertise. Multi-amplified setups involving factory subwoofers, center channel speakers, and surround sound configurations require advanced signal routing knowledge. Determining which amplifier channels feed which speakers demands factory wiring diagram interpretation most DIYers cannot accomplish confidently.
Mistakes here produce permanent audio degradation difficult to reverse.
If your engine bay modifications required specialized tools, you already understand when professional help makes sense. The same principle applies to complex electrical integration work. Knowing when to step back and hire expertise demonstrates automotive maturity rather than weakness.
Parts Sourcing Guide: Where to Find Compatible Components
Finding the right parts requires knowing where to look and what terminology manufacturers use. Generic search terms produce irrelevant results. Specific part numbers and vehicle-specific filters save hours of shopping frustration.
Understanding supplier categories helps you choose sources matching your priorities.
Specialty automotive audio retailers offer the best fitment guarantee. Companies like Crutchfield maintain extensive vehicle application databases covering every Grand Cherokee variation. Their online configurator asks your model year and trim, then displays only compatible kits.
This filtering eliminates wrong-part purchases that waste money and time.
Amazon inventory varies significantly by seller authenticity. Countless third-party vendors list dash kits claiming universal fitment. Many contain inaccurate specifications or substitute inferior materials.
Reading verified purchase reviews reveals actual fitment experiences. Look for buyers who documented their specific model year and installation results in review photos.
eBay deals attract budget-conscious shoppers but carry higher risk. Sellers occasionally list mismatched parts or refurbished kits without disclosure. Verify seller ratings thoroughly before purchasing.
Request photographs of actual items matching your vehicle configuration. Payment protection through PayPal or credit cards provides recourse if received parts prove incompatible.
Factory dealer parts counters carry genuine Mopar replacement bezels. These parts guarantee perfect fitment and exact color matching. However, Mopar bezels typically cost twice as much as quality aftermarket equivalents.
The price difference reflects brand premium rather than superior functionality. Most upgrade projects achieve identical results with reputable aftermarket branded components.
Local car audio shops sometimes stock installation kits for popular vehicles. Walking into a shop lets you physically inspect bezel quality before purchasing. Staff can answer specific questions about your model year configuration.
Supporting local businesses also builds relationships useful for future audio upgrade projects or troubleshooting assistance.
Online forums dedicated to Grand Cherokee communities provide invaluable sourcing advice. Members share current pricing, retailer recommendations, and warning about known problematic suppliers. Reading recent forum threads reveals which products remain available and which have been discontinued or replaced by updated versions.
Community knowledge often exceeds manufacturer specifications regarding real-world compatibility.
Head Unit Recommendations by Budget Tier
Choosing the right head unit depends on your audio priorities and spending comfort level. The market segments clearly into three distinct tiers, each serving different listener needs. Understanding what you get at each price point prevents overspending on features you won’t use or underbuying something that frustrates you within months.
Budget tier head units range from $180 to $300. These models from Pioneer, Kenwood, and JVC deliver solid CarPlay and Android Auto functionality. Audio processing remains basic with standard equalizer bands.
Build quality feels adequate for daily commuting but lacks premium materials. Most budget units include built-in amplifiers rated around fifty watts per channel. That power handles stock speakers adequately but reveals limitations quickly when you upgrade to aftermarket components.
Mid-range options span $350 to $600 and represent the sweet spot for most Grand Cherokee owners. Alpine and higher Pioneer series models dominate this category. You gain superior digital-to-analog converters, more advanced equalizer parameters, and built-in time alignment for speaker positioning.
Many mid-range units include five-volt preamp outputs for future amplifier additions. Display brightness improves significantly in direct sunlight compared to budget alternatives.
Premium head units exceed $700 and target serious audio enthusiasts. Alpine ILX-F507 and similar flagship models offer seven-inch touchscreens, full DSP integration, and multi-source processing. These units accept external processor input via optical or coaxial digital connections.
Remote app control provides extensive tuning capability from your smartphone. The investment pays off only if you plan matching speaker and amplifier upgrades to realize their full potential.
Feature comparison across tiers reveals significant gaps in processing capability:
| Feature | Budget Tier ($180-$300) | Mid-Range ($350-$600) | Premium ($700+) |
|---|---|---|---|
| CarPlay / Android Auto | Yes | Yes | Yes with wireless option |
| Built-in Equalizer | Basic 2-band | Advanced 13-band | Full DSP with time alignment |
| Preamp Outputs | None or 1 pair | 2 pairs stereo | 4+ pairs configurable |
| Bluetooth Version | 4.2 or older | 5.0 or newer | Latest with multipoint |
| Display Quality | Standard LCD | High-brightness LCD | OLED or high-res capacitive |
| App Control | Limited or none | Basic media control | Full system configuration |
| Future Expansion | Minimal | Moderate amplifier addition | Complete system integration |
Brand reputation matters less than specification matching. Alpine commands premium pricing for reliability and sound quality consistency. Pioneer delivers strong mid-range value with widely available service support.
Kenwood offers competitive specs at slightly lower prices. JVC excels in touchscreen responsiveness and interface design. All four brands produce units worthy of a Grand Cherokee installation when properly matched to your needs.
If you’ve already planned exterior lighting upgrades like a light bar install, you understand how system components must work together. The same principle applies here. Buying a premium head unit without matching speakers and amplification wastes money.
Start with the head unit that matches your current speaker setup, then upgrade other components as budget allows.
Detailed Tool List and Preparation Checklist
Having the right tools makes the difference between a clean install and a frustrating afternoon. Missing a single tool mid-project forces improvisation that risks damage. A proper toolkit costs less than fifty dollars and prevents those moments of panic when you need something you don’t have.
Essential trim removal tools come first. Plastic pry bars in multiple widths prevent dash panel damage during disassembly. Flat trim removers work for large panels.
Narrow picks access tight clip locations around the bezel perimeter. Metal screwdrivers scratch surfaces instantly. Proper plastic tools flex without marring factory finishes.
Budget twenty dollars for a complete trim tool set from any automotive parts retailer.
Fastening hardware requires specific socket sizes. An eight-millimeter socket removes most bezel and radio mounting screws. A ten-millimeter socket handles bracket attachment points.
A ratchet with extension provides reach into confined spaces. Socket sets cost fifteen to thirty dollars. Investing in a quality set serves you through every automotive project beyond this one.
Wiring work demands precision tools. Wire strippers with multiple gauge slots create clean cuts without damaging conductor strands. Crimping tools rated for automotive connectors ensure reliable electrical joints.
Electrical tape and heat shrink tubing protect splice points from moisture and vibration. A basic wiring kit runs thirty to fifty dollars. Don’t skip quality here.
Cheap crimps fail prematurely and cause intermittent problems that frustrate diagnosis.
Documentation tools prevent mistakes. Masking tape and a permanent marker label every connector before removal. A smartphone camera captures connector positions and wire routing paths.
Magnetic parts trays hold small screws during disassembly. These items cost almost nothing but save hours of confusion during reassembly.
Optional but helpful tools include a multimeter for verifying power and ground continuity, a panel popper for stubborn clips, and a flashlight with flexible neck for illuminating dark dash cavities. LED work lights mounted on dash surfaces eliminate shadow areas that hide critical connections.
Here’s a complete preparation checklist before starting your install:
- Battery disconnect procedure understood and planned
- Vehicle-specific dash kit ordered and verified
- Wiring harness adapter matched to model year and trim
- Interface modules selected for steering controls and amplifier
- All required tools gathered and tested
- Workspace organized with good lighting
- Connector photographs taken before disassembly
- Wiring diagrams printed or saved to phone
- Spare fuses and zip ties on hand
- Installation manual reviewed for head unit specifics
Skipping any checklist item risks incomplete installation or discovered missing parts after partial reassembly. Taking thirty minutes for thorough preparation prevents three-hour troubleshooting sessions later. Organization separates professional-quality installs from rushed job-site appearances.
Wiring Diagrams and Pinout Reference Guide
Understanding your wiring layout prevents connection errors that damage equipment. Factory harnesses use color-coded wires following industry standards, but Jeep occasionally deviates from typical conventions. Having reference information available during installation saves confusion and prevents reversed polarity connections that can destroy your new head unit.
Standard power wiring follows predictable patterns. Red wires carry switched ignition power, typically activating only when the key reaches accessory or run position. Yellow wires provide constant battery power for memory retention.
Black wires serve as chassis ground, connecting to bare metal dash points. Brown wires often handle illumination dimming circuits activated by parking lights.
Speaker wiring uses paired colors with a stripe indicating the positive conductor. Front left speakers use white and striped white. Front right speakers use gray and striped gray.
Rear left speakers use green and striped green. Rear right speakers use violet and striped violet. These color codes follow ISO standards adopted across most vehicle manufacturers.
Factory antenna systems require careful handling. Some Jeeps use power antenna wires that extend the factory mast when radio powers on. Aftermarket antennas typically mount externally and don’t require this function.
Connecting the antenna power wire to an external antenna port can damage your new stereo amplifier. Consult your head unit manual for antenna output specifications before making this connection.
Steering wheel control wiring varies significantly between interfaces. Some systems use simple resistor ladder detection. Others require digital communication protocol translation through dedicated interface modules.
Always follow the wiring diagram included with your specific interface module rather than assuming universal compatibility.
Ground connection quality determines overall system stability. Factory ground points near the radio location may show corrosion or paint buildup. Scrape contact surfaces to bare metal before attaching ground wires.
Use ring terminals secured with star washers for maximum conductivity. Test ground continuity with a multimeter before powering up the new unit.
Pinout configurations differ between major manufacturer harnesses. Metra harnesses use one color scheme. Pacer harnesses use another.
Selecting the correct harness for your vehicle application eliminates adapter confusion. Cross-reference your wiring diagram against the harness pin numbering before connecting anything permanently.
Resetting and Programming Your New Head Unit
New head units arrive configured for generic vehicle applications. Factory-specific settings require manual programming after physical installation. Skipping configuration steps leaves features nonfunctional or operating incorrectly.
Proper setup takes ten to twenty minutes and prevents confusion during initial operation.
Radio preset storage requires initial station scanning. Most modern head units perform automatic preset searching when powered on for the first time. Allow the scan to complete across your entire band range.
Manually saving individual stations works but consumes significantly more time during initial setup.
Bluetooth pairing procedures vary by manufacturer. Pioneer units typically display a default PIN code on startup. Enter that code into your phone’s Bluetooth settings pairing menu.
Alpine units often require navigating through display menus to initiate pairing mode. Consult your specific model manual for exact pairing sequence instructions.
Apple CarPlay and Android Auto activation differs between wired and wireless implementations. Wired connections simply plug your phone into the designated USB port using an Apple Lightning cable or USB-C cable depending on your device. Wireless implementations require initial Bluetooth pairing followed by USB connection for data transfer.
Some units toggle wireless capability through settings menus.
Equalizer presets provide starting points for sound tuning. Factory presets like Pop, Rock, and Jazz offer balanced frequency responses suited to general listening. Custom equalizer adjustment lets you compensate for speaker placement differences in your Grand Cherokee interior.
Driver-side speakers often benefit from slight treble boost to compensate for distance from the listener position.
Time alignment settings address speaker distance variations from your seating position. If your head unit supports DSP time correction, measure the distance from each speaker to your ear position. Enter those measurements into the alignment menu.
The processor delays nearer speakers electronically so all sound arrives simultaneously at your ears.
Microphone calibration affects Bluetooth call quality significantly. Some head units perform automatic microphone leveling during initial setup. Others require manual sensitivity adjustment based on cabin noise levels.
Test call quality with the vehicle stationary before driving to verify microphone placement produces clear voice transmission.
Navigation integration through CarPlay or Android Auto requires phone settings verification. Enable background app refresh and location services on your smartphone. Grant the navigation app permission to access contacts and messages for full voice command functionality.
Some vehicles require enabling driver focus modes to prevent distracting interactions while moving.
Year-by-Year Specific Installation Notes About Jeep Grand Cherokee Double Din Radio Install & Bezel Guide
Each Grand Cherokee model year contains subtle variations affecting installation approach. While core procedures remain consistent, specific years require attention to unique wiring configurations or dash panel designs. Understanding these differences prevents surprises during your particular installation.
2011 through 2013 early WK2 models feature simpler climate control integration. The bezel assembly includes integrated climate switch housings that connect via single multi-pin connectors. These models sometimes lack factory amplifier options in base trim levels.
Verify your equipment configuration before ordering bypass modules you may not need.
2014 facelift models introduced revised dash aesthetics with reshaped air vent surrounds. Bezels designed for 2011-2013 models don’t align properly with 2014-plus dash contours. Attempting to force early bezels into late models creates visible gaps around vent openings.
Always match bezel generation precisely to your model year.
2015 and 2016 models added Uconnect 8.4-inch touchscreen as optional equipment. Vehicles equipped with this screen require different wiring approaches than base radio models. The touchscreen interface communicates differently over the CAN bus.
Verify whether your vehicle has the standard radio or upgraded Uconnect system before purchasing installation hardware.
2017 through 2022 late WK2 production saw continued refinement of interior electronics. Factory amplifier placement shifted between model years within this range. Some years locate the amp behind the passenger side dash panel.
Others mount it under rear seats. Wiring harness selections must account for these amplifier location variations specifically.
2022 WL generation represents completely redesigned interior architecture. Dash bezels, wiring harnesses, and interface modules share zero compatibility with WK2 components. Attempting WK2 hardware on WL models guarantees fitment failure.
WL installations require separate part selection entirely.
Model year verification through VIN decoding provides absolute certainty about your specific configuration. Dealer parts departments perform this lookup free of charge. Online VIN decoders accessible through Chrysler group websites provide configuration details useful for parts ordering confirmation.
Regional variations between US and Canadian market vehicles occasionally affect wiring color codes and connector types. Importing dash kits from different markets sometimes creates minor fitment discrepancies. Purchasing from North American distributors ensures correct configuration for your specific vehicle.
Some owners exploring suspension modifications like a JK lift encounter similar year-by-year variation challenges. Each platform generation presents unique challenges requiring specific knowledge. Taking time to research your exact model year specifications before purchasing parts prevents costly wrong-order returns.