If you run larger tires, spend time on rough trails, or regularly push your Jeep Wrangler JK off-road, the front axle deserves attention. One area that can take a surprising amount of stress is the inner C—the forged section at each end of the front axle housing that supports the upper and lower ball joints.
A bent inner C can create alignment problems, uneven tire wear, and expensive repair work. Installing weld-on C gussets adds reinforcement around this area and helps the factory inner C resist bending.
The job is not complicated in concept, but it does involve welding, front-end disassembly, careful fitment, and heat control. This guide explains how Jeep JK C gusset installation works, what you need before starting, how Dana 30 and Dana 44 applications differ, and which mistakes to avoid.
One important point before starting: there is no single installation procedure that applies to every C-gusset kit. For example, Synergy states that its JK gussets can be installed with the axle still in the Jeep, while Artec’s instructions call for removing the axle assembly. Always use the instructions supplied with your exact kit as the final authority. (SYNERGY MANUFACTURING)
What Are C Gussets on a Jeep JK?
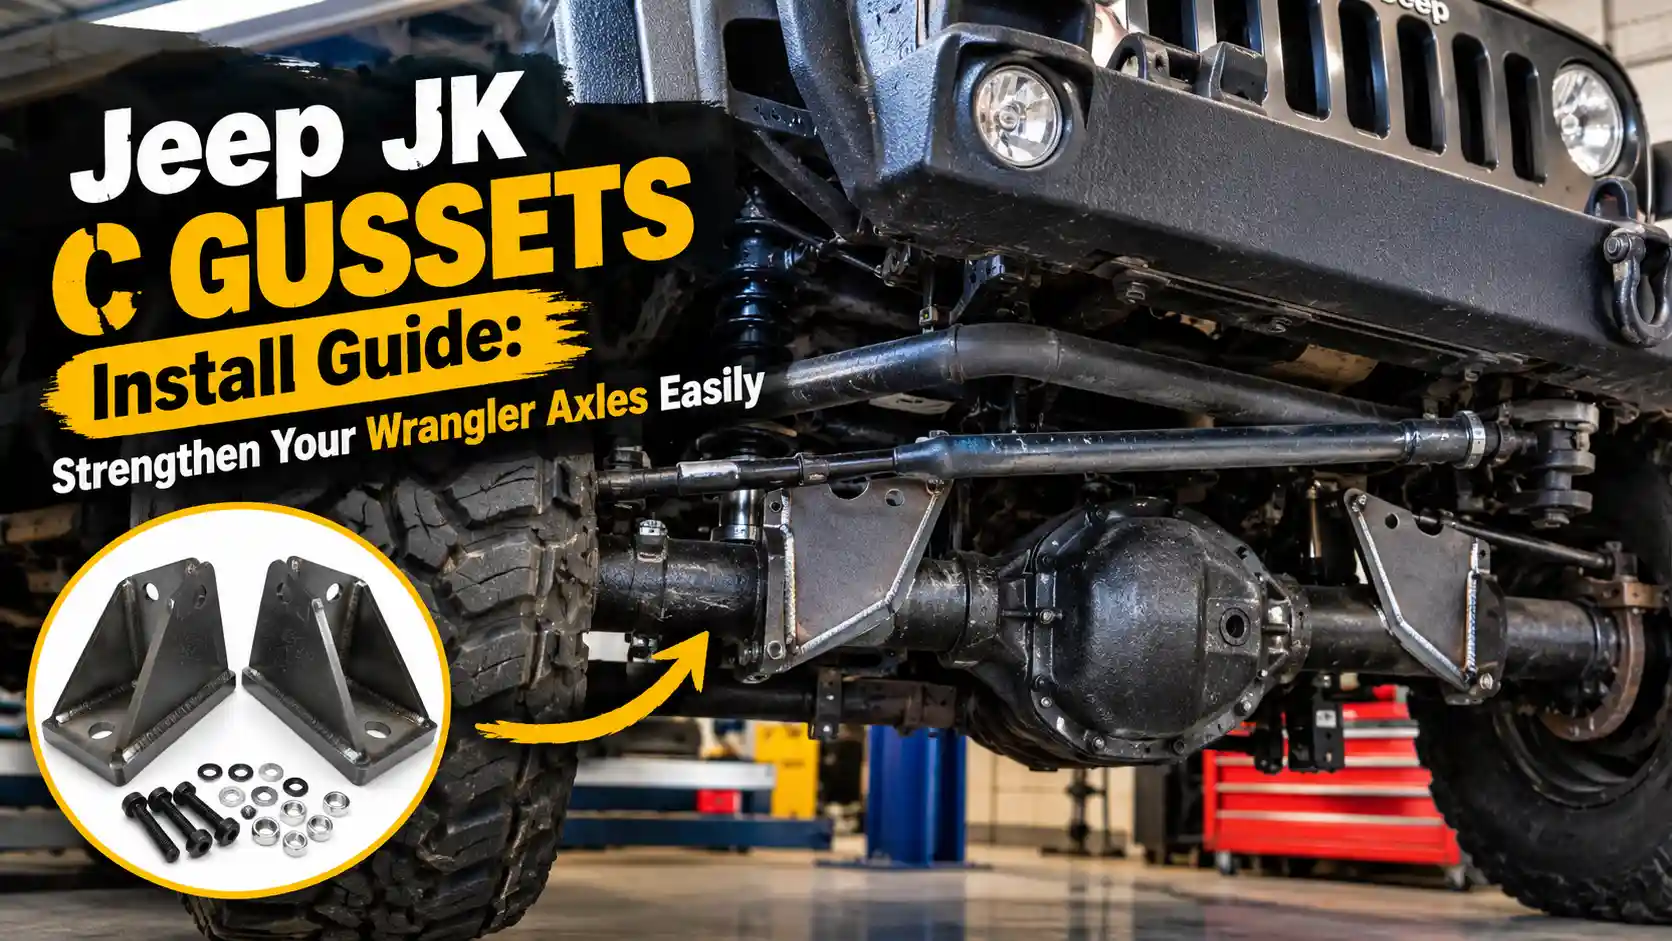
C gussets are steel reinforcement plates welded around the upper and lower portions of the front axle’s inner C.
The inner C is the part of the axle housing where the steering knuckle connects through the upper and lower ball joints. Every impact that travels through the front wheel can place load on this area.
A C-gusset kit does not replace the inner C. Instead, it braces the existing structure so it is harder for the C to bend under load.
Many Jeep JK kits include:
- Two upper inner C gussets
- Two lower inner C gussets
- Driver-side and passenger-side pieces where required
For example, Synergy’s JK/JKU kit includes two upper and two lower gussets and is designed for the front Dana 30 and Dana 44. (SYNERGY MANUFACTURING)
Why Jeep JK Owners Install Inner C Gussets
The factory axle was designed around the loads expected from a stock Jeep. Once you add larger and heavier tires, wheels with more aggressive offset, difficult trails, repeated impacts, or hard landings, the forces reaching the axle increase.
The inner C is only one part of that system, but it is an important one.
C gussets are commonly installed to:
- Reinforce the factory inner Cs
- Reduce the risk of bending during hard off-road use
- Help maintain front-end geometry
- Protect an axle before moving to larger tires
- Add strength without replacing the entire axle housing
- Complement sleeves, a truss, stronger ball joints, or upgraded axle shafts
Synergy specifically describes its gussets as reinforcement intended to help prevent factory JK inner Cs from bending. (SYNERGY MANUFACTURING)
Think of C gussets as preventive reinforcement. They are not a guaranteed repair for an inner C that is already bent.
Does Your Jeep JK Need C Gussets?
Not every Wrangler needs them.
A mostly stock JK used for commuting and light dirt-road driving puts much less stress on its front axle than a Jeep running larger tires through rocks, deep ruts, and hard trail obstacles.
C gussets become more worth considering when your Jeep has one or more of the following:
- Larger-than-stock tires
- Heavy wheels
- Aggressive wheel offset or spacers
- Regular rock crawling
- High-speed trail use
- Repeated hard impacts
- A heavily loaded overland setup
- Other front axle modifications
- Plans for more difficult off-road driving
Tire diameter alone should not decide whether you need gussets. Tire weight, wheel offset, driving style, vehicle weight, terrain, axle condition, and how hard you use the Jeep all matter.
What About 33-Inch Tires?
A lightly used JK on 33s may never have an inner-C problem. If you drive difficult trails, however, gussets can still provide inexpensive preventive reinforcement.
What About 35-Inch Tires?
This is where many owners begin looking seriously at C gussets.
The larger tire creates more leverage at the wheel, while many 35-inch combinations also add considerable unsprung weight. That does not mean every JK on 35s will bend an inner C, but aggressive use increases the reason to consider reinforcement.
What About 37-Inch Tires?
With 37s, the discussion should become broader than C gussets alone.
At that point, consider the complete front axle system, including:
- Inner Cs
- Axle tubes
- Ball joints
- Axle shafts
- U-joints
- Differential
- Gearing
- Steering components
- Wheel bearings
C gussets can strengthen one vulnerable area, but they do not turn a factory Dana 30 or Dana 44 into a heavy-duty aftermarket axle.
How to Tell If Your Jeep JK Inner C Is Already Bent
Do not assume that welding gussets onto the axle will fix an existing alignment problem.
Before installing them, inspect the axle.
Possible signs of a bent inner C include:
- One front tire leaning inward or outward
- Abnormal camber
- Uneven inner or outer tire wear
- Alignment measurements that remain out of specification
- Front-end geometry that looks different from side to side
- Repeated problems around the ball-joint area
- Visible deformation around the inner C
The JK does not have conventional factory camber adjustment at the front wheels, so a significant camber problem deserves proper diagnosis rather than simply adding reinforcement.
A bent axle tube, damaged ball joint, wheel bearing problem, or bent inner C can create similar symptoms. Measure and inspect the axle before welding anything permanently in place.
Jeep JK Dana 30 vs Dana 44 C Gusset Compatibility
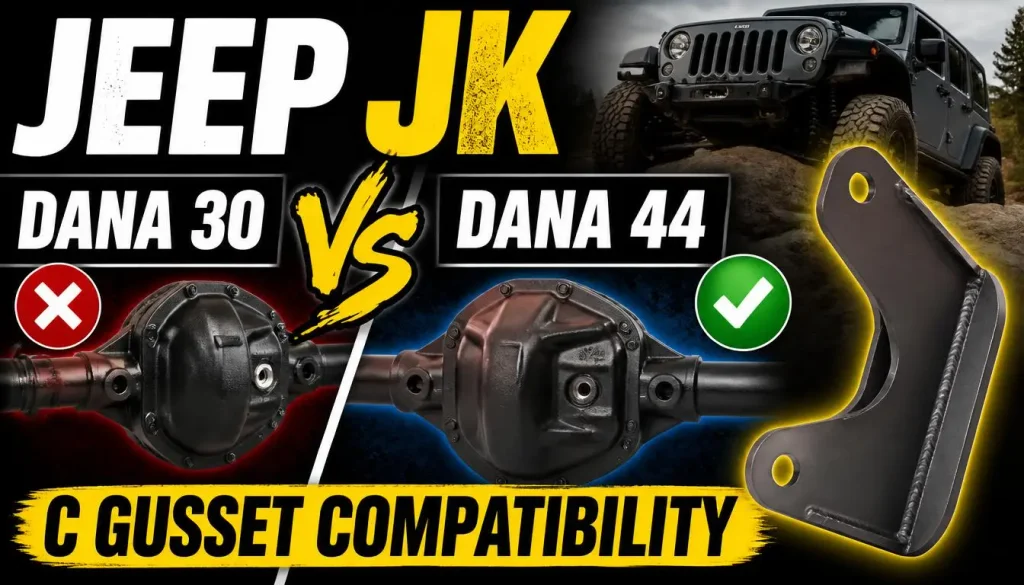
Most Wrangler JK C-gusset kits are designed around the factory front Dana 30 and Dana 44.
As a general rule:
- Many Sport and Sahara JKs use a Dana 30 front axle.
- Rubicon JKs commonly use a Dana 44 front axle.
- Axle swaps, special editions, international models, and previous modifications can change that.
Do not order a kit based only on the badge on the body.
Identify the axle currently installed in the Jeep.
Synergy lists its D30/D44 inner C gusset kit for 2007–2018 Jeep Wrangler JK and JKU models. It also notes that Rubicon Recon axle-end forgings may require modification of the gussets for proper fit. (SYNERGY MANUFACTURING)
JK vs JKU Compatibility
JK generally refers to the two-door Wrangler, while JKU refers to the four-door Wrangler Unlimited.
Many front C-gusset kits work with both because the relevant front axle design is shared across compatible applications. Still, verify the manufacturer’s fitment list before ordering.
What to Look for When Choosing a Jeep JK C Gusset Kit
Do not choose a kit based only on how thick the steel looks in a product photo.
Check:
- Exact vehicle-year compatibility
- Dana 30 or Dana 44 compatibility
- Upper and lower gussets included
- Steel thickness
- Formed or contoured design
- Driver/passenger orientation
- Spring-perch clearance
- Welding requirements
- Special-model exclusions
- Installation instructions
- Whether axle removal is required
Different manufacturers use different designs and procedures. Synergy’s current JK/JKU kit, for example, uses 3/16-inch carbon-steel brackets, while Artec lists its JK gussets as 1/4-inch steel. Thickness alone does not determine which kit is best; fit, coverage, weld quality, and correct installation matter just as much. (SYNERGY MANUFACTURING)
Upper vs Lower Jeep JK C Gussets
A complete kit typically reinforces both sides of each inner C.
The upper gusset fits around the upper portion of the C near the coil spring perch.
The lower gusset reinforces the bottom portion.
Before grinding or welding, lay every piece against the axle and determine its correct position.
Do not assume four similar-looking pieces are interchangeable. Some designs use universal upper pieces while their lower gussets are side-specific.
Test-fitting now can save a lot of grinding and frustration later.
C Gussets vs Axle Sleeves vs an Axle Truss
These upgrades are often grouped together, but they reinforce different areas.
| Upgrade | Main Area Reinforced | Main Purpose |
|---|---|---|
| C Gussets | Inner Cs | Helps resist bending around the ball-joint/knuckle mounting area |
| Axle Sleeves | Axle tubes | Adds support inside or around the axle tubes |
| Axle Truss | Axle housing/tubes | Helps tie the housing together and resist tube/housing deflection |
| Heavy-Duty Ball Joints | Ball-joint connection | Better suited to increased wheel/tire loads |
C gussets are not a substitute for sleeves or a truss, and sleeves do not reinforce the inner Cs in the same way.
Synergy, for example, sells its inner axle sleeves alongside C gussets and a front axle truss as separate reinforcement components. (SYNERGY MANUFACTURING)
Which combination makes sense depends on tire size, trail difficulty, axle type, budget, and how long you plan to keep the factory housing.
Tools and Materials Needed for Jeep JK C Gusset Installation
The exact list depends on your kit and how much disassembly it requires, but a typical installation may need:
- Compatible C-gusset kit
- Floor jack
- Properly rated jack stands
- Wheel chocks
- Socket and wrench set
- Breaker bar
- Torque wrench
- Ball-joint press
- Tie-rod separator if required
- Grinder
- Wire wheel or sanding disc
- C-clamp
- Rubber mallet
- Marker or paint pen
- Welding machine
- Appropriate welding consumables
- Welding helmet
- Welding gloves and protective clothing
- Safety glasses
- Cleaning supplies
- Rust-resistant paint or coating
- Replacement cotter pins or hardware where needed
- Factory service information
- Instructions supplied with your gusset kit
If your kit requires complete axle removal, you will also need the tools and space to disconnect suspension, steering, brakes, driveshaft components, and axle shafts safely.
Safety Checks Before You Start
This is not the right job for improvised vehicle support or first-time welding practice.
Before beginning:
- Park on a flat, solid surface.
- Chock the wheels that remain on the ground.
- Support the Jeep with properly rated jack stands.
- Never rely on a hydraulic jack alone.
- Keep fuel, cleaners, wiring, brake hoses, and other heat-sensitive components away from welding areas.
- Disconnect or protect electrical components as required by the welder and vehicle service information.
- Wear proper welding PPE.
- Keep a suitable fire extinguisher nearby.
- Inspect the axle before reinforcing it.
- Read the complete instructions for your specific kit before disassembly.
EVO’s C2 installation instructions specifically warn about welding hazards and recommend professional welding.
If you cannot confidently produce structural-quality welds, let an experienced welder or off-road fabrication shop perform the welding.
Do You Need to Remove the Front Axle?
This is one of the most important questions because the answer depends on the gusset kit.
Synergy says its JK C gussets can be installed while the axle remains in the vehicle and even with the knuckles attached, although it recommends removing the knuckles and ball joints to reduce the chance of heat damage. (SYNERGY MANUFACTURING)
Artec takes a different approach. Its published procedure calls for removing the axle from underneath the Jeep before the welding stage. (Artec Industries)
Neither procedure should automatically be applied to another manufacturer’s kit.
Axle-in-Vehicle Installation
Possible advantages include:
- Less suspension disassembly
- Faster access on compatible kits
- Fewer components removed
Possible disadvantages include:
- Less room around the weld area
- More nearby components to protect
- Greater difficulty controlling access and welding position
Axle-Removal Installation
Possible advantages include:
- Better access around the inner Cs
- Easier cleaning and welding
- Easier inspection of the complete housing
Possible disadvantages include:
- Significantly more disassembly
- More time
- More fasteners and components to reinstall correctly
Follow your kit instructions rather than choosing whichever method seems quicker.
Should You Remove the Ball Joints Before Welding?
Removing the ball joints is one of the safest ways to protect them from welding heat.
Synergy states that ball-joint removal is not mandatory for its installation but recommends removing the knuckles and ball joints to prevent possible heat damage. EVO also strongly recommends removing the upper and lower ball joints before welding its C2 gussets. (SYNERGY MANUFACTURING)
This can also be a convenient time to inspect the ball joints.
If they already have play, torn boots, rough movement, or significant wear, replacing them during the gusset job can save you from repeating much of the same front-end disassembly later.
How to Install C Gussets on a Jeep JK
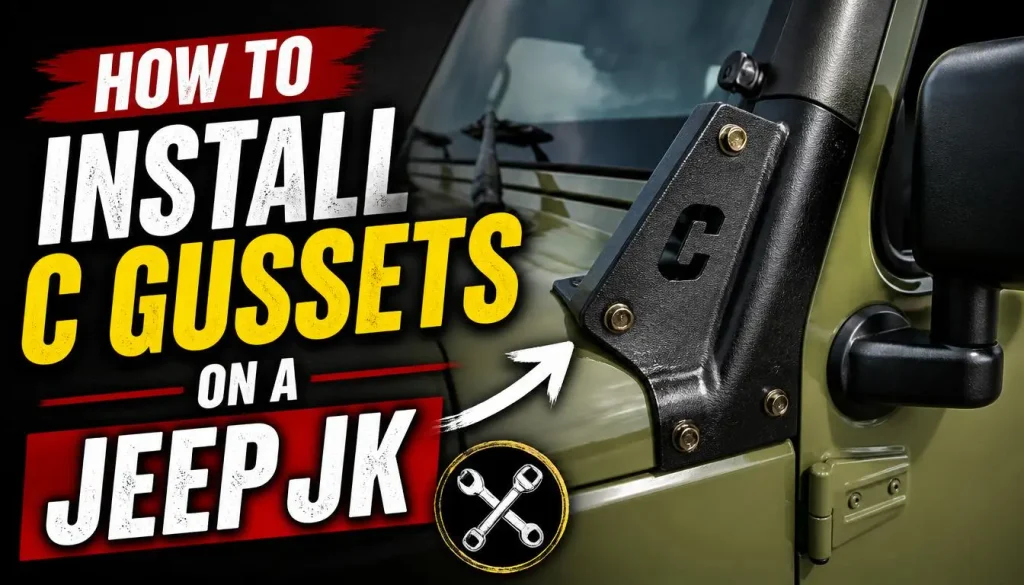
The following is a general workflow, not a replacement for the instructions supplied with your kit.
Step 1: Inspect the Front Axle
Before removing anything, inspect:
- Inner Cs
- Axle tubes
- Ball joints
- Steering knuckles
- Unit bearings
- Axle seals
- Suspension brackets
If the inner C is already bent, stop and determine the correct repair before welding reinforcement onto it.
Step 2: Lift and Secure the Jeep
Loosen the front lug nuts slightly before lifting.
Raise the front of the Wrangler and support the frame securely on jack stands.
Remove the front wheels.
Make sure the Jeep cannot shift while you are working, grinding, or welding.
Step 3: Remove Components Required by Your Kit
Depending on the installation procedure, this may include:
- Brake calipers
- Brake rotors
- Unit bearings
- Axle shafts
- Tie rod
- Drag link
- Steering stabilizer
- Steering knuckles
- Ball joints
- Shocks
- Sway-bar links
- Track bar
- Coil springs
- Control arms
- Front driveshaft connection
Do not allow brake calipers to hang by the brake hoses.
Artec’s procedure, for example, hangs the calipers securely and removes the hub and axle shaft assembly before continuing toward full axle removal. (Artec Industries)
Step 4: Test-Fit Every Gusset
Place the upper and lower gussets onto the inner Cs before removing paint.
Check:
- Correct side
- Correct orientation
- Contact with the axle
- Spring-perch fit
- Weld locations
- Nearby clearance
Mark the areas that must be cleaned.
EVO’s instructions use this same basic approach: position the gussets first, mark the weld areas, then remove the coating from those locations.
Step 5: Clean the Welding Surfaces
Use a grinder, wire wheel, or sanding disc to remove:
- Paint
- Powder coating
- Rust
- Scale
- Grease
- Dirt
Expose clean bare metal anywhere the weld must penetrate.
Do not grind unnecessarily into the axle itself. The goal is to remove contamination, not reshape the housing.
Step 6: Fit the Upper Gussets
Install both upper gussets and make sure they seat correctly.
Depending on the design, a clamp or light tapping with a rubber mallet may be needed to bring the gusset tightly against the axle.
Synergy’s installation guide notes that a slight gap may be present around the ball-joint area and uses a clamp to pull the gusset into position before welding. (SYNERGY MANUFACTURING)
Step 7: Tack-Weld the Upper Gussets
Once everything is properly seated, tack the gussets in several locations.
Tack welding first gives you a final chance to verify:
- Position
- Alignment
- Clearance
- Contact
Do not rush directly into a complete weld.
Step 8: Weld the Upper Gussets With Controlled Heat
Heat control matters.
Excessive concentrated heat can damage nearby components and can create unnecessary thermal stress in the axle assembly.
The exact weld sequence should come from your gusset manufacturer.
For example, EVO directs installers to weld in sections no longer than one inch while alternating between driver and passenger sides and cooling between increments.
That does not mean one-inch welds are a universal specification for every C-gusset kit. Follow the procedure supplied with yours.
Step 9: Fit the Lower Gussets
Repeat the same basic process for the lower pieces:
- Test-fit.
- Confirm orientation.
- Mark weld areas.
- Clean to bare metal.
- Position the gusset.
- Tack it into place.
- Recheck alignment.
- Complete the required welds.
Avoid assuming that the lower driver and passenger pieces are identical.
Step 10: Allow the Assembly to Cool Properly
Do not immediately start hammering, painting, or reinstalling heat-sensitive components while the area is still extremely hot.
Allow the housing and gussets to cool according to the manufacturer’s procedure.
Avoid introducing an improvised cooling method when the instructions specify a particular process.
Step 11: Clean and Protect the Welded Area
Once the assembly has cooled:
- Remove slag if applicable
- Clean welding residue
- Inspect the welds
- Remove surface contamination
- Coat exposed metal
Bare steel will rust quickly, especially in areas exposed to water, road salt, mud, and winter conditions.
Synergy and EVO both finish their procedures by cleaning the welded area and protecting exposed metal with paint. (SYNERGY MANUFACTURING)
Step 12: Check Coil Spring Clearance
This step is easy to overlook.
Place the spring in its normal position and confirm that the upper gusset does not interfere with it.
Artec specifically includes a spring-clearance check in its JK instructions and notes that limited relief may be required if contact occurs. (Artec Industries)
Never blindly grind a gusset simply because another Jeep required modification. Check your own parts first.
Step 13: Reinstall the Ball Joints and Knuckles
If you removed the ball joints, inspect the bores and install the joints according to the ball-joint manufacturer’s instructions.
Then reinstall the steering knuckles.
Use the correct torque specifications from the applicable Jeep service information or component manufacturer.
Do not use random torque values from an unrelated model year or axle.
Step 14: Reinstall the Axle Shafts Carefully
If the shafts were removed, clean and inspect them before reinstalling.
Support the shaft while sliding it through the axle tube.
Avoid forcing the splines into place.
Artec warns that forcing the axle shaft during reassembly can damage the axle seal. (Artec Industries)
Step 15: Reassemble Brakes, Steering, and Suspension
Reinstall everything removed during disassembly.
Depending on your procedure, that can include:
- Unit bearings
- Rotors
- Calipers
- Tie rod
- Drag link
- Steering stabilizer
- Coil springs
- Shocks
- Sway-bar links
- Track bar
- Driveshaft
- Control arms
Replace damaged cotter pins or hardware where required.
Route brake hoses and ABS wiring correctly and make sure nothing contacts the new gussets.
Step 16: Torque Fasteners Correctly
Final torque matters just as much as good welding.
Use specifications that apply to:
- Your Jeep year
- Your axle
- Your suspension components
- Your aftermarket steering parts
- Your ball joints
Some suspension fasteners should be tightened with the Jeep at normal ride height rather than with the axle hanging. Follow the service procedure for the components you removed.
Step 17: Reinstall the Wheels and Lower the Jeep
Install the wheels, lower the Jeep onto the ground, and torque the lug nuts correctly.
Turn the steering from lock to lock and inspect for interference before driving.
How to Prevent Heat Damage While Welding C Gussets
Poor heat management is one of the easiest ways to turn a reinforcement project into a repair job.
Use these principles:
- Remove heat-sensitive parts when recommended.
- Tack everything before final welding.
- Avoid continuously heating one small area.
- Follow the weld sequence supplied with the kit.
- Alternate locations if instructed.
- Allow controlled cooling between weld sections.
- Keep wiring, brake hoses, seals, and flammable material protected.
- Do not guess at welding settings.
There is no universal amperage, voltage, wire speed, or filler recommendation that should be copied across every C-gusset installation.
Those settings depend on the welding process, material thickness, joint design, machine, filler material, and manufacturer’s procedure.
If you are uncertain, use a professional fabricator.
Common Jeep JK C Gusset Installation Mistakes
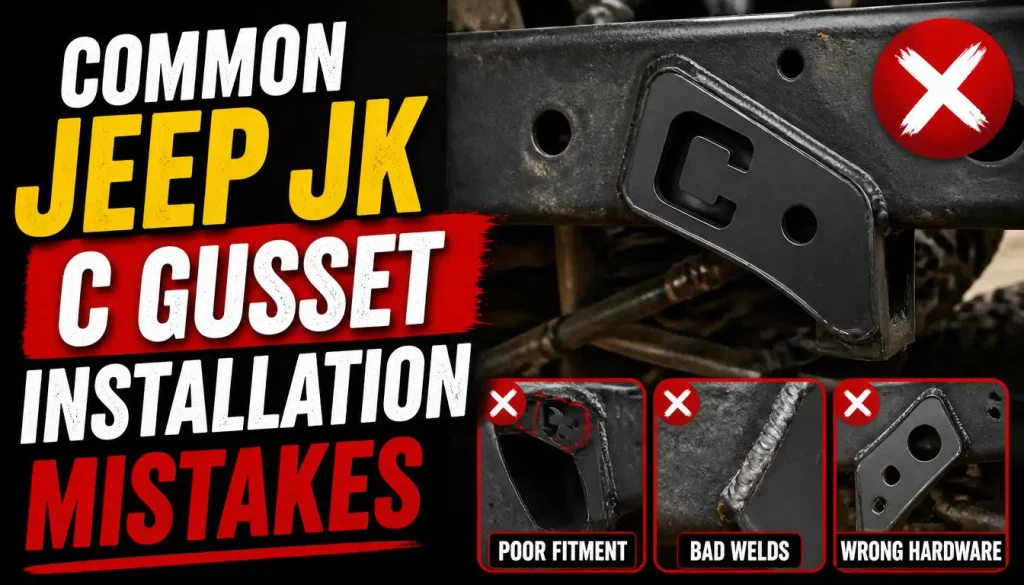
Welding Over Paint or Rust
A clean joint is essential for a sound weld.
Grinding a tiny strip and leaving contamination directly beside the weld can also create problems.
Prepare the full area required by the kit instructions.
Installing the Gusset on the Wrong Side
Check orientation before grinding and welding.
Once a gusset is fully welded, correcting the mistake becomes a major job.
Skipping the Test Fit
Factory variation and aftermarket parts can affect clearance.
Always test-fit first.
Overheating the Axle
Long continuous welds in one area can put unnecessary heat into the assembly.
Use the manufacturer’s welding sequence.
Leaving Ball Joints Exposed to Excessive Heat
If the manufacturer recommends removal, follow that recommendation.
Replacing a damaged ball joint immediately after installing gussets defeats much of the benefit of saving labor.
Gusseting an Already Bent C
C gussets reinforce. They do not automatically return an already deformed C to factory geometry.
Inspect first.
Ignoring Coil Spring Clearance
An upper gusset that contacts the spring can create noise, wear, and unwanted interference.
Check it before final reassembly.
Forgetting Rust Protection
Welding burns away factory coatings.
Protect the exposed steel after the work is complete.
Damaging an Axle Seal During Reassembly
Support the axle shaft and insert it carefully rather than forcing it through the seal.
Guessing Torque Specifications
The internet contains torque values for many Jeep generations, axles, and aftermarket components.
Use specifications that match your actual parts.
What to Check After Installing C Gussets
Before driving:
- Inspect every weld.
- Confirm all hardware is installed.
- Check ball-joint attachment.
- Check tie-rod and drag-link attachment.
- Verify brake caliper installation.
- Inspect brake hoses.
- Inspect ABS wiring.
- Check coil spring clearance.
- Turn the steering lock to lock.
- Verify no part touches the new gussets.
- Confirm lug-nut torque.
During the first road test, pay attention to:
- Steering feel
- Brake operation
- New noises
- Vibration
- Pulling
- ABS warnings
- Tire contact
If anything feels wrong, stop and inspect it.
Should You Get an Alignment After Installing C Gussets?
An alignment check is a sensible idea, especially when the job involved removing ball joints, steering components, control arms, the track bar, or the complete axle.
The gussets themselves should not intentionally change alignment geometry. However, the installation process may disturb components, and checking alignment also gives you a useful opportunity to confirm that the front axle geometry remains within specification.
If camber is significantly out of range after the job, investigate the cause instead of assuming a conventional alignment adjustment will solve it.
Do You Need to Retorque Anything After Installation?
Reinspection is good practice after major suspension or axle work.
Check your manufacturer’s instructions for the required interval.
Artec, for example, tells installers to torque the relevant fasteners again after 50 miles. (Artec Industries)
Also inspect the vehicle after your first hard trail outing.
Look for:
- Loose hardware
- Fresh rust around welds
- Cracked coating
- Contact marks
- Spring interference
- Steering interference
- Fluid leaks
How Long Does Jeep JK C Gusset Installation Take?
There is no useful single answer because two C-gusset jobs can require completely different amounts of work.
A kit installed with the axle under the Jeep can take considerably less time than a procedure requiring:
- Complete axle removal
- Ball-joint removal
- Steering disassembly
- Suspension disassembly
- Rusted fastener repair
- New ball joints
- Axle sleeves
- A truss
An experienced off-road shop with a lift and fabrication equipment will normally complete the work much faster than a first-time DIY installer working on jack stands.
Do not schedule the project around the shortest installation time you find online.
Give yourself enough time to clean, inspect, weld, cool, coat, reassemble, torque, and check everything correctly.
How Much Does Jeep JK C Gusset Installation Cost?
The gussets themselves are often one of the less expensive parts of the job.
The total cost can increase because of:
- Welding labor
- Ball-joint replacement
- Shop time
- Alignment
- Seized hardware
- Axle seals
- Unit bearings
- Additional axle reinforcement
- Corrosion repairs
If a shop must remove the complete axle assembly, expect more labor than a gusset kit that can be welded with the axle still installed.
Prices also vary significantly between the USA, Canada, UK, and Australia, so get a quote based on the actual Jeep, axle, kit, and required disassembly.
DIY vs Professional C Gusset Installation
A confident home mechanic may be able to handle much of the disassembly and reassembly.
The welding is where the decision becomes more serious.
DIY May Make Sense If You Have:
- Strong mechanical experience
- Proper vehicle support equipment
- Experience servicing Jeep front axles
- Ball-joint tools
- Grinding and fabrication equipment
- Proven structural welding ability
- Access to correct service information
Professional Installation Is Safer If You:
- Have never welded structural automotive parts
- Cannot identify a sound weld
- Do not have stable vehicle support
- Need the axle removed
- Are dealing with significant rust
- Suspect the axle is already bent
- Are combining gussets with a truss or sleeves
A poor gusset weld can be worse than leaving the component alone.
Should You Replace Ball Joints While Installing C Gussets?
Not automatically.
If the current ball joints are tight, smooth, undamaged, and relatively new, there may be no reason to replace them solely because you are installing gussets.
However, if the installation already requires ball-joint removal and the existing joints are worn, this is a practical time to replace them.
Larger tires can add stress to ball joints, unit bearings, steering components, and other front-end parts, so inspect the entire system rather than focusing only on the gussets.
Synergy also recommends considering heavy-duty ball joints as part of a more complete JK axle reinforcement package. (SYNERGY MANUFACTURING)
Are C Gussets Enough for 35- or 37-Inch Tires?
Sometimes they are only one part of the answer.
For moderate driving on 35s, the factory axle may need far less reinforcement than a Jeep on 37s that regularly climbs rocks.
Consider the complete build.
For 35-Inch Tires
Depending on use, you may consider:
- C gussets
- Healthy ball joints
- Proper gearing
- Strong steering components
- Axle tube reinforcement if your use justifies it
- Quality axle shafts for harder wheeling
For 37-Inch Tires
The list becomes more serious:
- C gussets
- Axle truss or other housing reinforcement
- Axle shafts
- Ball joints
- Gearing
- Steering upgrades
- Differential strength
- Driveshaft and U-joint condition
- Unit bearings
At some point, putting more money into a factory axle becomes less attractive than starting with a stronger complete housing.
There is no universal point at which that happens. A lightweight trail Jeep, a heavy overlander, and a hard rock crawler can place very different demands on the same axle.
Can C Gussets Fix a Bent Jeep JK Inner C?
Not by themselves.
A gusset is reinforcement.
If the C is already bent, the axle geometry should first be measured and the damage evaluated.
Depending on severity, the correct repair may involve:
- Professional straightening
- Replacement inner C
- Axle housing repair
- Replacement axle housing
- Complete axle replacement
Welding a gusset onto a damaged component without correcting the underlying problem can permanently reinforce the wrong geometry.
C Gusset Maintenance and Long-Term Inspection
Once installed properly, C gussets require very little routine maintenance.
Still, inspection should become part of your normal front-axle checks.
After hard off-road use, look at:
- Gusset welds
- Inner C area
- Ball joints
- Axle tubes
- Spring clearance
- Steering components
- Rust or damaged coating
If the paint has been chipped away by rocks or tools, clean the exposed area and protect it before corrosion spreads.
Also keep an eye on front tire wear. Tires are often one of the easiest places to notice that something in the front end has changed.
Frequently Asked Questions About Jeep JK C Gussets Install Guide
Do Jeep JK C Gussets Require Welding?
Most common heavy-duty JK inner C-gusset kits are weld-on designs. Synergy, EVO, and Artec all specify welding for the products discussed in their installation information. (SYNERGY MANUFACTURING)
Can You Install C Gussets With the Axle Still in the Jeep?
Some kits allow it.
Synergy specifically says its JK C gussets can be installed while the axle remains in the vehicle. Other manufacturers, including Artec, call for axle removal.
Follow the instructions for your exact kit. (SYNERGY MANUFACTURING)
Can You Weld C Gussets With the Ball Joints Installed?
It may be possible with certain products, but that does not mean it is the preferred method.
Synergy says removal is not required for its kit but recommends removing the knuckles and ball joints to reduce the risk of heat damage. EVO also recommends ball-joint removal. (SYNERGY MANUFACTURING)
Do I Need C Gussets With 35-Inch Tires?
There is no universal requirement based only on tire size.
A Jeep on 35s that sees aggressive trail use has more reason to consider gussets than one used mainly on pavement. Tire weight, wheel offset, terrain, axle condition, and driving style all matter.
Do Dana 30 Axles Benefit From C Gussets?
They can.
Several aftermarket manufacturers offer JK C-gusset kits specifically for Dana 30 front axles, usually alongside Dana 44 compatibility. (SYNERGY MANUFACTURING)
Does a Rubicon Dana 44 Need C Gussets?
A Dana 44 is stronger in several areas than a Dana 30, but that does not mean the inner C is immune to bending.
Whether reinforcement makes sense depends on tire size, vehicle weight, terrain, and how aggressively the Jeep is used.
Are C Gussets Better Than Axle Sleeves?
They solve different problems.
C gussets reinforce the inner Cs. Sleeves reinforce the axle tubes.
One does not directly replace the other.
Do I Need an Axle Truss With C Gussets?
Not necessarily.
A truss is a larger housing-reinforcement modification. It may be worth considering for hard off-road use, larger tires, or a build where axle-tube strength is also a concern.
What Are C2 Axle Gussets?
“C2” is terminology used by EVO for its JK axle gusset kit. The kit uses upper and lower gussets welded around the inner C area. (EVO Manufacturing)
Do C Gussets Change Alignment?
Properly installed gussets should reinforce the existing axle geometry rather than intentionally change it.
If the Jeep develops an alignment problem afterward, inspect the installation and front suspension rather than assuming the change is normal.
Should I Get an Alignment After Installing C Gussets?
It is a good idea, particularly when steering, suspension, knuckles, ball joints, or the axle itself were removed.
An alignment check can also help identify geometry problems that may have existed before installation.
Can C Gussets Interfere With the Coil Springs?
Certain combinations can require a clearance check. Artec specifically instructs installers to verify spring clearance after fitting its JK gussets. (Artec Industries)
Are C Gussets Worth Installing on a Daily Driver?
If the Jeep is stock and never sees demanding terrain, they may not be a priority.
If the daily driver also runs larger tires and spends weekends on difficult trails, preventive reinforcement becomes easier to justify.
Final Thoughts
Jeep JK C gussets are a relatively simple way to reinforce an important part of the Wrangler’s front axle. They are especially worth considering when larger tires, heavier wheels, and off-road impacts place more load on the factory inner Cs.
The key is installing them correctly.
Inspect the axle before welding. Confirm whether you have a Dana 30 or Dana 44. Buy a kit made for your exact application. Test-fit every gusset. Protect the ball joints and other heat-sensitive parts. Control welding heat. Check spring clearance. Reassemble everything using the correct torque specifications, and inspect the work again after the Jeep has been driven.
Most importantly, do not treat every Jeep JK C gusset install guide as interchangeable. Manufacturer procedures differ. Synergy allows its gussets to be installed with the axle still under the Jeep, while other kits may require significantly more disassembly. (SYNERGY MANUFACTURING)
When the work is done properly, C gussets can add useful protection to a Wrangler that sees larger tires and harder terrain without immediately replacing the complete front axle.